Astral Pay - Help:
Watch the Video
Each Payment, Refund and Payout in Stripe creates a ‘Balance Transaction’, and these are stored in Astral Pay in the Transactions page.

Figure 1 | Astral Pay Transactions
These transactions will either be posted automatically or manually.
The Astral Pay Setup page has a switch called ‘Auto Post Transactions’ which is enabled by default.

Figure 2 | Stripe Dashboard - Setup
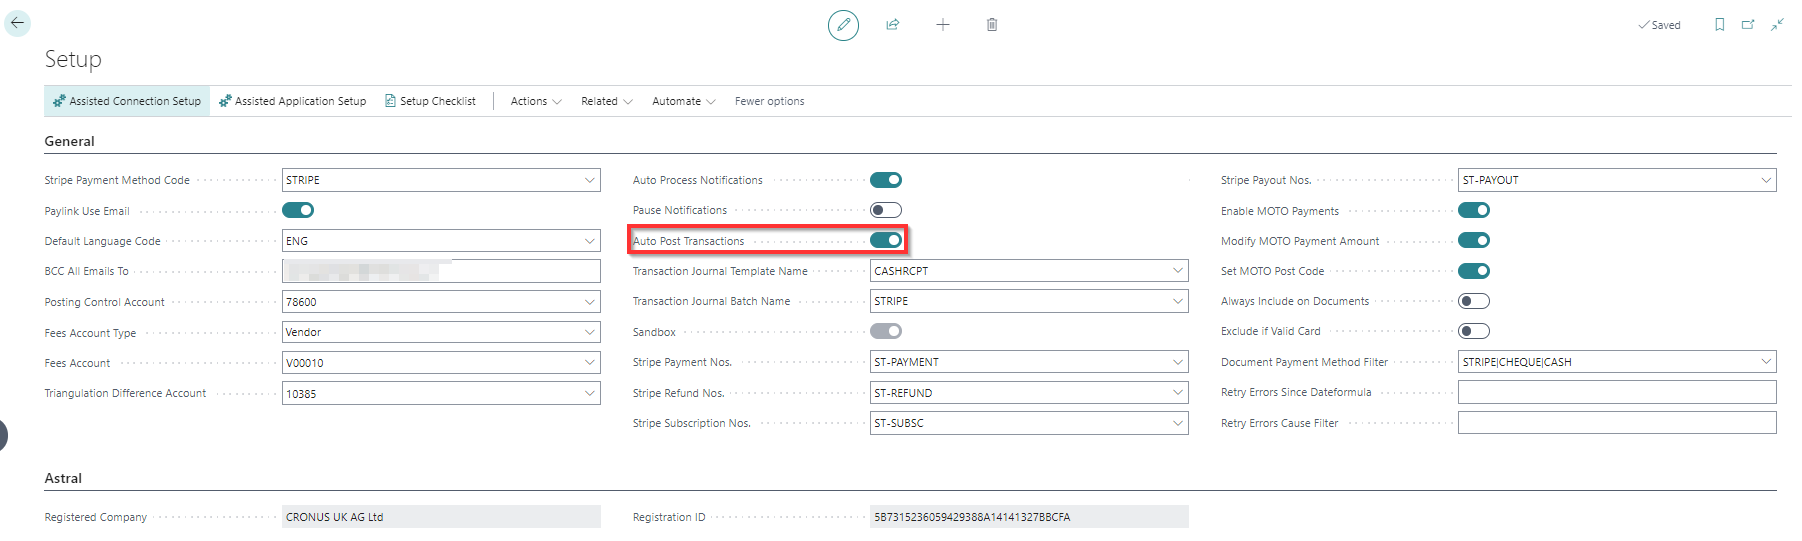
Figure 3 | Astral Pay Setup Page
Each time a Charge, Refund or Payout is added, it will retrieve the underlying ‘Balance Transaction’ and store it, and if the ‘Auto Post Transactions’ switch is enabled, it will also attempt to post the transaction. Posting the transaction will update the Business Central ledgers in respect of Customer postings, G/L Account Fee postings and Bank Ledger postings.
If the automatic posting failed (perhaps because the Bank Account has not been specified against the ‘Stripe Balance’), or if the ‘Auto Post Transaction’ switch is turned off, the transaction will need to be posted manually.
The ‘Unposted Transactions’ Role Centre tile will show a count of any transactions that are yet to be posted.
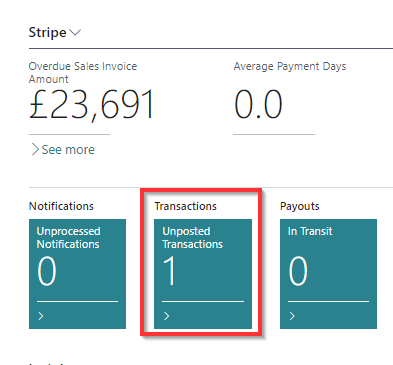
Figure 4 | Unposted Transactions Tile
Click the tile and it will show the unposted transaction entries.
To post an individual transaction, select the entry and click the ‘Post’ action. This will open a window allowing you to specify the Journal Template and Batch to use. It also allows the user to select ‘Create Journal Only’ which will display the journal in a window to review prior to posting.

Figure 5 | Post Stripe Transaction
If the ‘Create Journal Only’ option is enabled, the Cash Receipt Journal will be displayed. The journal should be reviewed and then Posted.
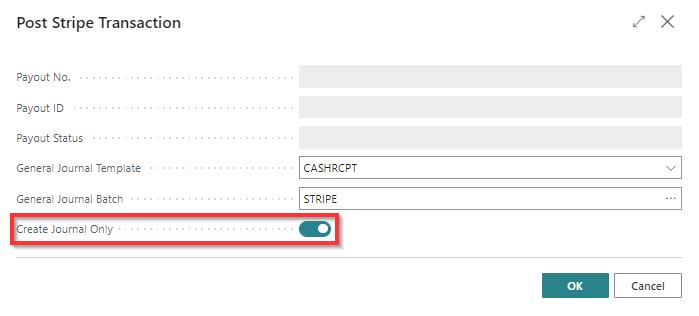
Figure 6 | Cash Receipt Journals
If there are many Unposted transactions, the ‘Post ALL’ action can be used to attempt to post all of the entries.
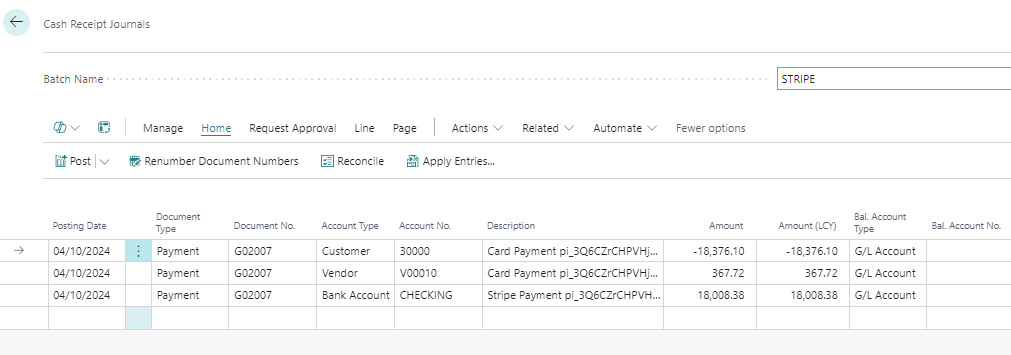
Figure 7 | Post All Entries
If the entries still do not post, select each entry in turn and click ‘Post’. Selecting a single transaction to post will therefore display any error that is causing the transaction not to post.
Should the list contain entries that you do not want to be posted, select the entry and click the ‘Mark As Posted’ action item.