Astral Pay - Help:
Watch the Video
The Setup Checklist allows you to keep track of what is incomplete for the Astral Pay setup.
To access this, in the search bar type in 'Astral Pay Setup' and select Astral Pay Setup from the list.
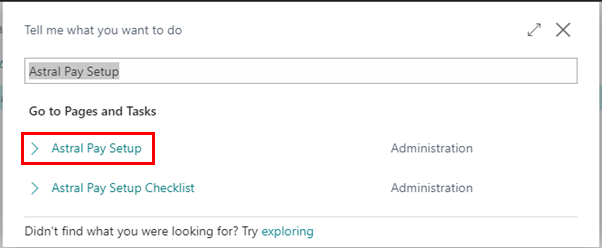
Figure 1 | Setup
The Setup page will open, then click on 'Setup Checklist' in the ribbon.

Figure 2 | Setup
The required setup is split into Connection Setup; Application Setup; SMTP Email Setup; Direct Debit Schemes; and Notification Setup.
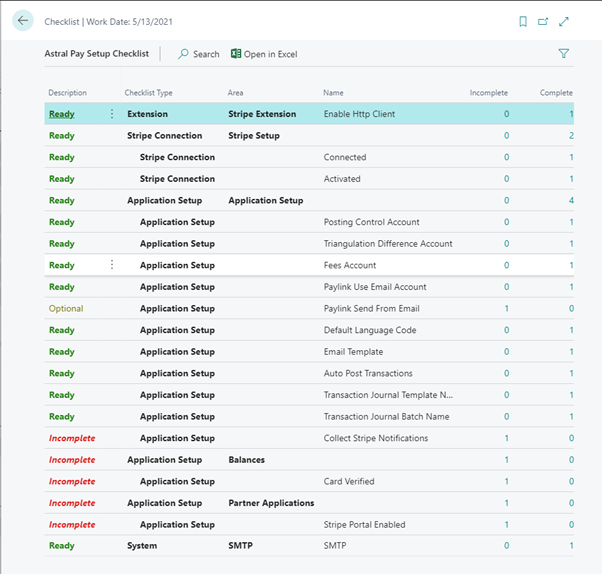
Figure 3 | Astral Pay Setup Checklist
Each line in this screen represents setup or configuration that is required before you start creating and posting payments.
Review each line where the 'Description' field is red and states Incomplete. To complete these actions, click on the number of records in the 'Incomplete' column, and it will open the wizard at the correct step.

Figure 4 | Incomplete Item Example
Follow the instructions on the screen to complete the setup.
Once all of the setups are complete you can start to create PayLinks or Mail Order / Telephone Order transactions.
SMTP Setup
Click on the number in the incomplete column for SMTP setup.
The SMTP Mail Setup window will open (figure 4). Add your 'SMTP Server' details, 'User ID' and 'Password' and 'Close' the window.
NOTE 1: You can use the 'Apply Office 365 Server Settings' action to enter some of the details for you if you are using Office 365.
NOTE 2: If you are using Office 365, make sure to check whether you are using Multi-Factor Authentication. If you are you will need to create an "app password". Details on how to create new app passwords can be found here.
NOTE 3: Setting up SMTP is optional. If you prefer to not have to set this up, you can elect to not have Astral Pay send emails. Please refer to the 'PayLink Use SMTP' setting. Instead of Astral Pay sending the email, you would instead copy and paste the PayLink in to a manually written email. In this scenario, we suggest creating a draft email that you can use as a template.
Figure 5 | SMTP Mail Setup Window
Notifications Setup
In the Setup Checklist again, click on the number in the Incomplete column for Collect Stripe Notifications.
Figure 6 | Collect Stripe Notifications
The window in figure 7 will open.
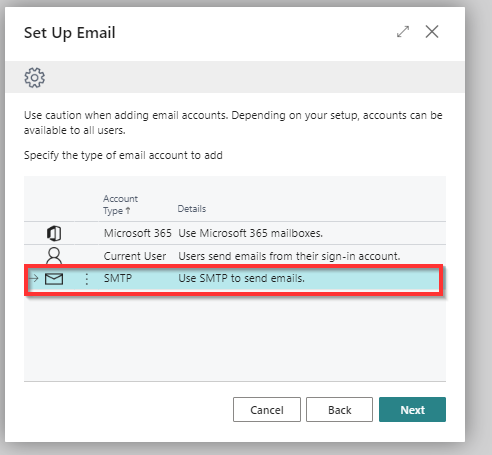
Figure 7 | Set Status To Ready
Click on 'Process' and then click 'Set Status to Ready'.
Close the window.