Astral Reports - Help V5:
Watch the video
Select the cell you wish to populate your GL Account numbers, then select the ‘Astral Reports’ tab from the ribbon and click ‘Get Table’, and select ‘General Ledger Accounts’.
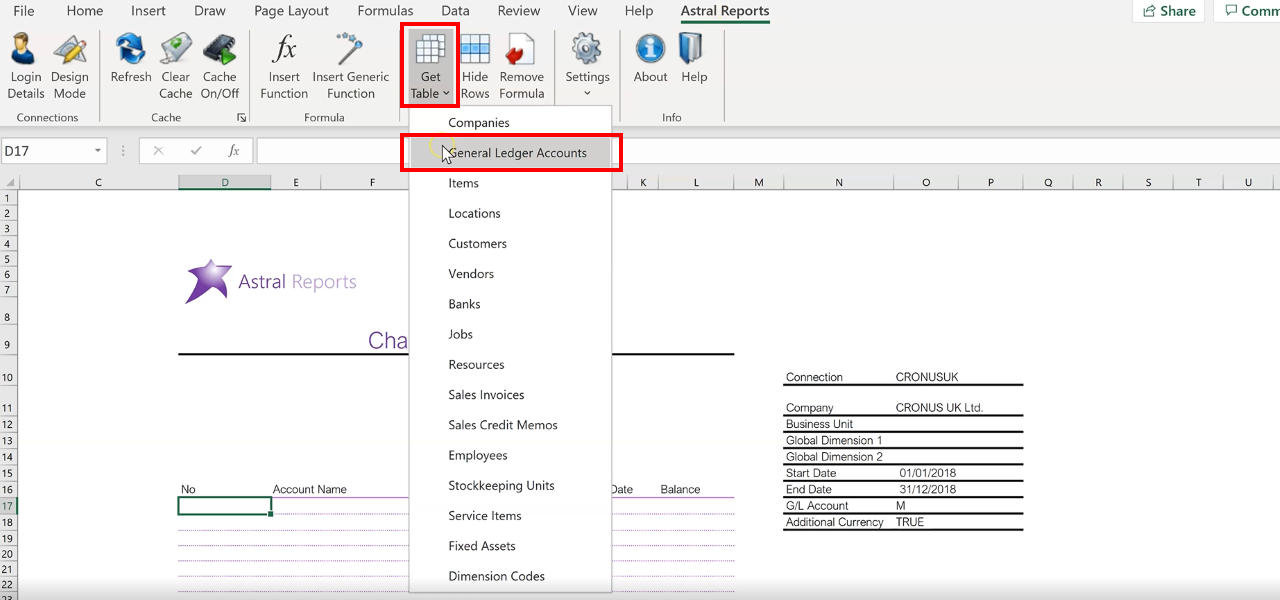
Figure 1 | Populate Account No. - Get Table
Specify the ‘Connection’ and ‘Company Name’.
The three additional arguments are optional - ‘Fill Across Rows’, ‘Include Totaling Accounts’, and ‘Copy Formulae in Adjacent Cells’.
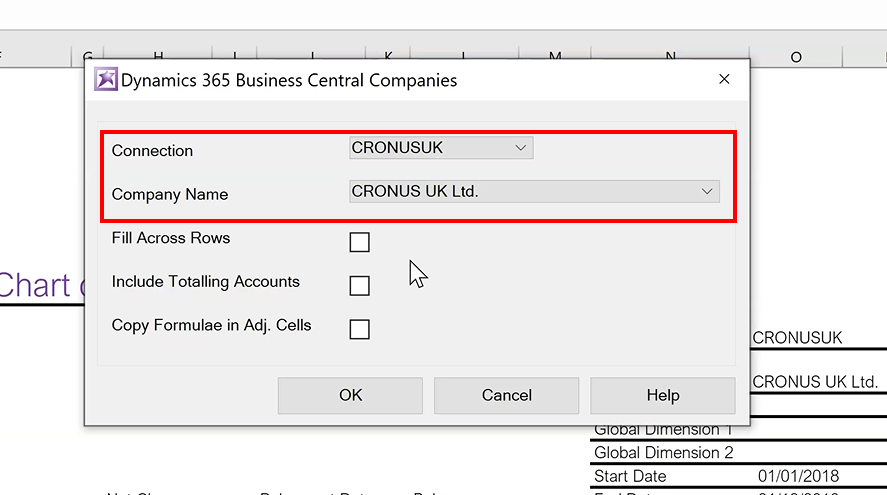
Figure 2 | Populate Account No. - Connection & Company
In this instance, leave them unticked and click ‘OK’.
The GL Account Numbers will then populate down the page.

Figure 3 | Populate Account No. - GL Account Numbers
Next, populate the ‘GL Account Names’.
Select the cell which you wish the names to populate from, then click ‘Insert Function’ on the ribbon.
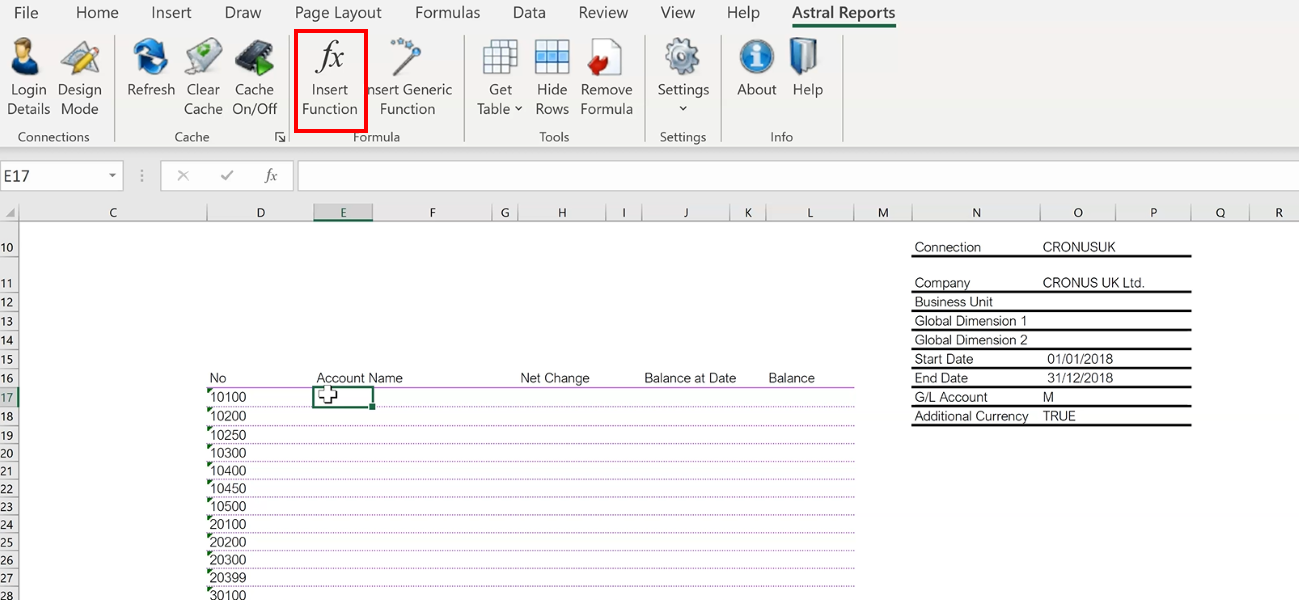
Figure 4 | Populate Account Names - Insert Function
Select ‘Astral Reports’ from the ‘Select a category’ drop down.
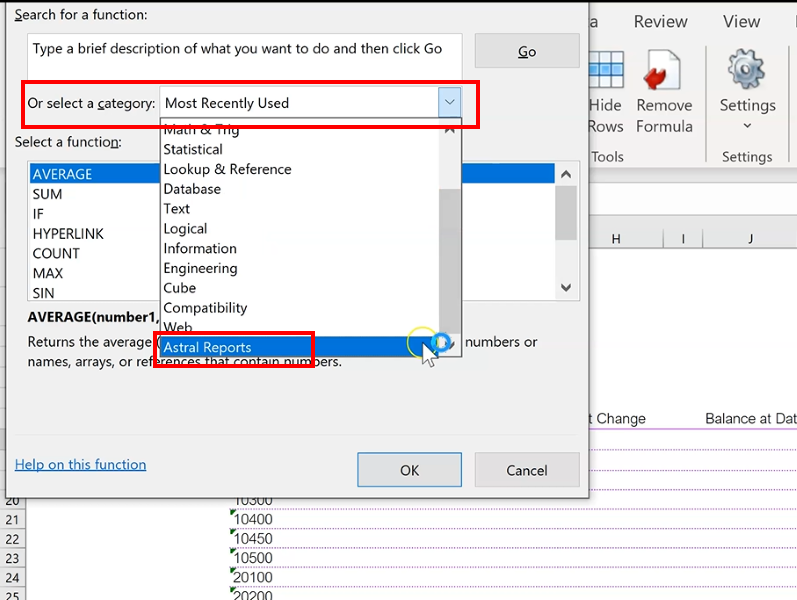
Figure 5 | Populate Account Names - Select Category
In the ‘Select a Function’ box, scroll down to ‘BC_GLName’ and click ‘OK’.
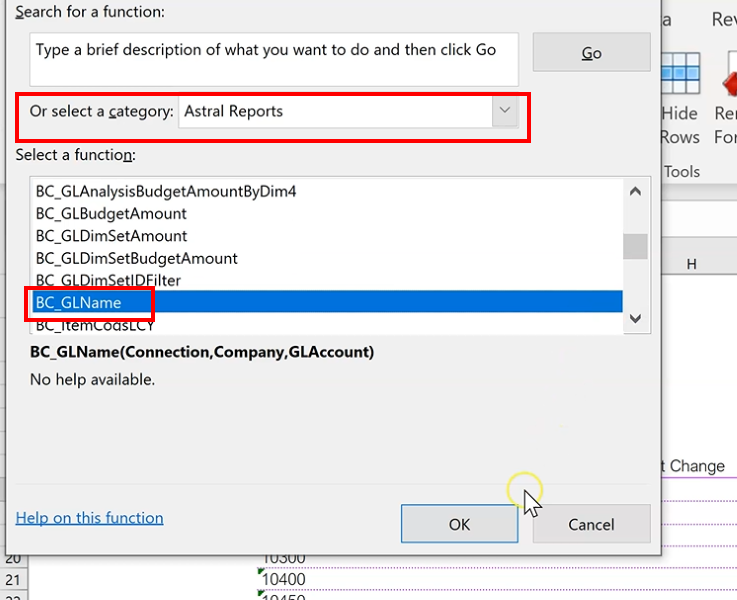
Figure 6 | Populate Account Names - Select Function
Specify the ‘Connection’ and ‘Company’ by linking them to the document and locking the cells.
To lock the cells, add a dollar sign between the characters. A shortcut to doing this is by simply pressing F4 on your keyboard.
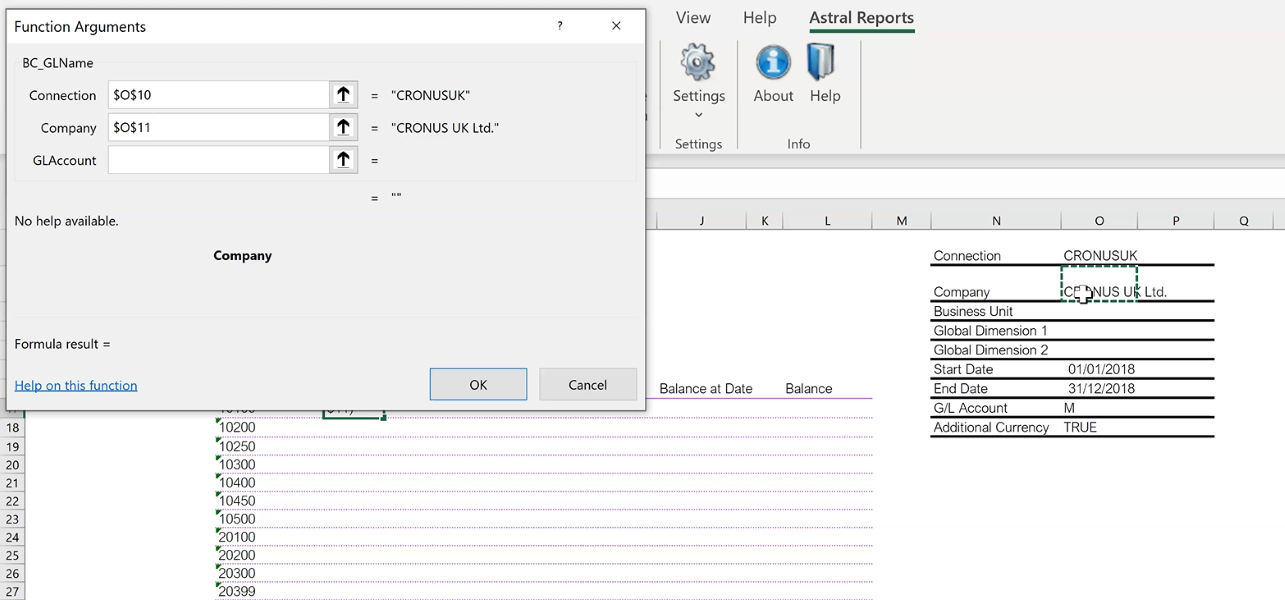
Figure 7 | Populate Account Names - Function Arguments
For ‘GLAccount’, select the first GL Account number from the spreadsheet, but leave the cell unlocked as you want this to change down the page.
Then click ‘OK’.
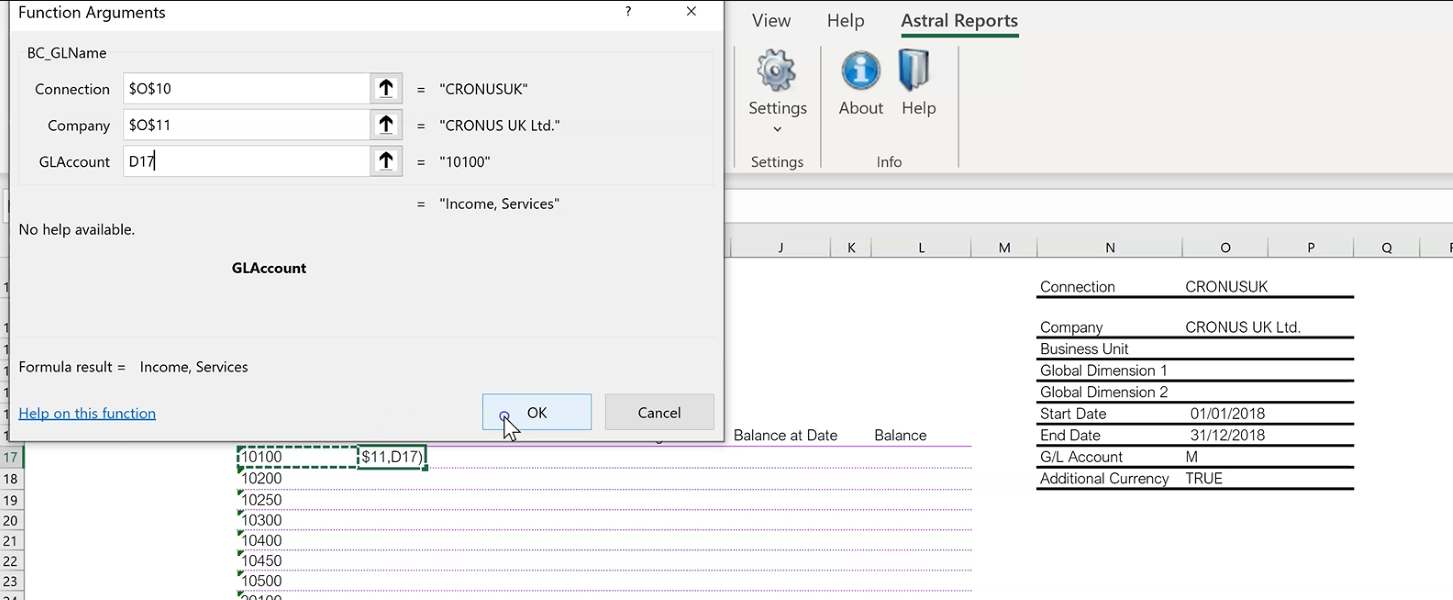
Figure 8 | Populate Account Names - Function Arguments
The first formula will be populated, double click the right hand corner of the cell which will autofill the same formula all the way down.

Figure 9 | Populated Account Names
Next, populate ‘NET Change’ by again selecting the first cell in the column, and clicking ‘Insert Function’.
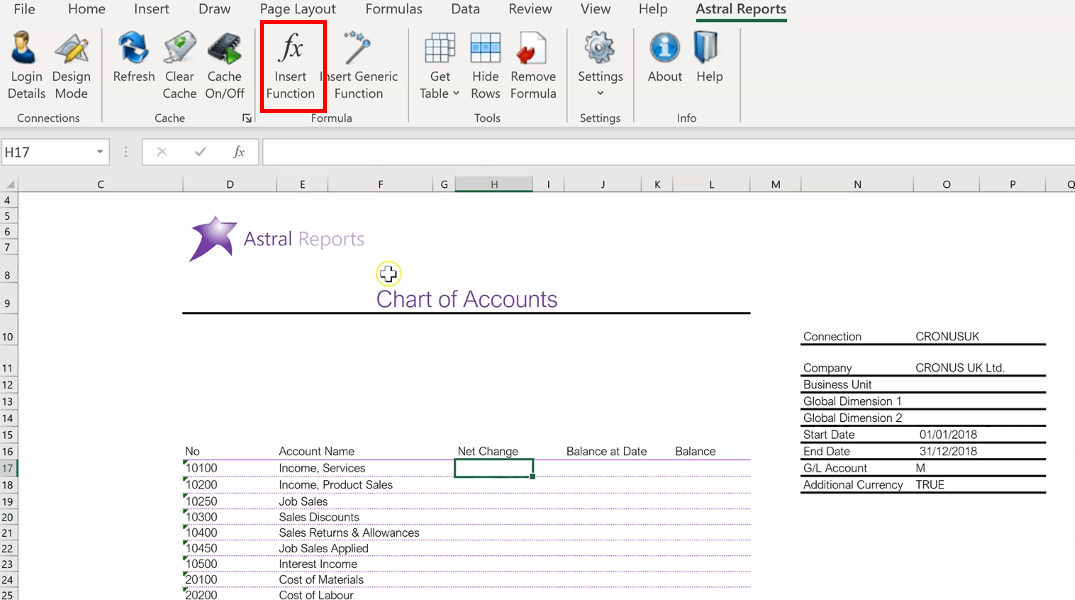
Figure 10 | Populate NET Change - Insert Function
Scroll down to ‘BC_GLAmount’ and click ‘OK’.
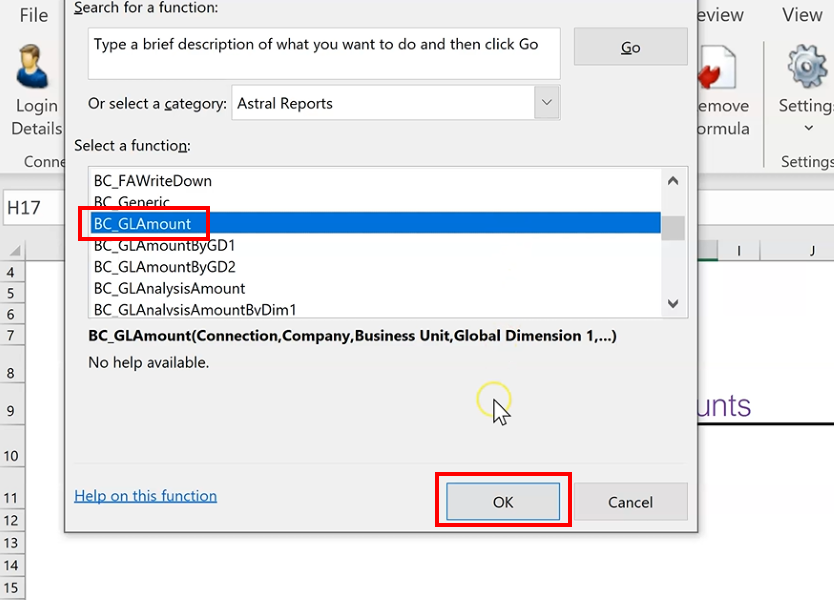
Figure 11 | Populate NET Change - Select Function
Now again, populate the ‘Connection’, ‘Company’ and ‘Business Unit’, locking the cells.
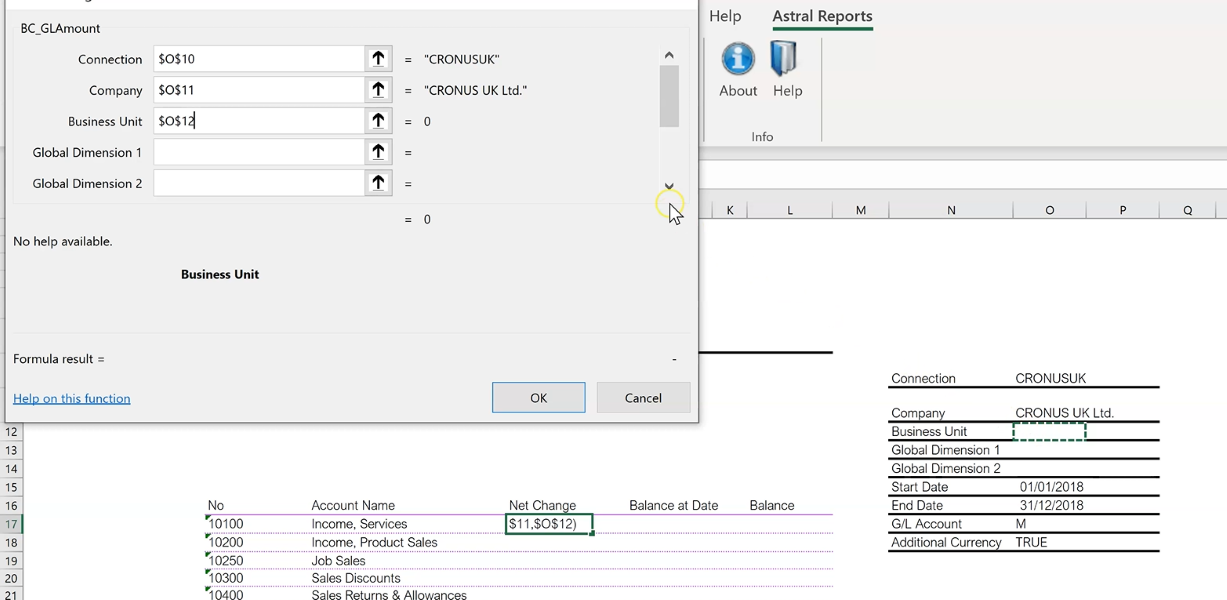
Figure 12 | Populate NET Change - Function Arguments
Leave the ‘Global Dimension’ values blank, and link the ‘Start Date’ and ‘End Date’, locking in the cells.
Lastly, for the ‘G/L Account’, select the first account number from the spreadsheet, but leave the cells unlocked and leave ‘Additional Currency’ blank.
Then click OK.
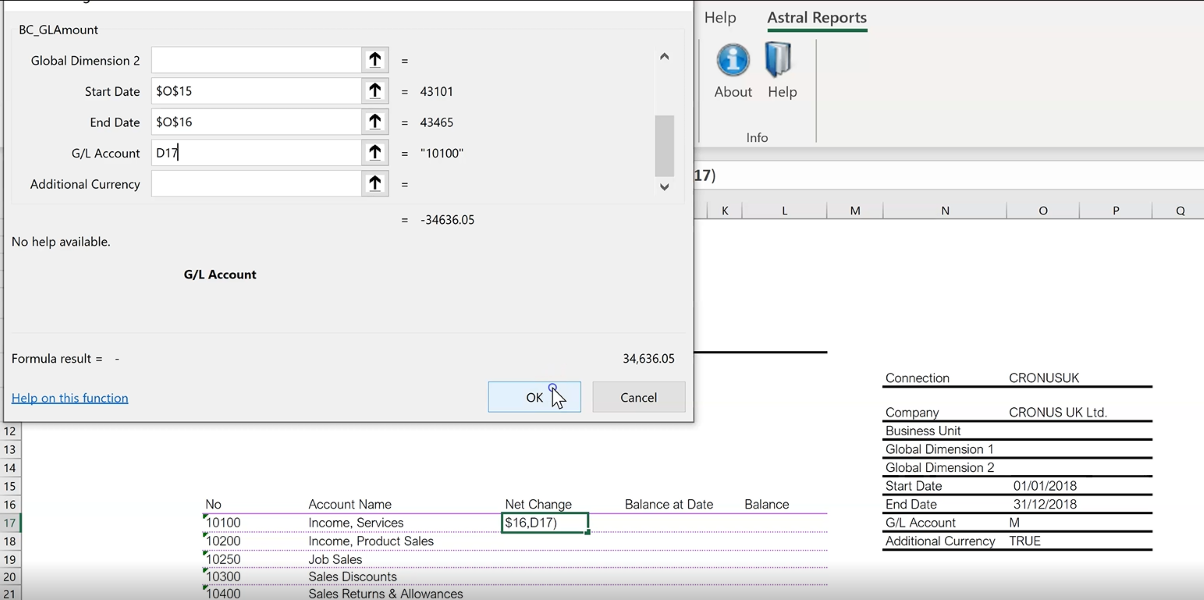
Figure 13 | Populate NET Change - Function Arguments
Again, you can either double click the bottom right hand corner of the cell to autofill, or you can hold onto the corner of the cell and drag it down the page.
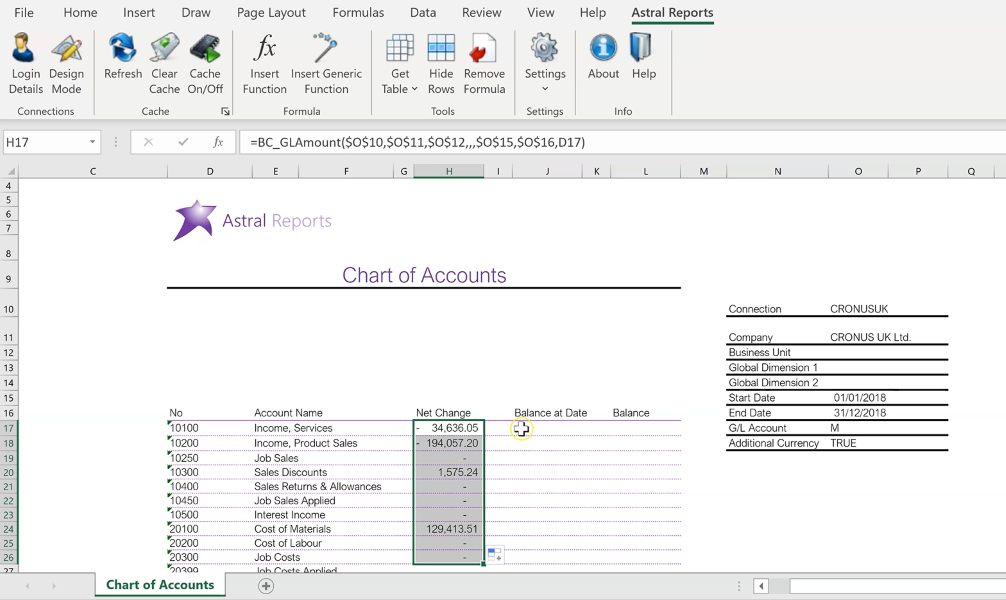
Figure 14 | Populated NET Change
Now populate the ‘Balance at Date’ again by clicking the first cell in the column and selecting Insert Function’.
Now this time, select ‘BC_GLAmount’ and click ‘OK’.
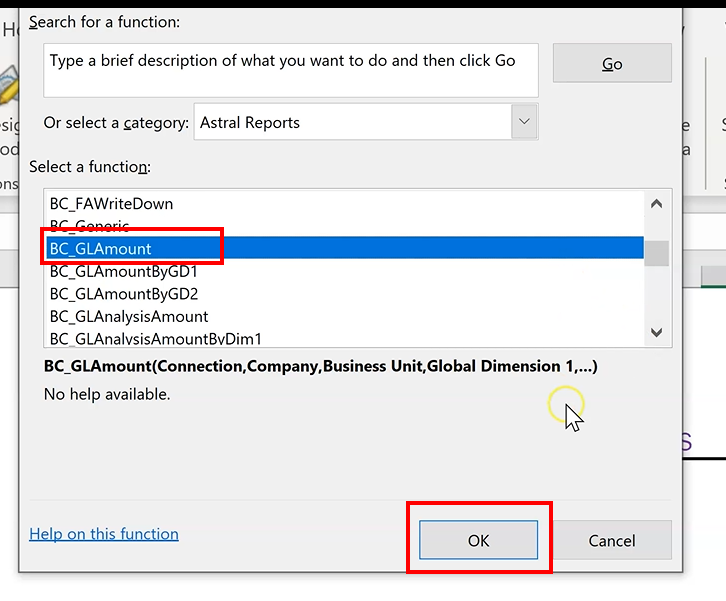
Figure 15 | Populate Balance at Date - Select Function
Again, fill in the same arguments.
However, leave the ‘Start Date’ blank, but fill in the ‘End Date’ and select ‘GL Account Number’ from G/L Accounts, leaving it unlocked.
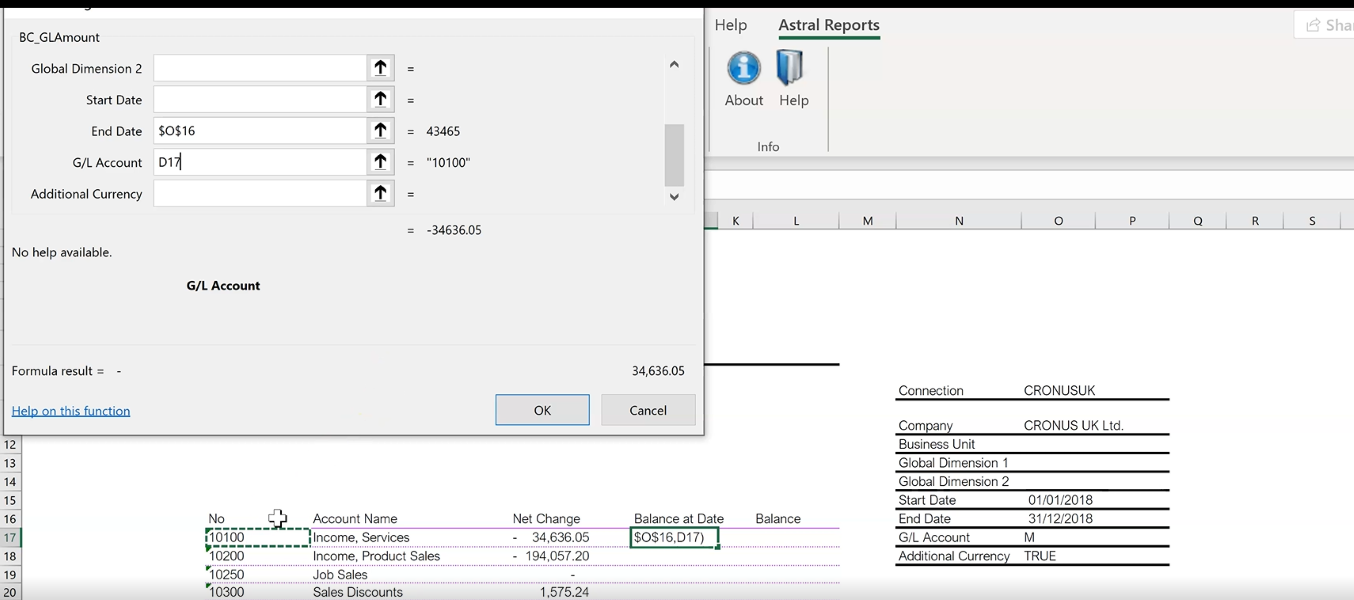
Figure 16 | Populate Balance at Date - Function Arguments
Drag the cell down to populate.
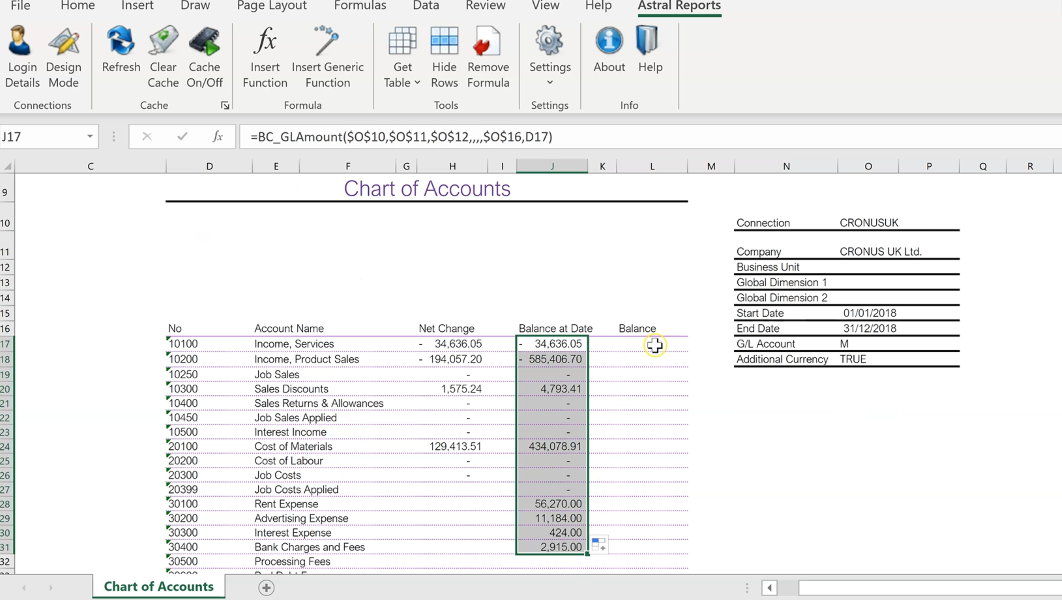
Figure 17 | Populated Balance at Date
Lastly, populate ‘Balance’.
So again click on the first cell in the column and click ‘Insert Function’, selecting ‘BC_GLAmount’.
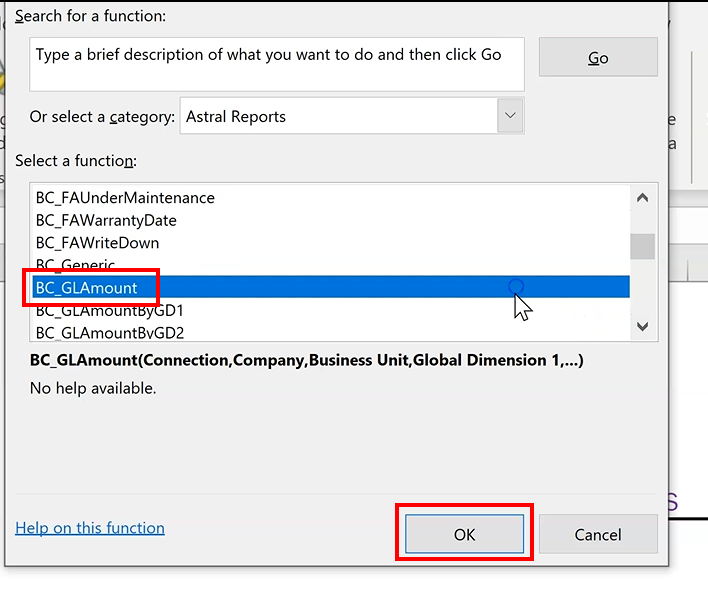
Figure 18 | Populate Balance - Select Function
Again, fill in the same arguments, but this time do not place in any dates and insert ‘GL Account Number’ for ‘G/L Accounts’ and click ‘OK’.
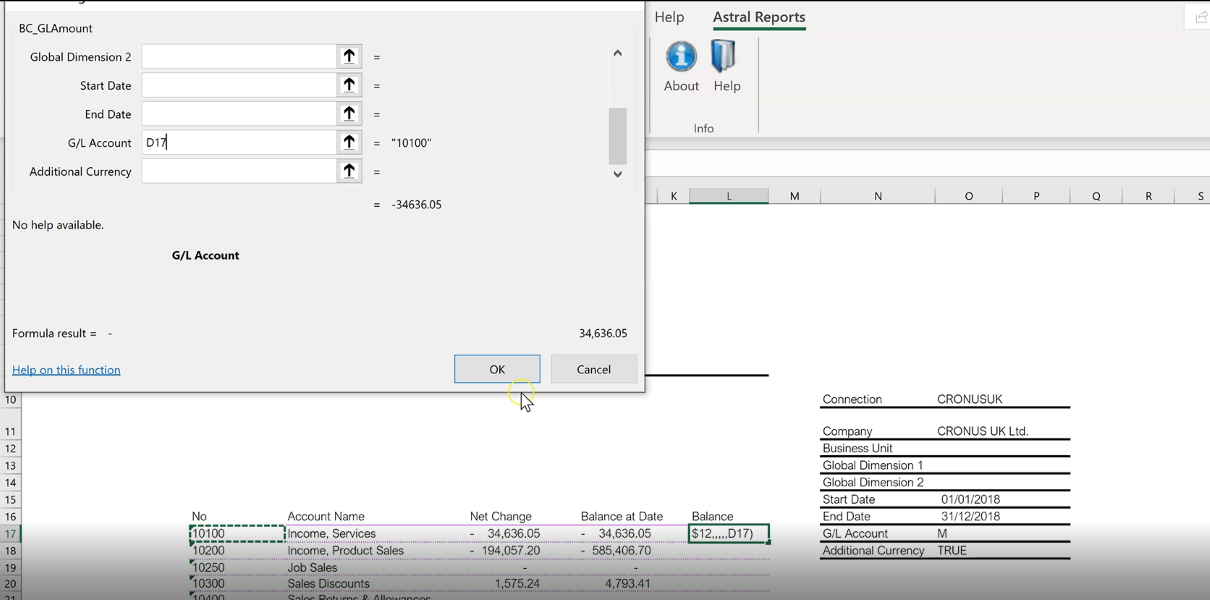
Figure 19 | Populate Balance - Function Arguments
Again, drag this down the page.
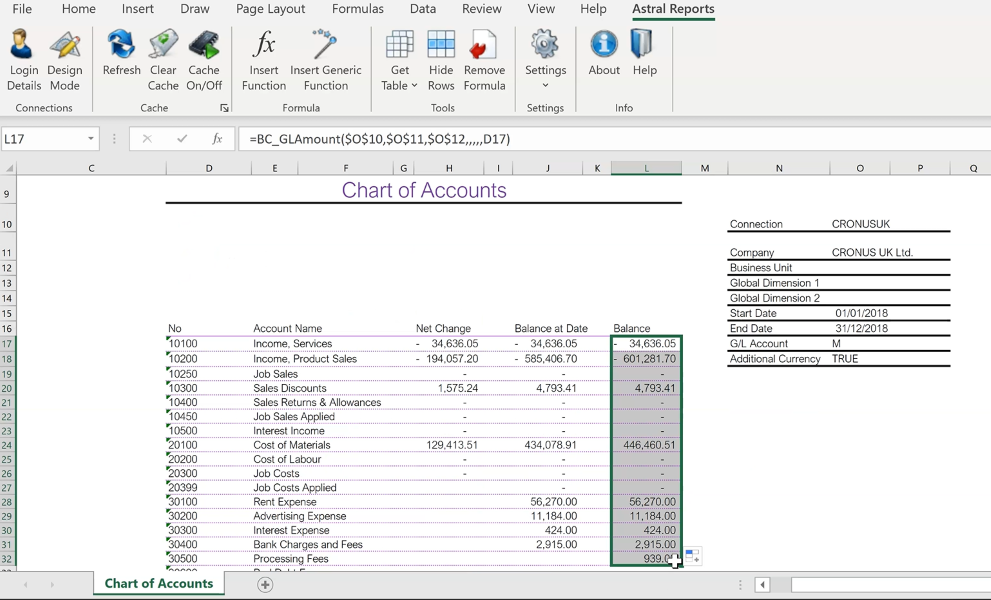
Figure 20 | Populated Balance
And that’s the Chart of Accounts complete.