Astral Reports - Help V5:
Watch the video
We will demonstrate how to create a Profit and Loss by Department and by Dimension value.
We’re starting with blank P&L spreadsheet where we have already populated the values that we’re going to use.
There’s the ‘G/L Account No.’, ‘Account’ names, ‘Net Change’, and then some blank spaces for the Dimension values to calculate against, and then the ‘Totals’.
On the right we also have already filled in our key with the ‘Connection’, ‘Company’, ‘Business Unit’, ‘Global Dimension 1’, ‘Global Dimension 2’, ‘Start Date’, and ‘End Date’.
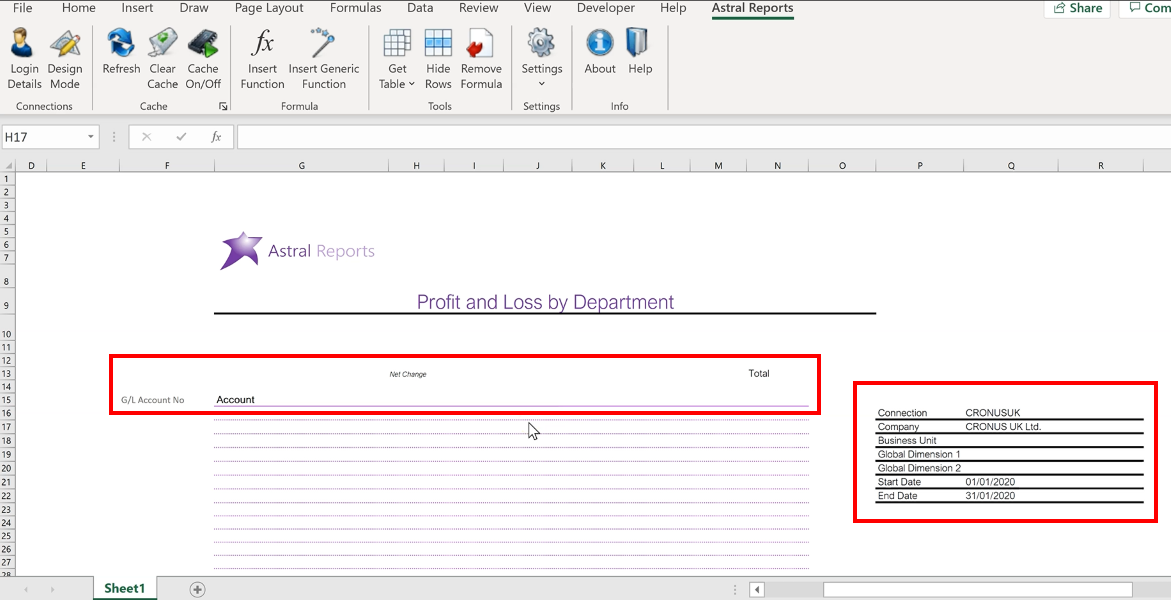
Figure 1 | Prepared Blank P&L
Begin by pulling in the ‘G/L Accounts’.
Select the first cell in this column, then make sure to select the ‘Astral Reports’ tab and then click ‘Get Table’ on the ribbon, and ‘General Ledger Accounts’.
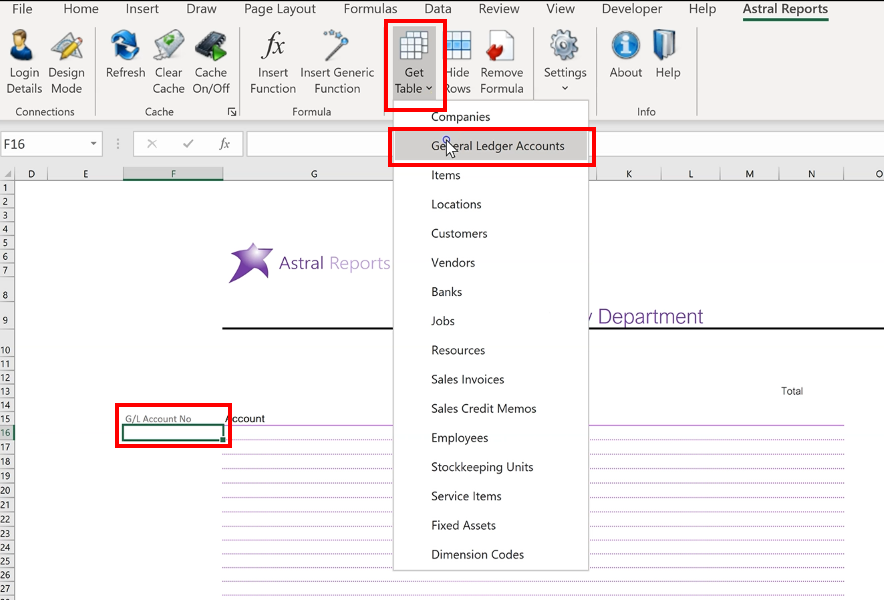
Figure 2 | Adding G/L Accounts
By default, the ‘Connection’ has been selected as we only have one tenant that we are analysing from in this demo.
Select the ‘Company Name’ from the dropdown, and then tick the ‘Include Totalling Accounts’ option so that the totalling accounts are included in the report.

Figure 3 | Companies
Click ‘OK’, and the G/L Account No’s will be populated down the column.
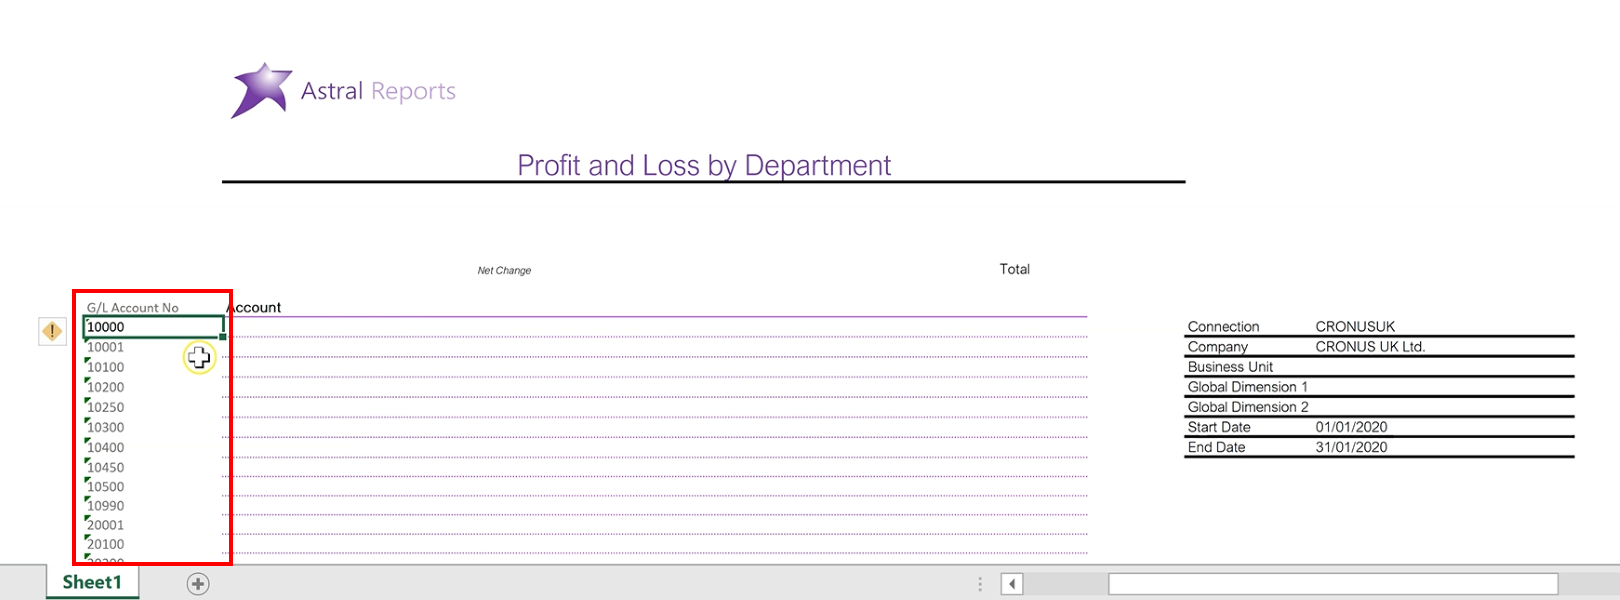
Figure 4 | Populated G/L Accounts
Next, select the first cell in the ‘Account’ column, and go to ‘Insert Function’ to place the first function.
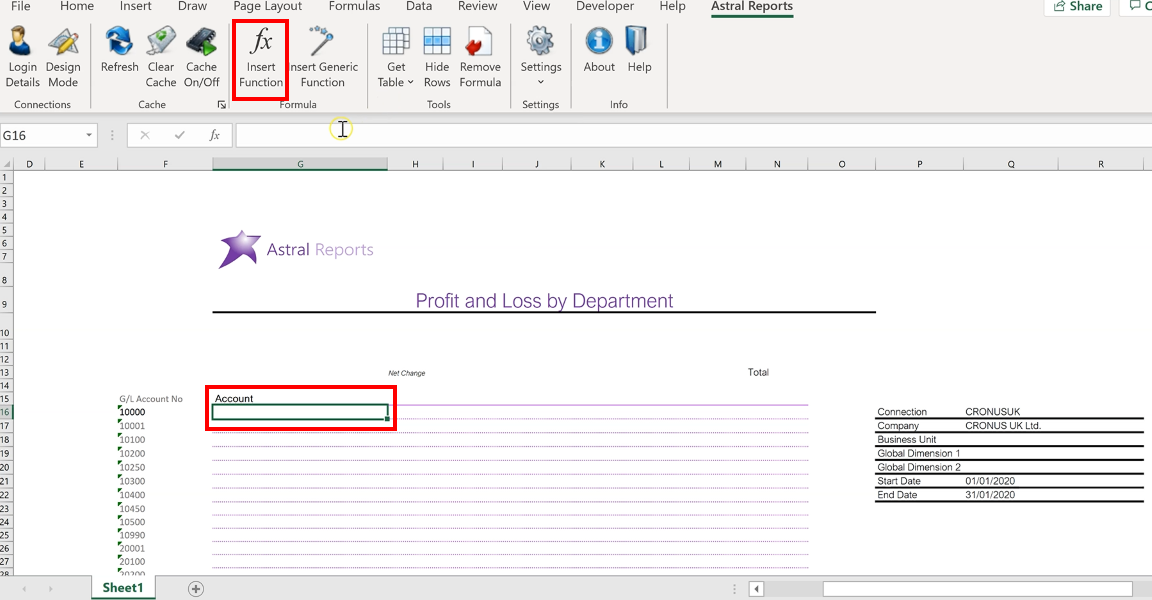
Figure 5 | Populate Account Names - Insert Function
Select ‘Astral Reports’ for the category, and then ‘BC_GLName’ for the function and click ‘OK’.
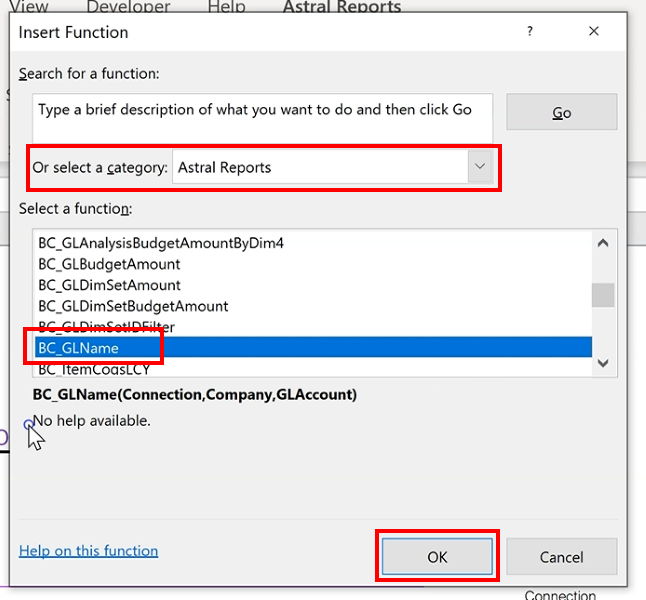
Figure 6 | Select Category & Function
Now fill in the Function Arguments.
Starting with the ‘Connection’ and ‘Company’, select them from the key, making sure to lock the values by clicking F4.
Note here, if you only have one connection then you don’t need to fill in the ‘Connection’ argument. However, for demonstration purposes we have.
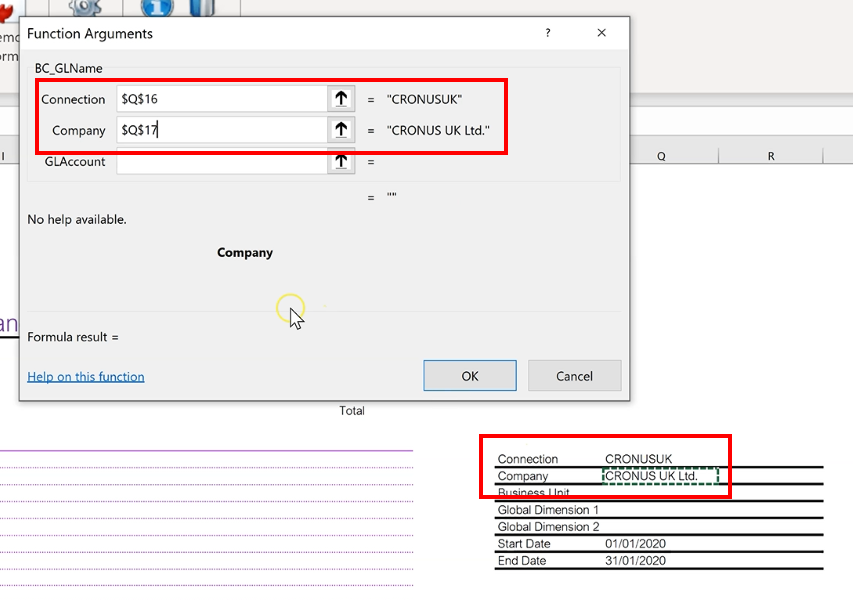
Figure 7 | Function Arguments
Now select the first ‘G/L Account No.’ for ‘GLAccount’, but this time, only lock the column and leave the row to flow freely by adjusting the formula so that the dollar sign is before the column number but remove it from the row – such as in this example, ‘$F16’.
And click ‘OK’.
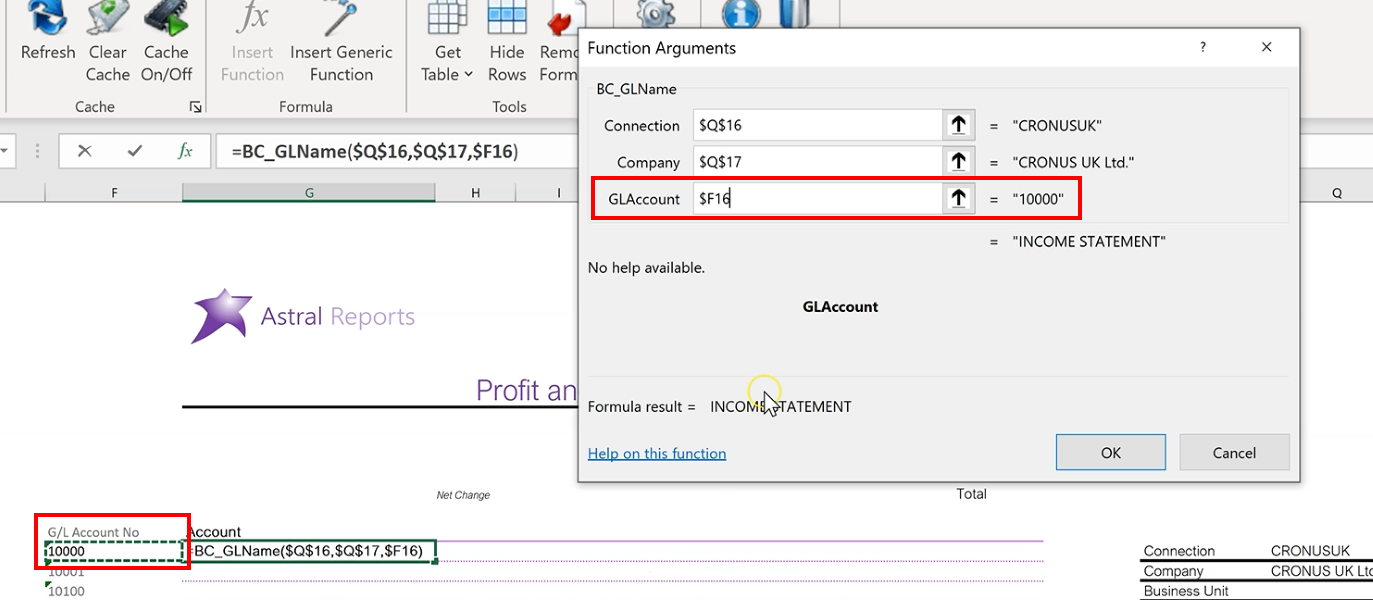
Figure 8 | Function Arguments
Copy this formula down the column, either by dragging it or double clicking the corner, and all the Account numbers will be populated using the same formula.
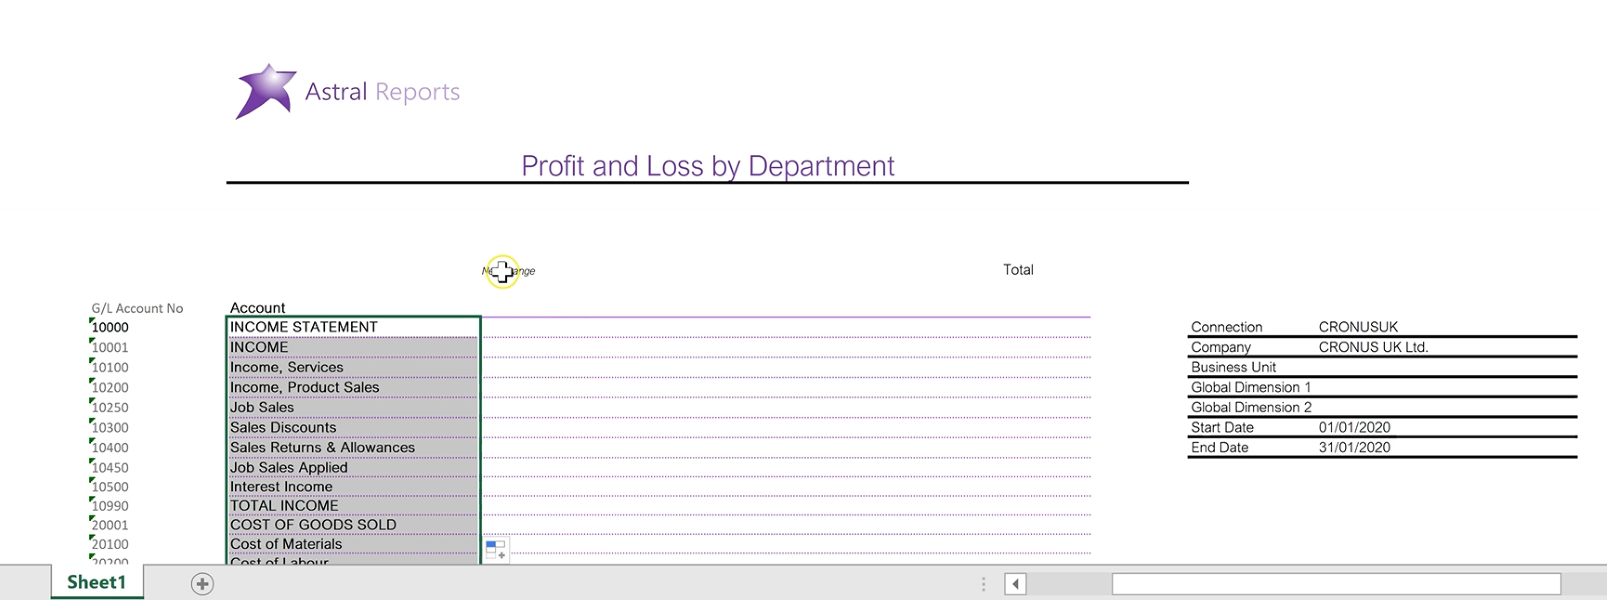
Figure 9 | Populated Account Names
Scrolling down, you can see when the Balance Sheet values begin. But as they are not necessary, highlight all the rows involved, and right click to ‘Delete’ – that is a standard Excel function.
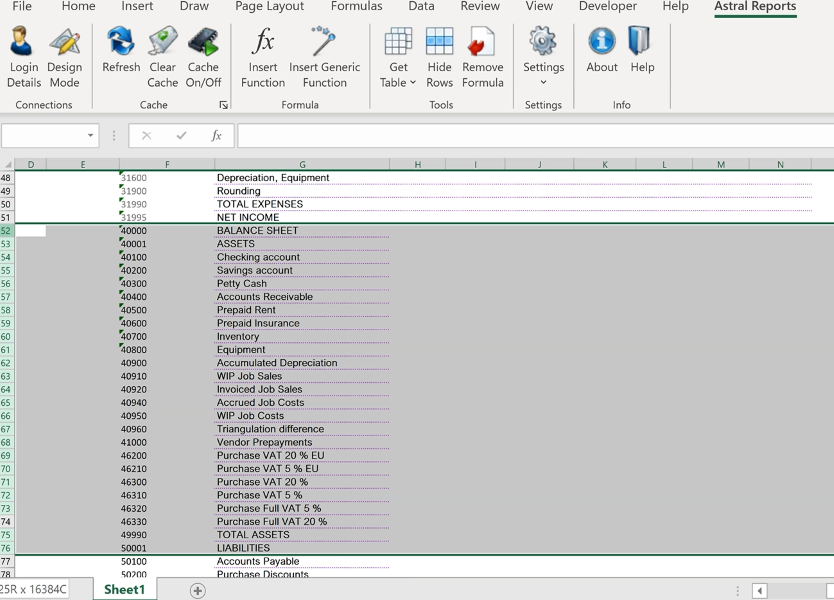
Figure 10 | Remove Balance Sheet Data
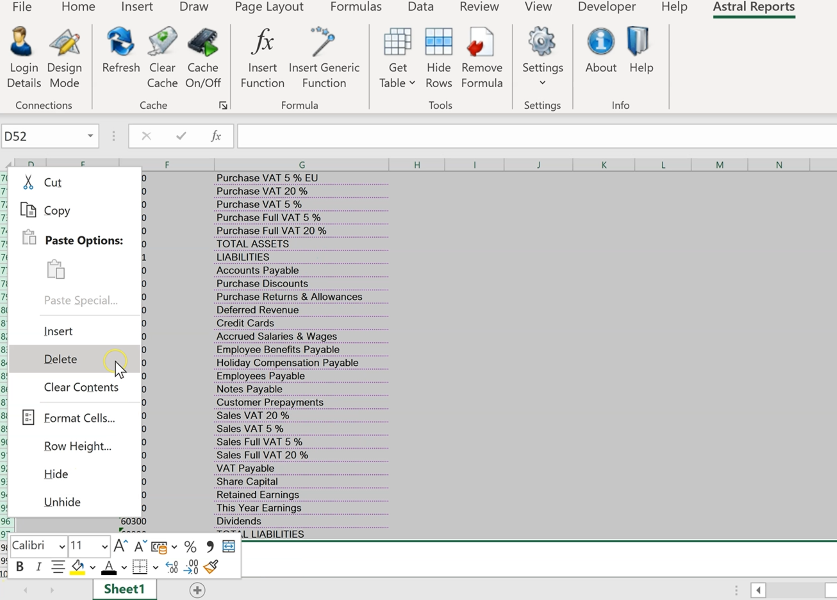
Figure 11 | Remove Balance Sheet Data
Now, to populate the ‘Net Change’, again, click on the first cell of the column, and go to ‘Insert Function’ again.

Figure 12 | Populate Net Change - Insert Function
Now, with ‘Astral Reports’ still as the category, select ‘BC_GLAmount’ for the function, and click ‘OK’.
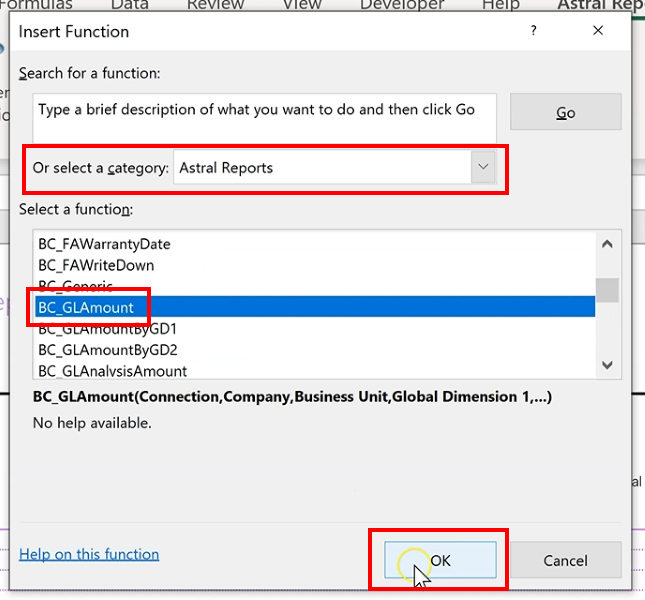
Figure 13 | Insert Function
Fill in the ‘Connection’ and ‘Company’ as before, locking them in using F4 as these values will not be changing.
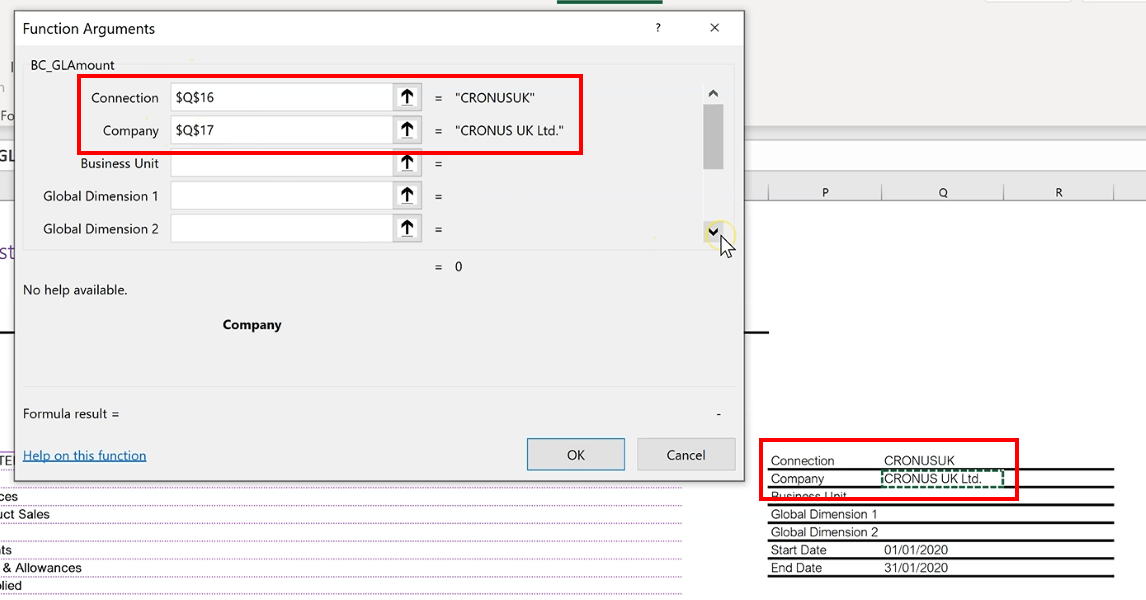
Figure 14 | Function Arguments
Then select the ‘Start’ and ‘End Dates’ from the key, locking them in too.
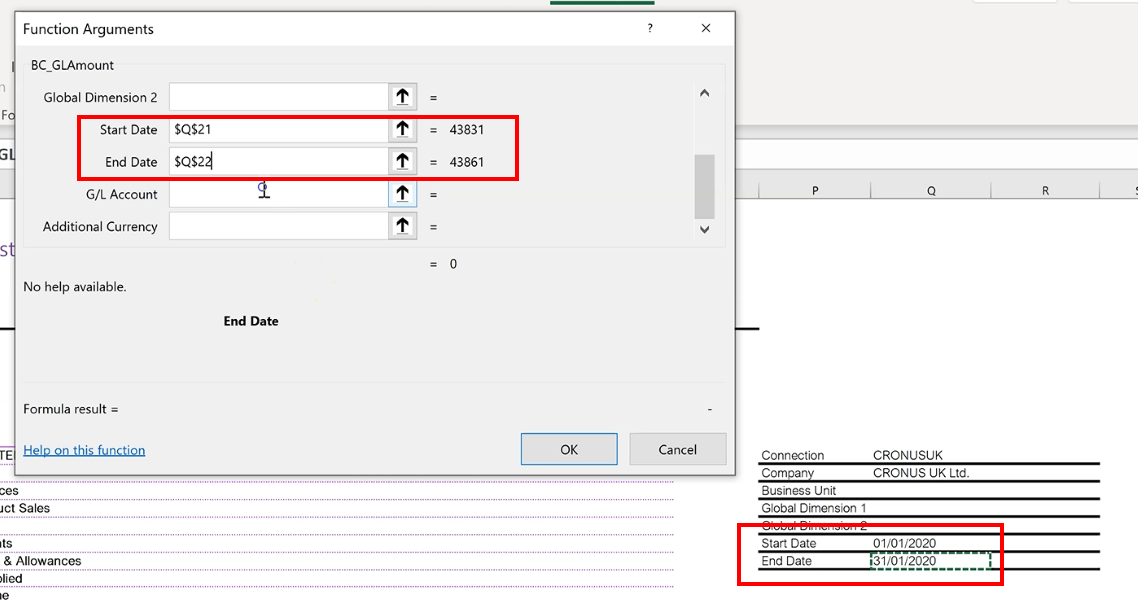
Figure 15 | Function Arguments
Select the ‘G/L Account’ from the ‘G/L Account No.’ column and lock it the same as before, where the column is locked but the row can move freely.
Then click ‘OK’.
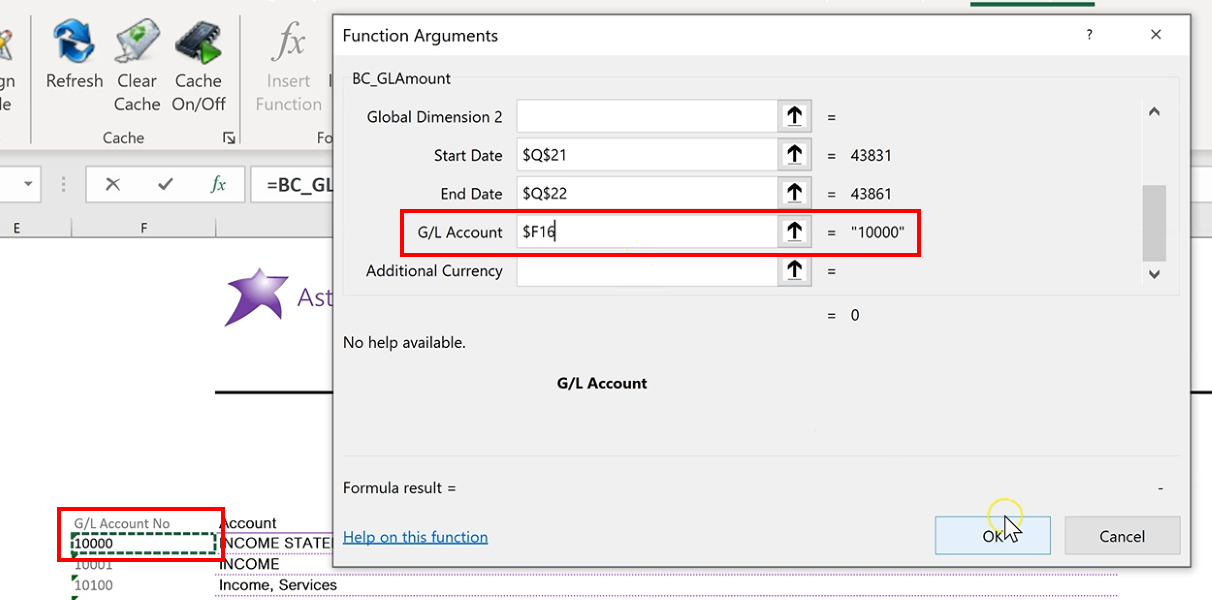
Figure 16 | Function Arguments
Copy the formula down the column to populate the rest of the Net Change data.
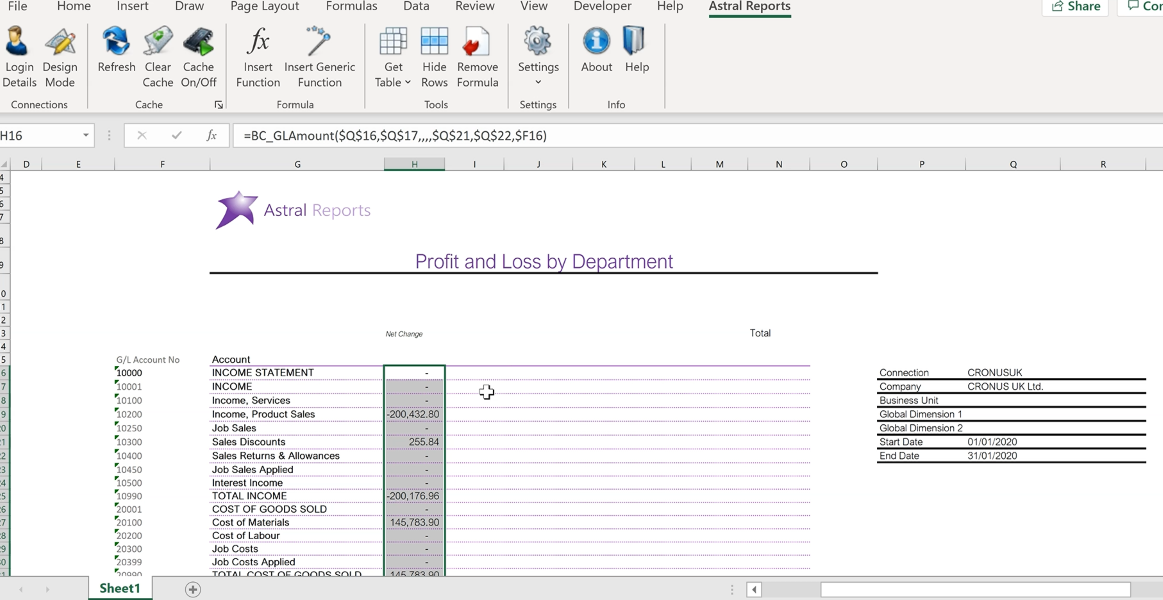
Figure 17 | Populated Net Change
Now, just to make it a bit easier to read which are the totalling accounts and which aren’t, select the accounts that are not in caps – the regular G/L accounts – and indent them.
This is purely to make the report easier to read.
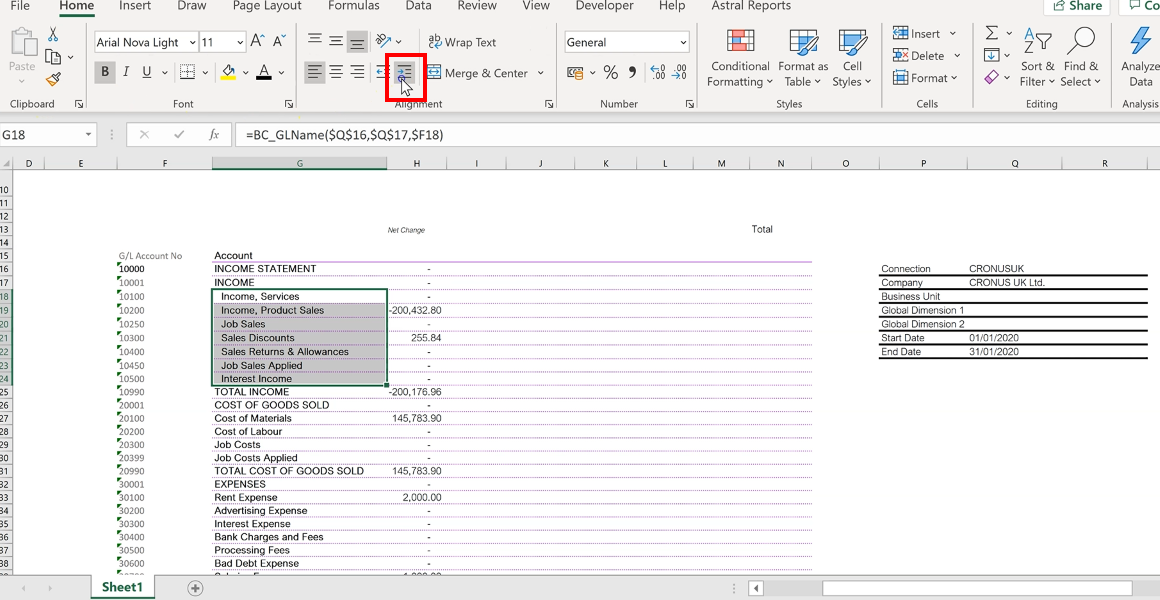
Figure 18 | Indent Figures
Also, for the particular calculated amounts like ‘COST OF GOODS SOLD’ and ‘NET INCOME’ you could leave them in or calculate them separately if you wanted.
Now we’ll look at the values according to some Dimensions.
Selecting the first empty cell, select the ‘Astral Reports’ tab and go to ‘Get Tables’ then ‘Dimension Codes’.
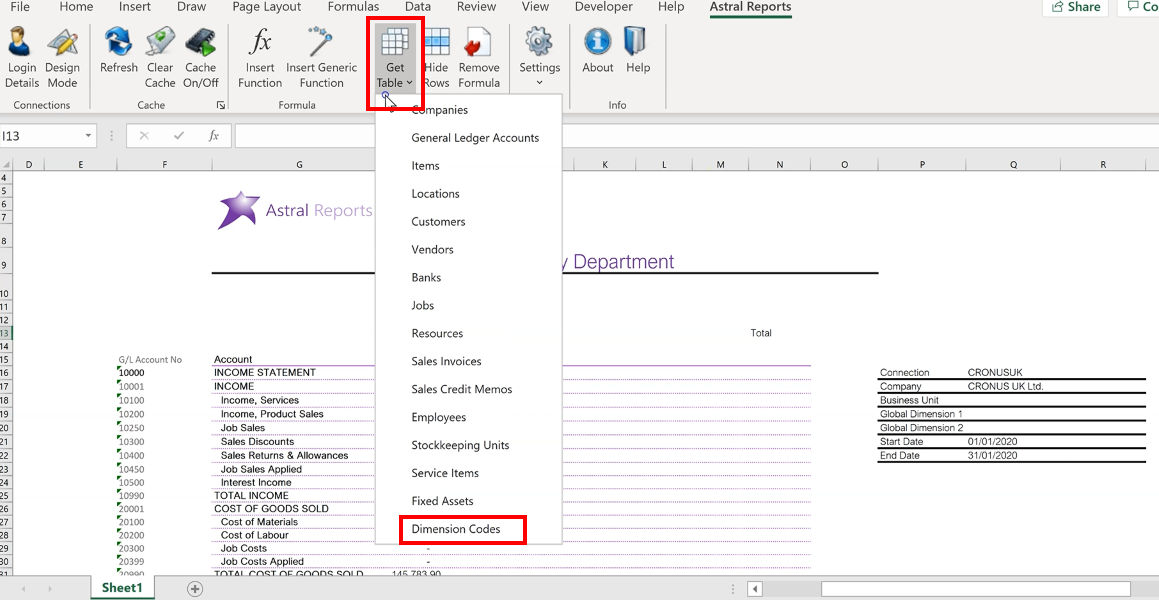
Figure 19 | Populate Dimensions
Select the ‘Company Name’ again and then the ‘Dimension Code’ – in this case we’ll go for ‘DEPARTMENT’.
Make sure ‘Fill Across Rows’ in ticked on so that the Dimensions fill across the top of the report and click ‘OK’.
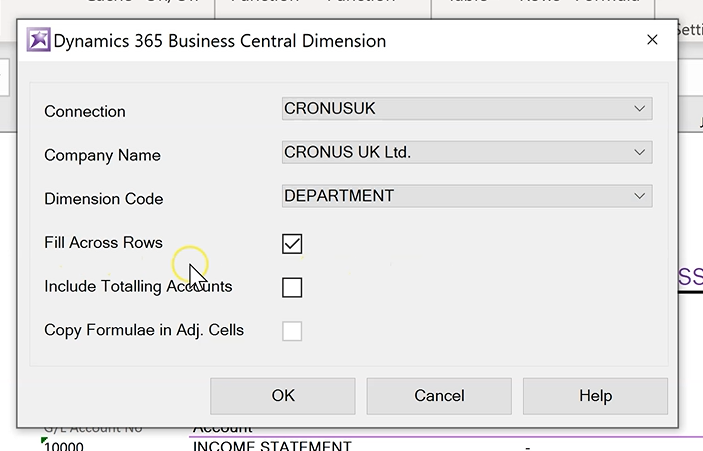
Figure 20 | Dimension Selection
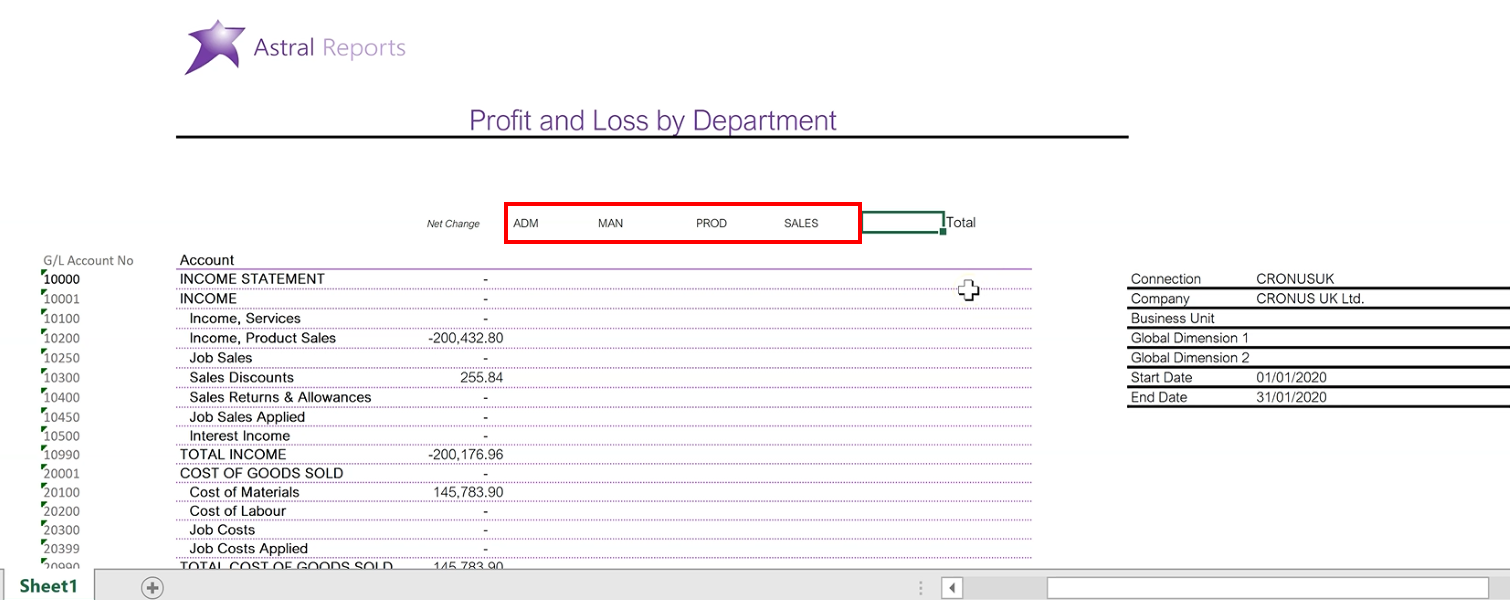
Figure 21 | Populated Dimensions
In the last column, we will place the symbol in figure 22.
As mentioned previously, this symbol represents any dimensions that are outside of the specified dimensions of ‘ADM’, ‘MAN’, PROD’, and ‘SALES’.
So by having a column that represents everything outside of the dimensions, this allows you to make sure that the ‘Totals’ are correct.
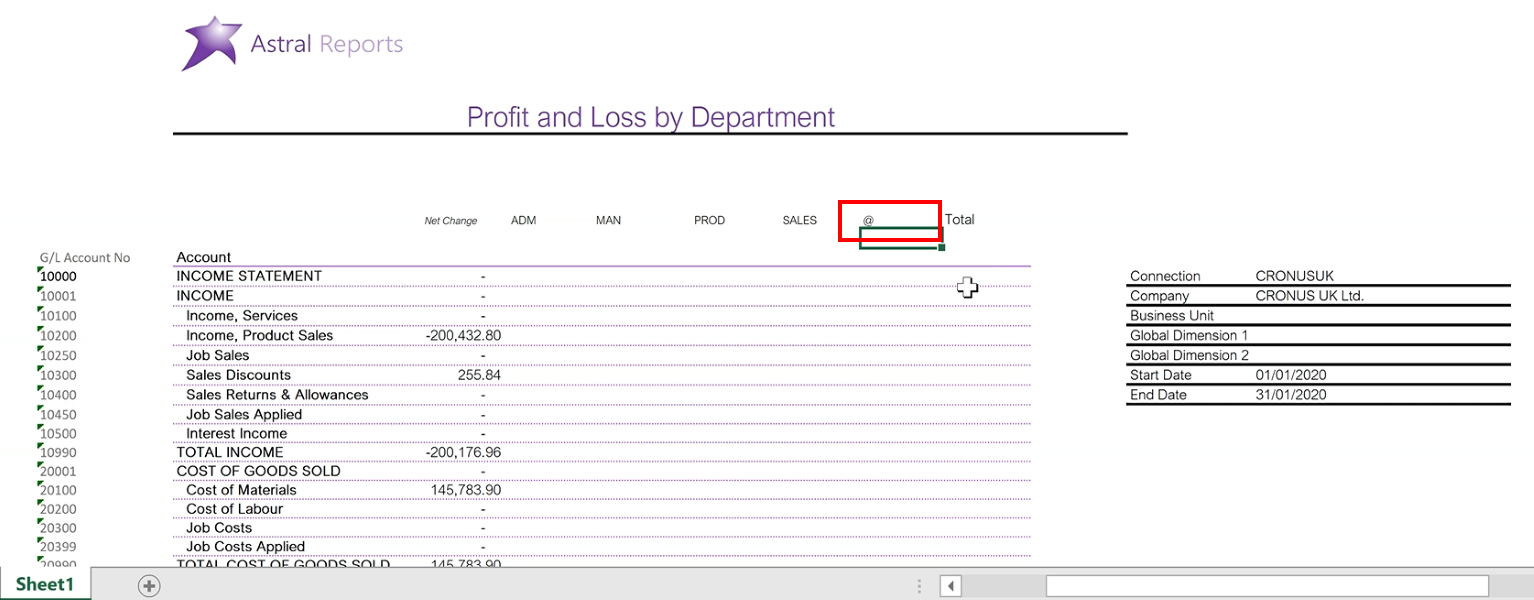
Figure 22
Now place the Dimension functions.
Select the first cell in the first Dimension column – in this case I16 for ADM – then go to ‘Insert Function’.
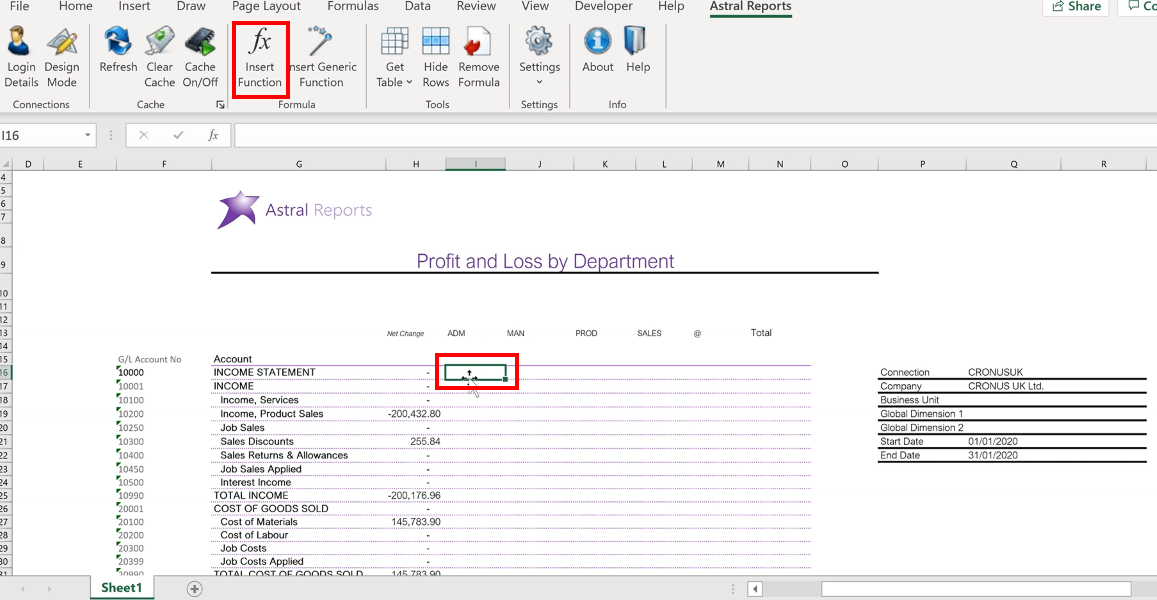
Figure 23 | Populate Dimension Functions
Now select the function ‘BC_GLAmount’ and click ‘OK’.
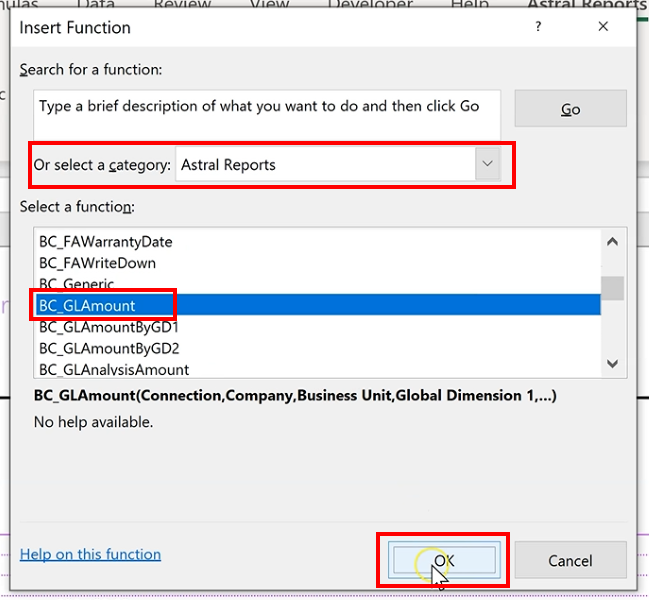
Figure 24 | Insert Function
Fill in the ‘Connection’ and ‘Company’ function arguments as before, locking the cells.
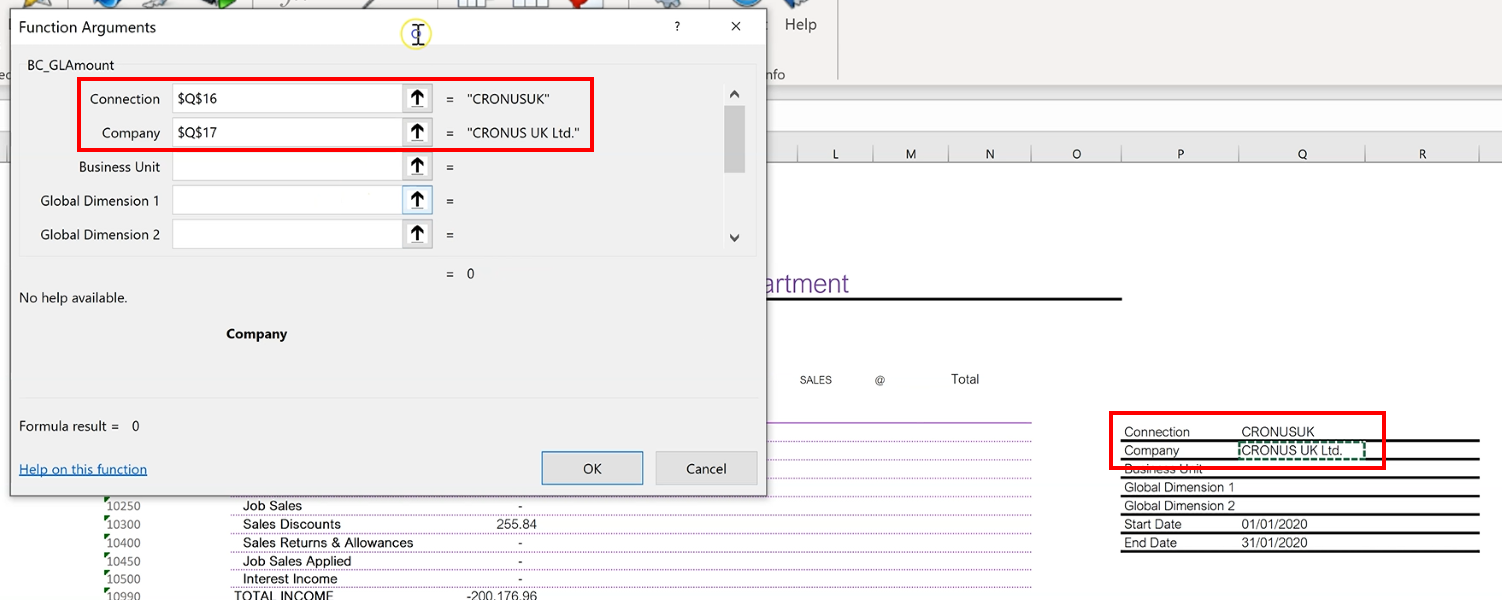
Figure 25 | Function Arguments
This time, for ‘Global Dimension 1’, select the first Department Code from the spreadsheet, but this time lock the row and allow the column to move freely.
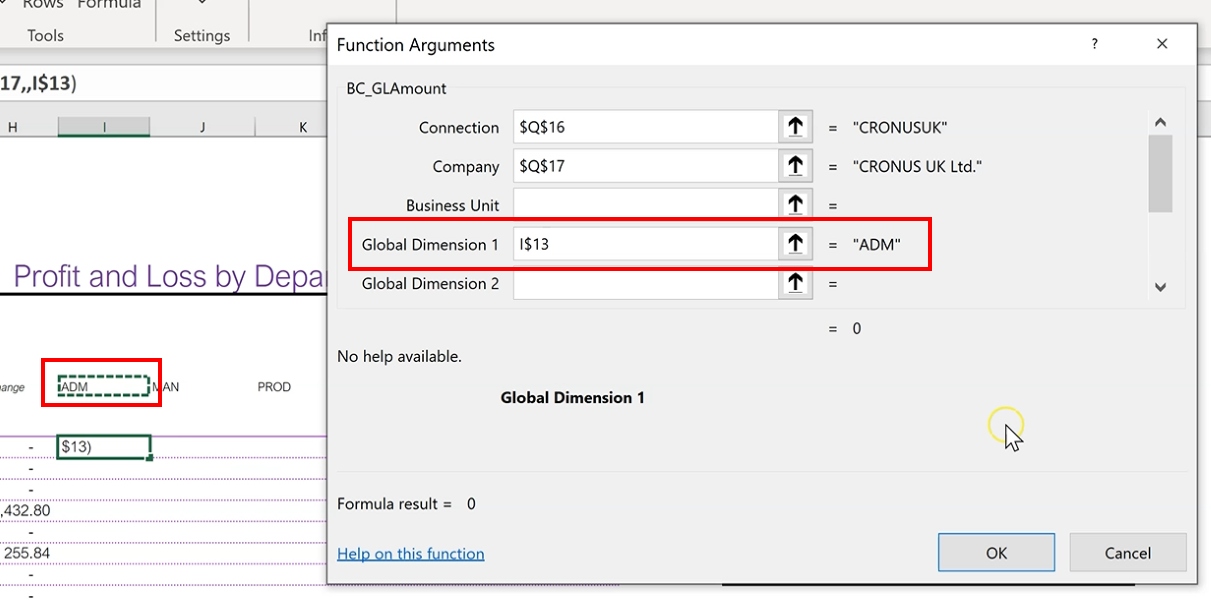
Figure 26 | Function Arguments
Then fill in the ‘Start Date’ and ‘End Date’, locking the cells.
For ‘G/L Amount’, select the first G/L Account No., but lock the column and leave the row to move freely.
You can of course include ‘Additional Currency’ at this stage, however, for this demonstration we will not include it.
There is a separate video and help page on using the ‘Additional Currency’ function if you would like to.
So for now, click ‘OK’.

Figure 27 | Function Arguments
Drag the formula across the dimensions.
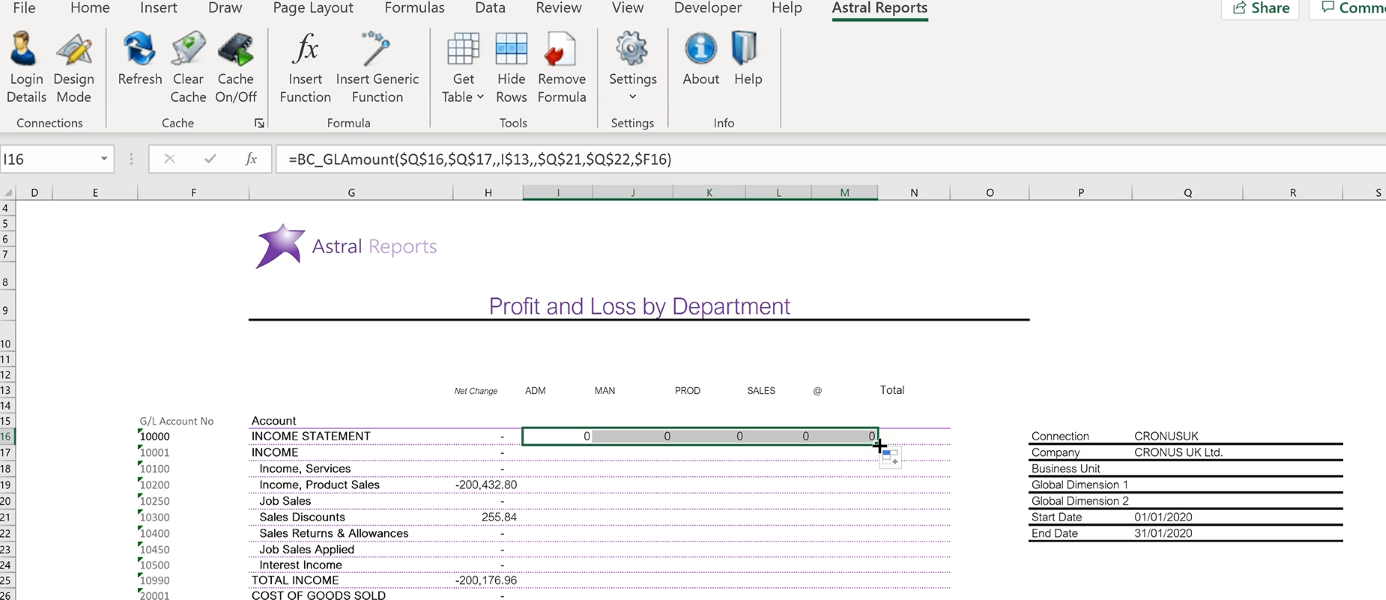
Figure 28 | Populated Dimesnion Functions
And then copy it down the page.
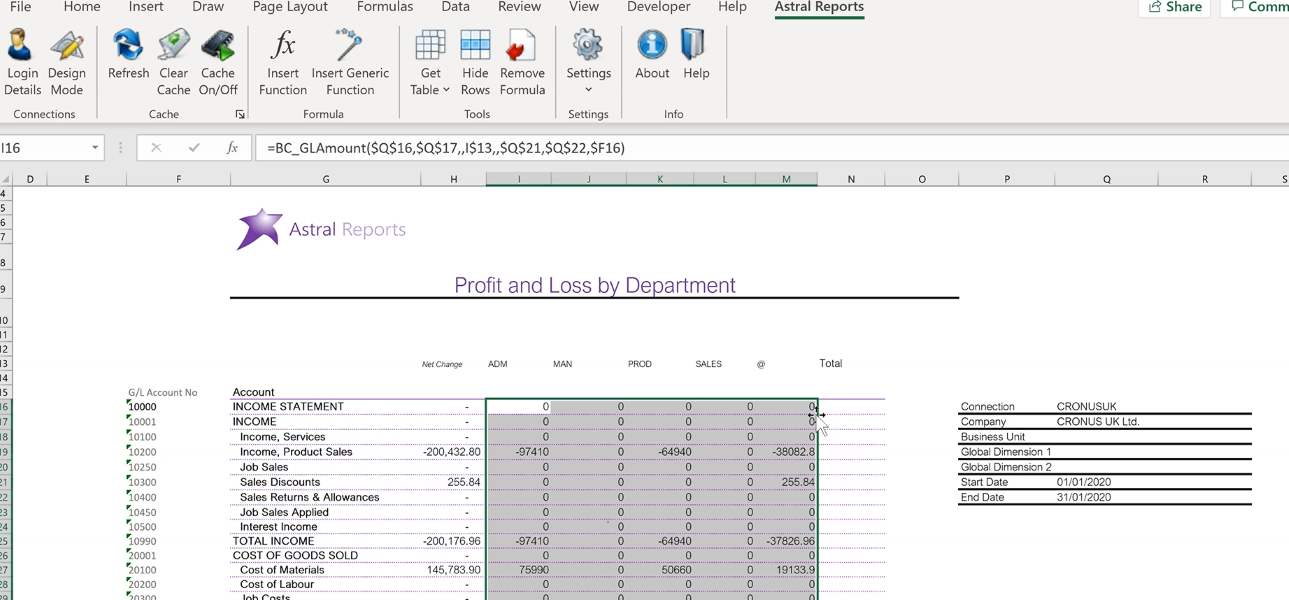
Figure 29 | Populated Dimesnion Functions
Now just change the formatting slightly on the figures.
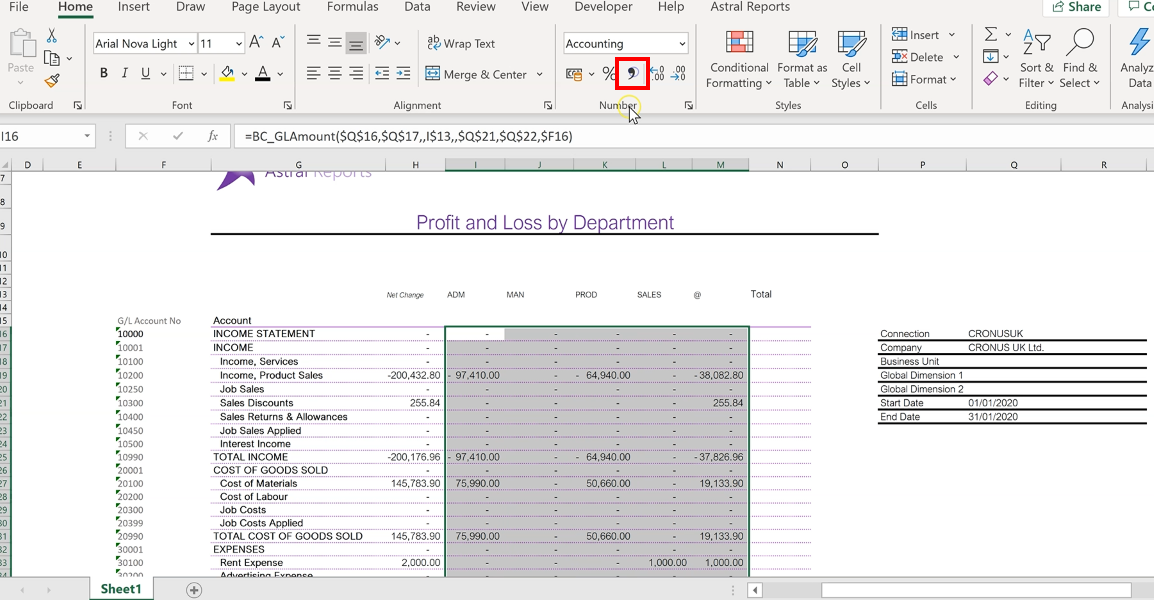
Figure 30 | Adjust Formatting
Now to finish, fill in the ‘Total’ column.
Select the first cell, and then type in a simple formula that will add up the figures across the dimension values.
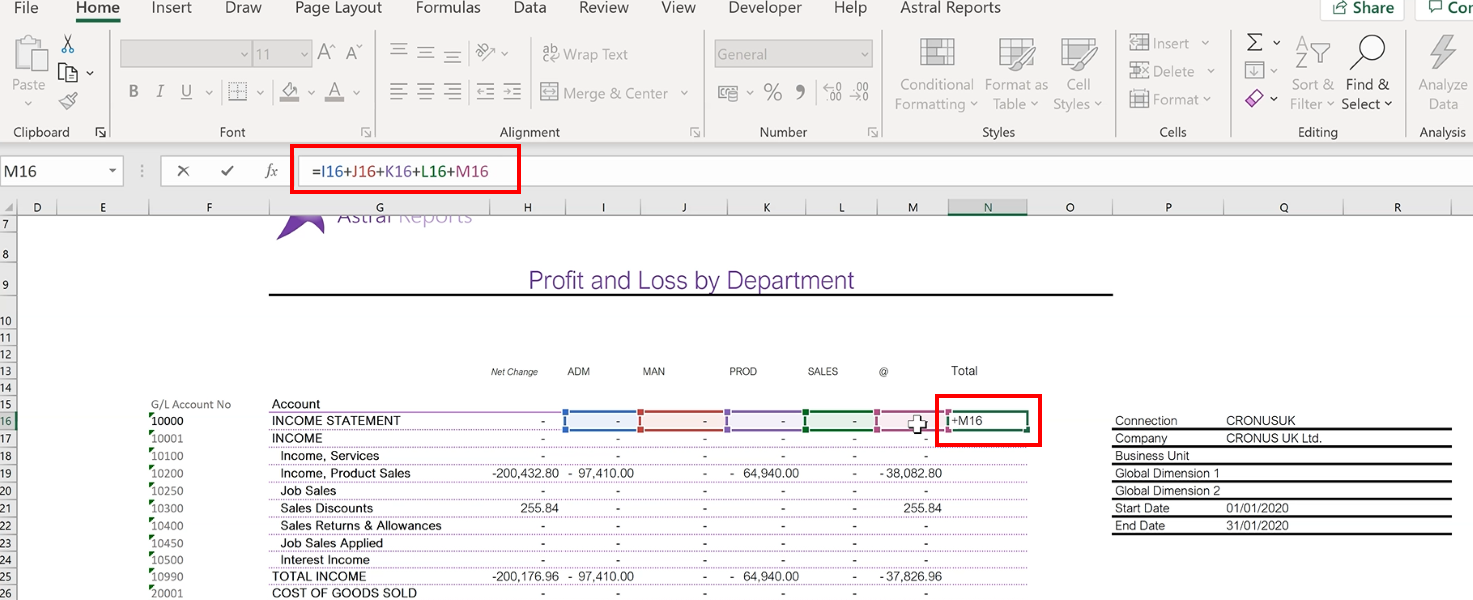
Figure 31 | Populate Total
Then copy the formula down once again.
So now you can see that the Dimension values Total is the same as the Net Change.
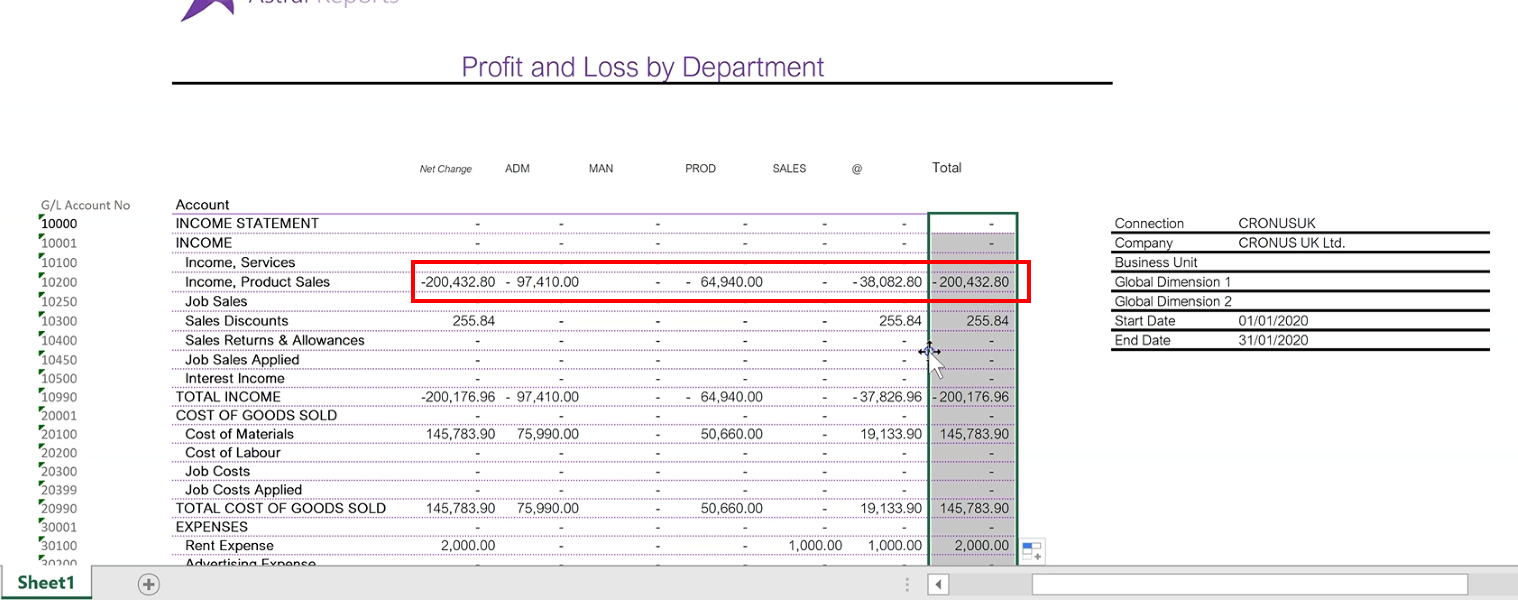
Figure 32 | Populated Totals
At the bottom, the total for the totalling accounts has also been calculated.
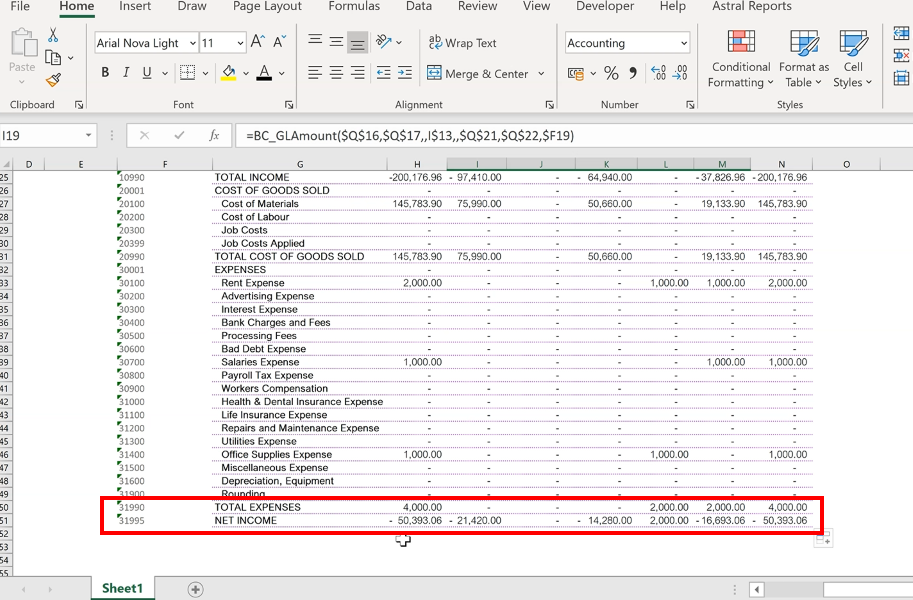
Figure 33 | Totalling Accounts
You can manually check the ‘NET INCOME’ value by placing a simple formula below it and adding up the totalling accounts.
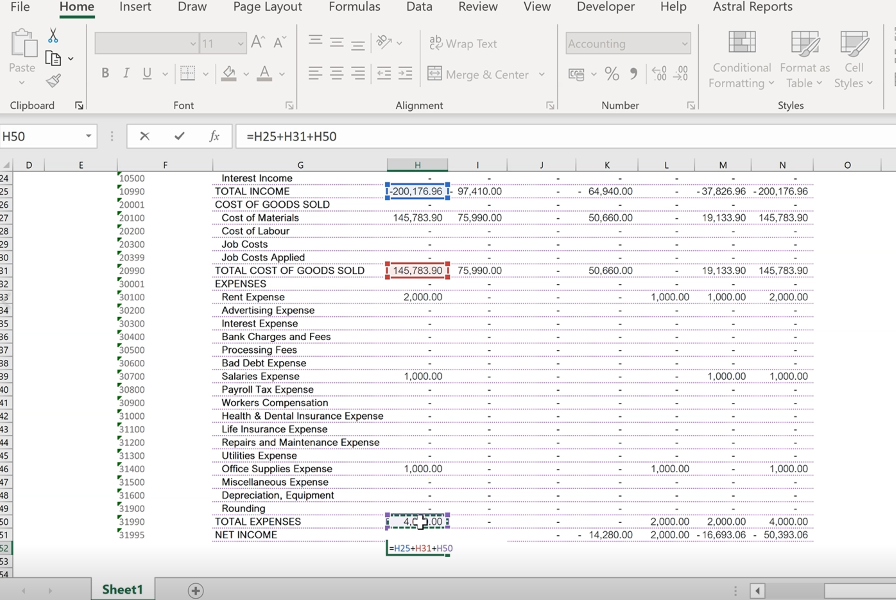
Figure 34 | Check Net Income
Finally, you can use the standard Excel function of Hiding the G/L Account No. column if you wanted to.
But there you have it, that’s a completed Profit and Loss report by Department.
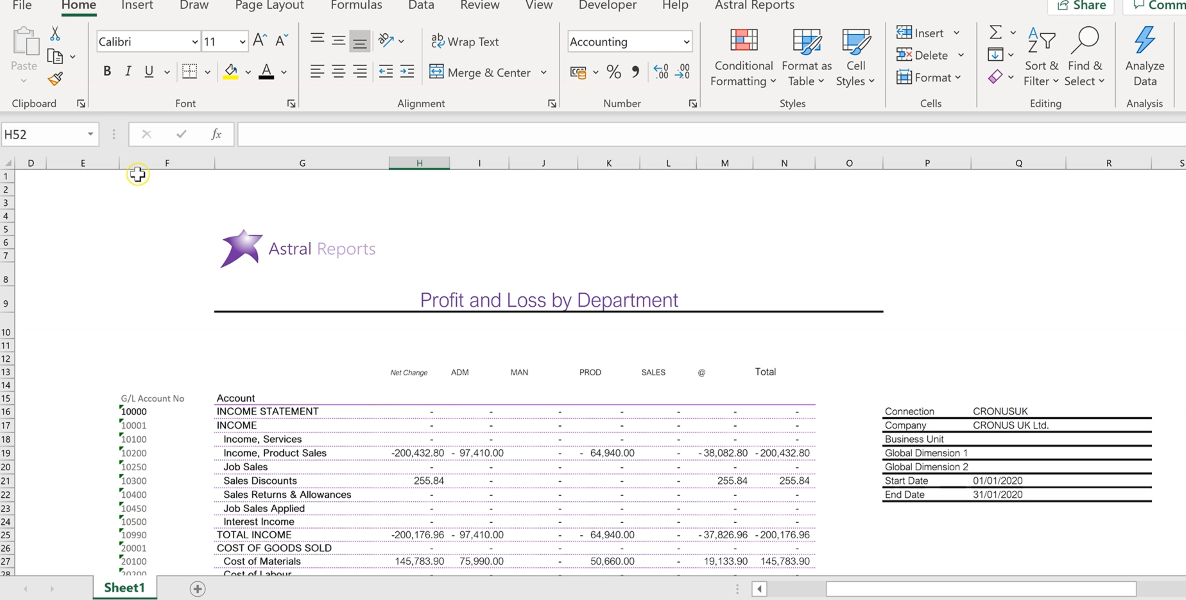
Figure 35 | Completed P&L by Department Report