Astral Apply - Help:
To install the extension, search for “Astral” in the Business Central search facility, and expand the “Get from Microsoft AppSource”.
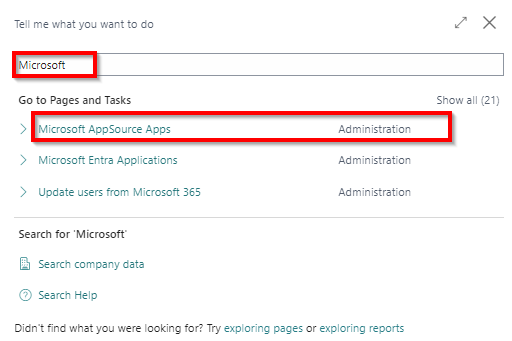
Figure 1 | Search Astral Apply
Click the 'Astral Apply' link, and your browser will open up the AppSource listing. On the listing, click the 'Get it now' button.
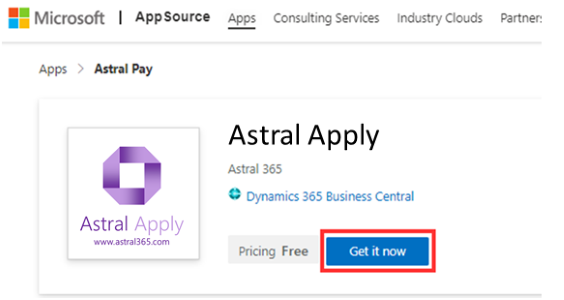
Figure 2 | Astral Apply on AppSource
In the next window, click on the Privacy confirmation tick box and then 'Continue'.
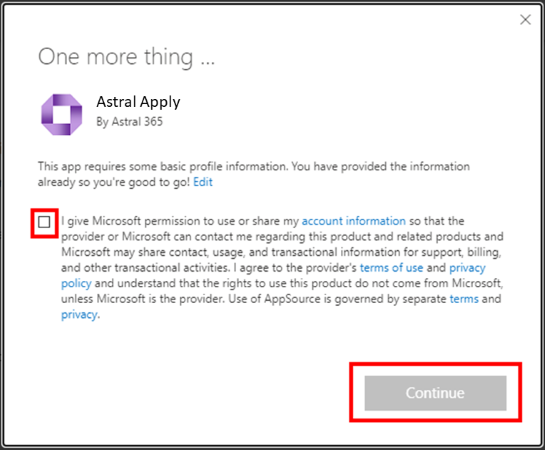
Figure 3 | Privacy Confirmation
The download will begin on your Dynamics 365 Business Central system and you may be asked to select the database you want this installed into.
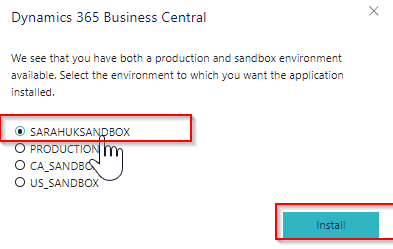
Figure 4 | Select Database to Install on
Select this and click 'Install'.
Next, choose the Language, then click 'Install'.
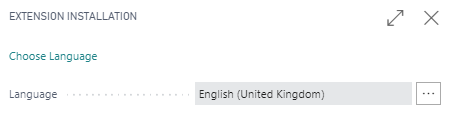
Figure 5 | Select Language
You will receive a confirmation message that the extension is being installed.
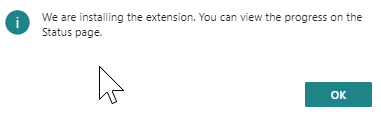
Figure 6 | Download Confirmation
Once the Extension is installed, you will notice a notification at the top of your Role Centre in Business Central prompting you to continue the Setup process.

Figure 7 | Business Central Notification
NOTE: All of our extensions include our licensing objects, and to use the functionality a licence must exist. In order to create and check the licence, “Allow HttpClient Requests” must be enabled for the extension.
To check that Http is enabled, search for 'Extensions' in Business Central, select the 'Astral Apply' entry, and then click 'Configure'.
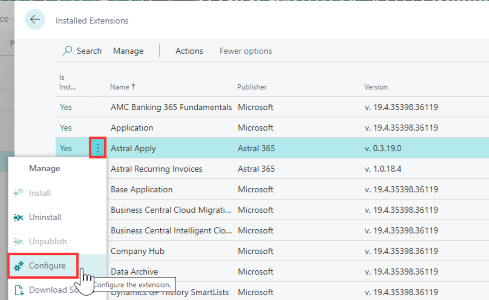
Figure 8 | Configure Astral Apply
The following screen will be displayed:
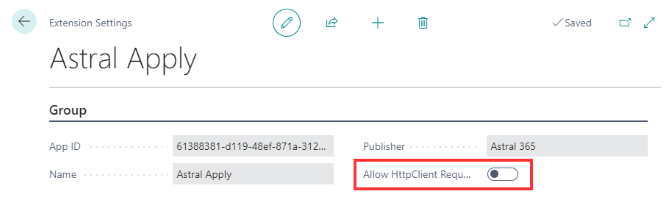
Figure 9 | Enable Http
Make sure that the 'Allow HttpClient Requests' setting is enabled.