Astral eversign - Help:
Watch the Video
To sign up for Astral eversign, go to Microsoft AppSource, selecting Astral eversign, and click "GET IT NOW".
Astral eversign has a 30-day free trial period. The trial will automatically end and you will need to submit the Buy Now form to begin billing.
Sign up for an eversign account using this link to get the Astral 365 preferential pricing.
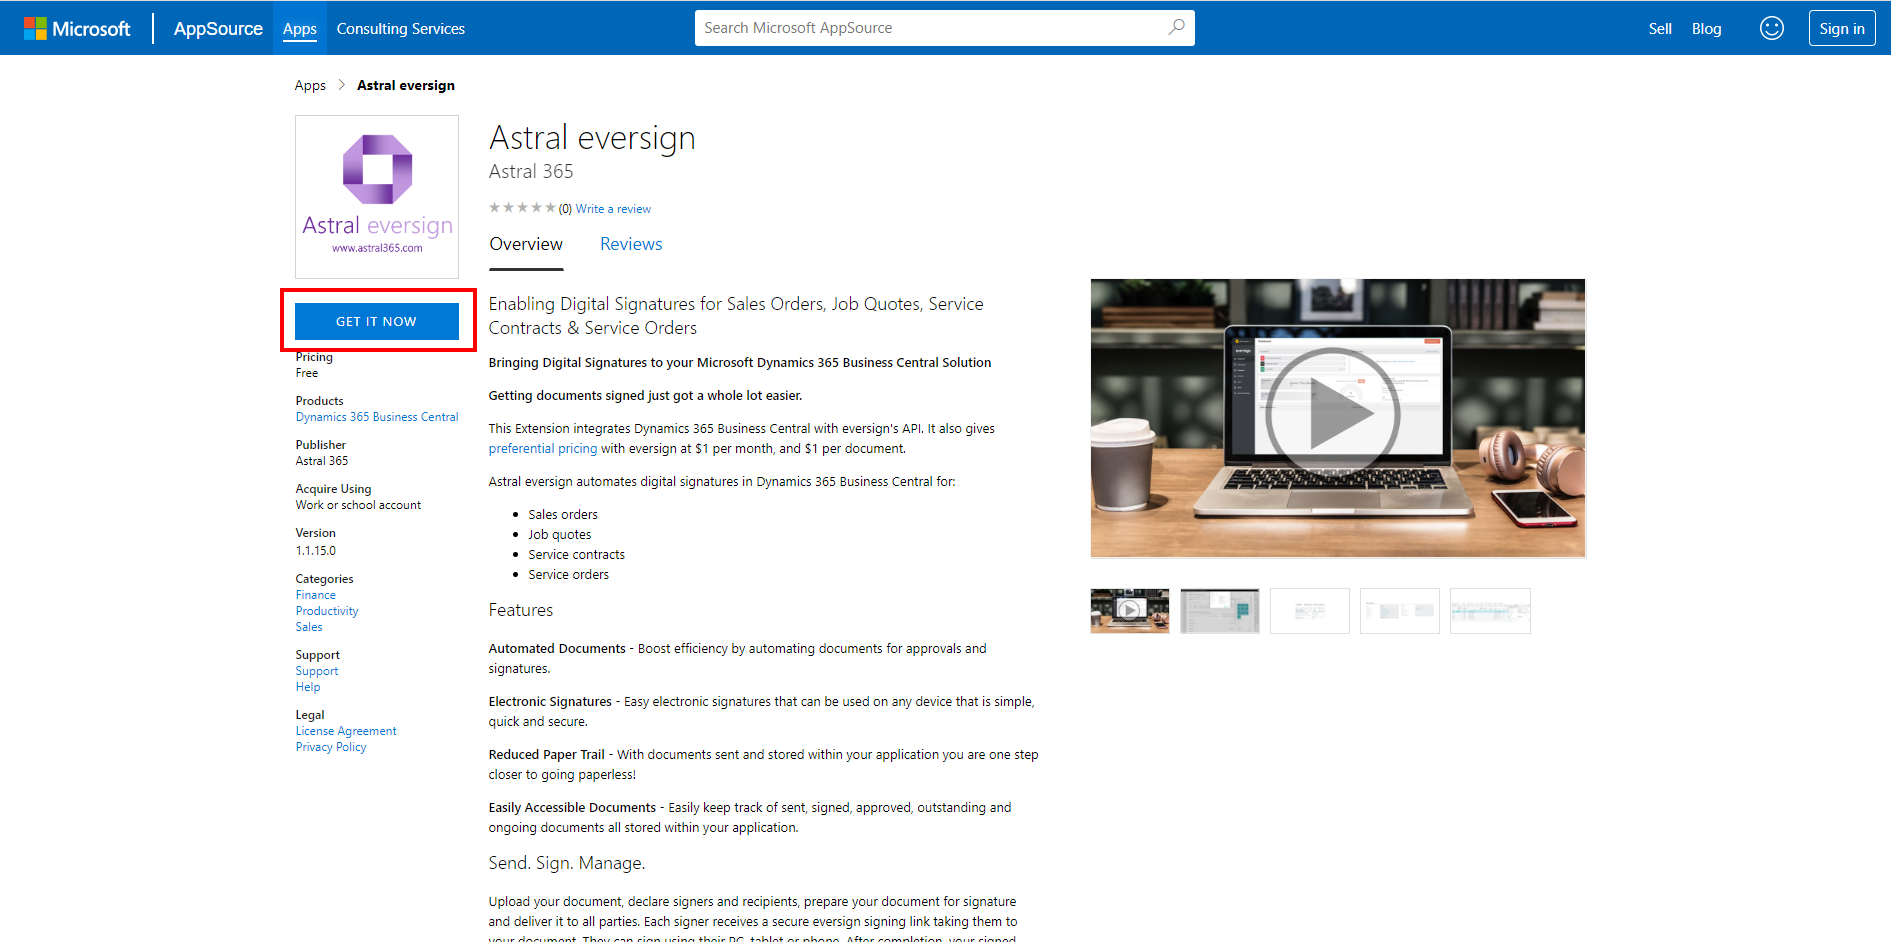
Figure 1 | Astral eversign on AppSource
Once downloaded from AppSource, navigate to your Business Central, and you should see a notification bar:

Figure 2 | Business Central Astral eversign Notification
Click on "Set it up now" and the setup wizard will open. Click "Next".
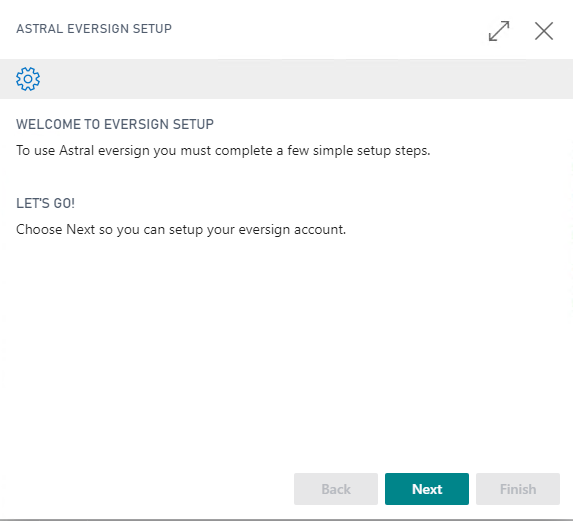
Figure 3 | Astral eversign Setup Wizard
Now you will need to create an account with eversign, click on the second link, or click the button below:
Go to eversign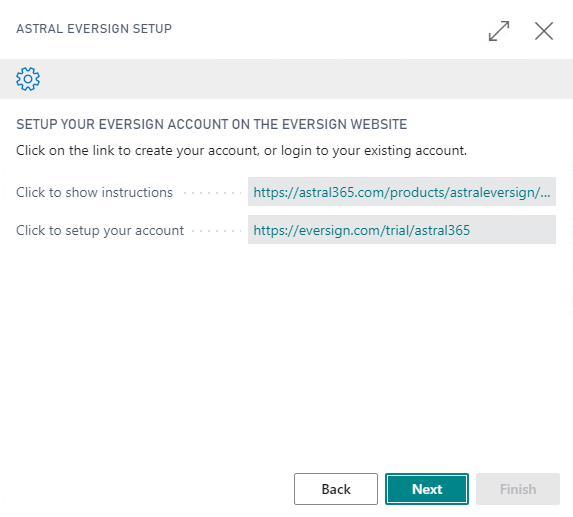
Figure 4 | Astral eversign Setup Wizard
A new web page will open, which will direct you to the eversign website, where you will need to create an account (Figure 5). Fill in the required information, and when finished, click "Start using eversign".
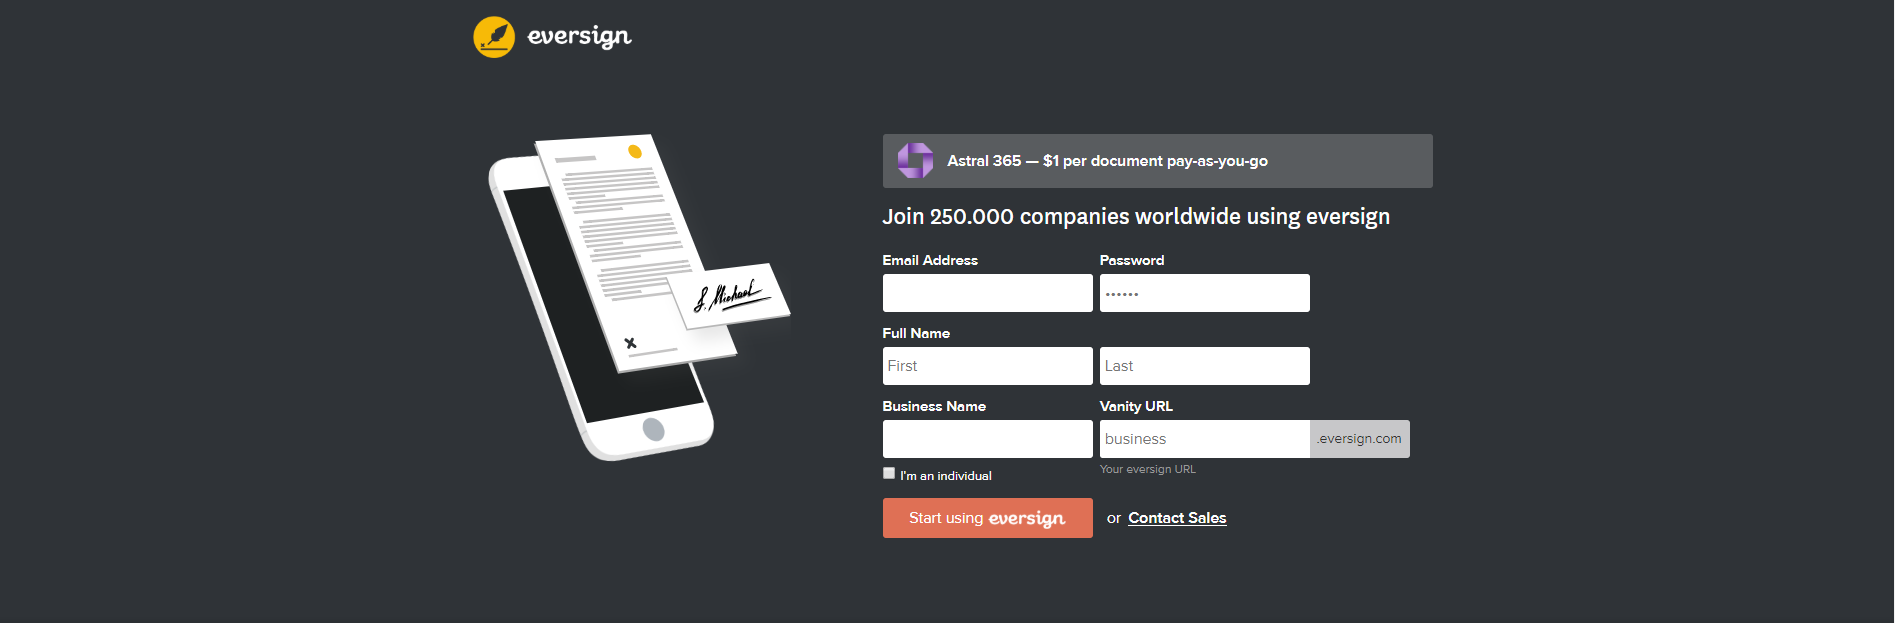
Figure 5 | eversign Subscription
You will be redirected to your eversign dashboard, and a confirmation email will be sent to you which you will need to confirm before proceeding.
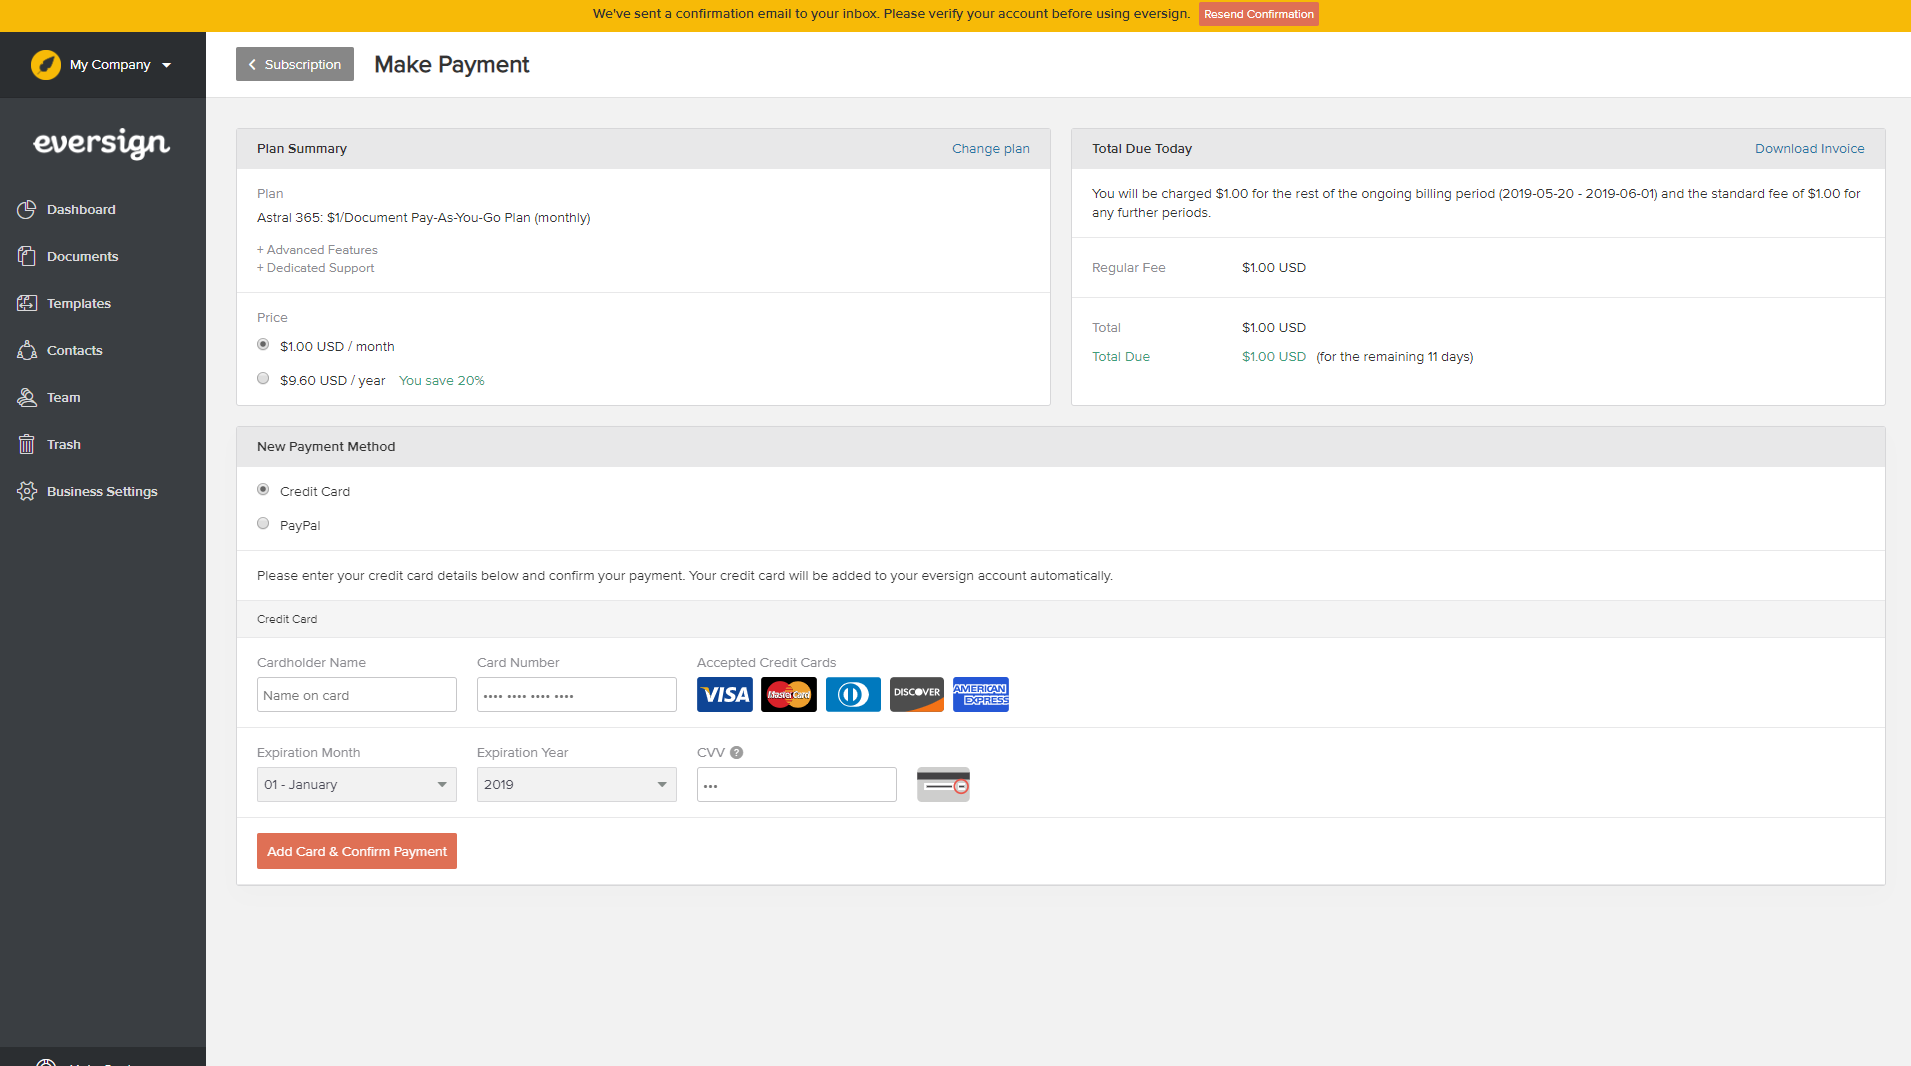
Figure 6 | eversign Subscription
Once you have confirmed your account you will be able to access your Dashboard, where you can keep track of documents and edit your signature.
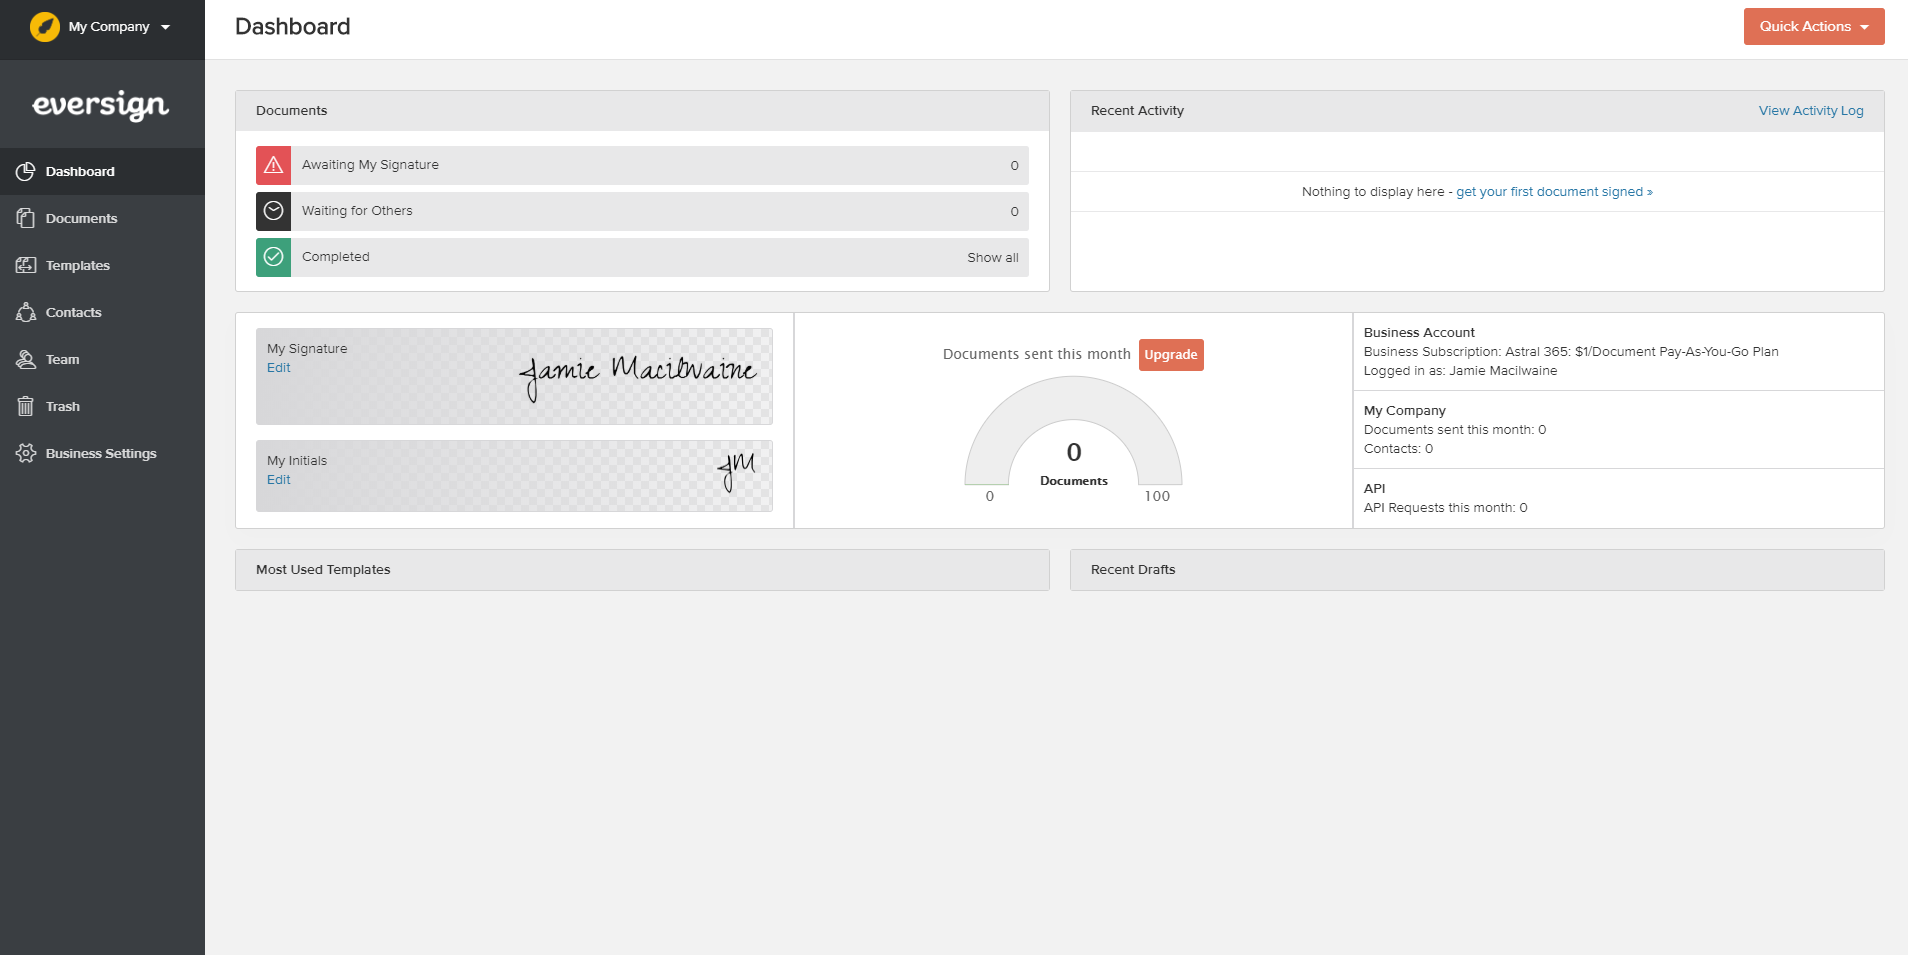
Figure 7 | eversign Dashboard
Navigate back to Business Central, and click "Next" now that you have completed this stage. You are now required to link Business Central to the eversign account you just created. To do this, you need to fill in the "Business ID" and "API Key", which can be found in your eversign account.
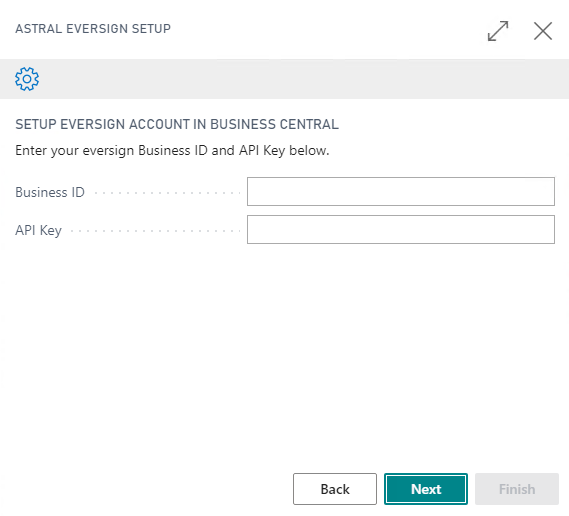
Figure 8 | Astral eversign Setup Wizard
To fill in the information, navigate back to your eversign account, and click on the left hand navigation, selecting "Developer".
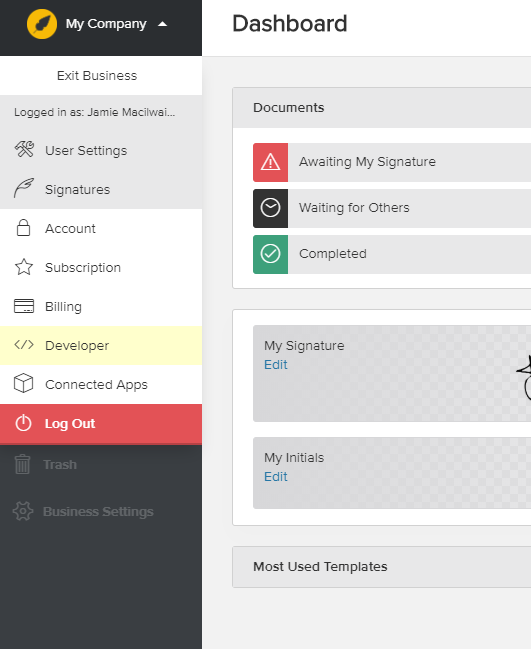
Figure 9 | eversign Dashboard
Here you will see your personalised, unique, "API Access Key" and "Business ID".
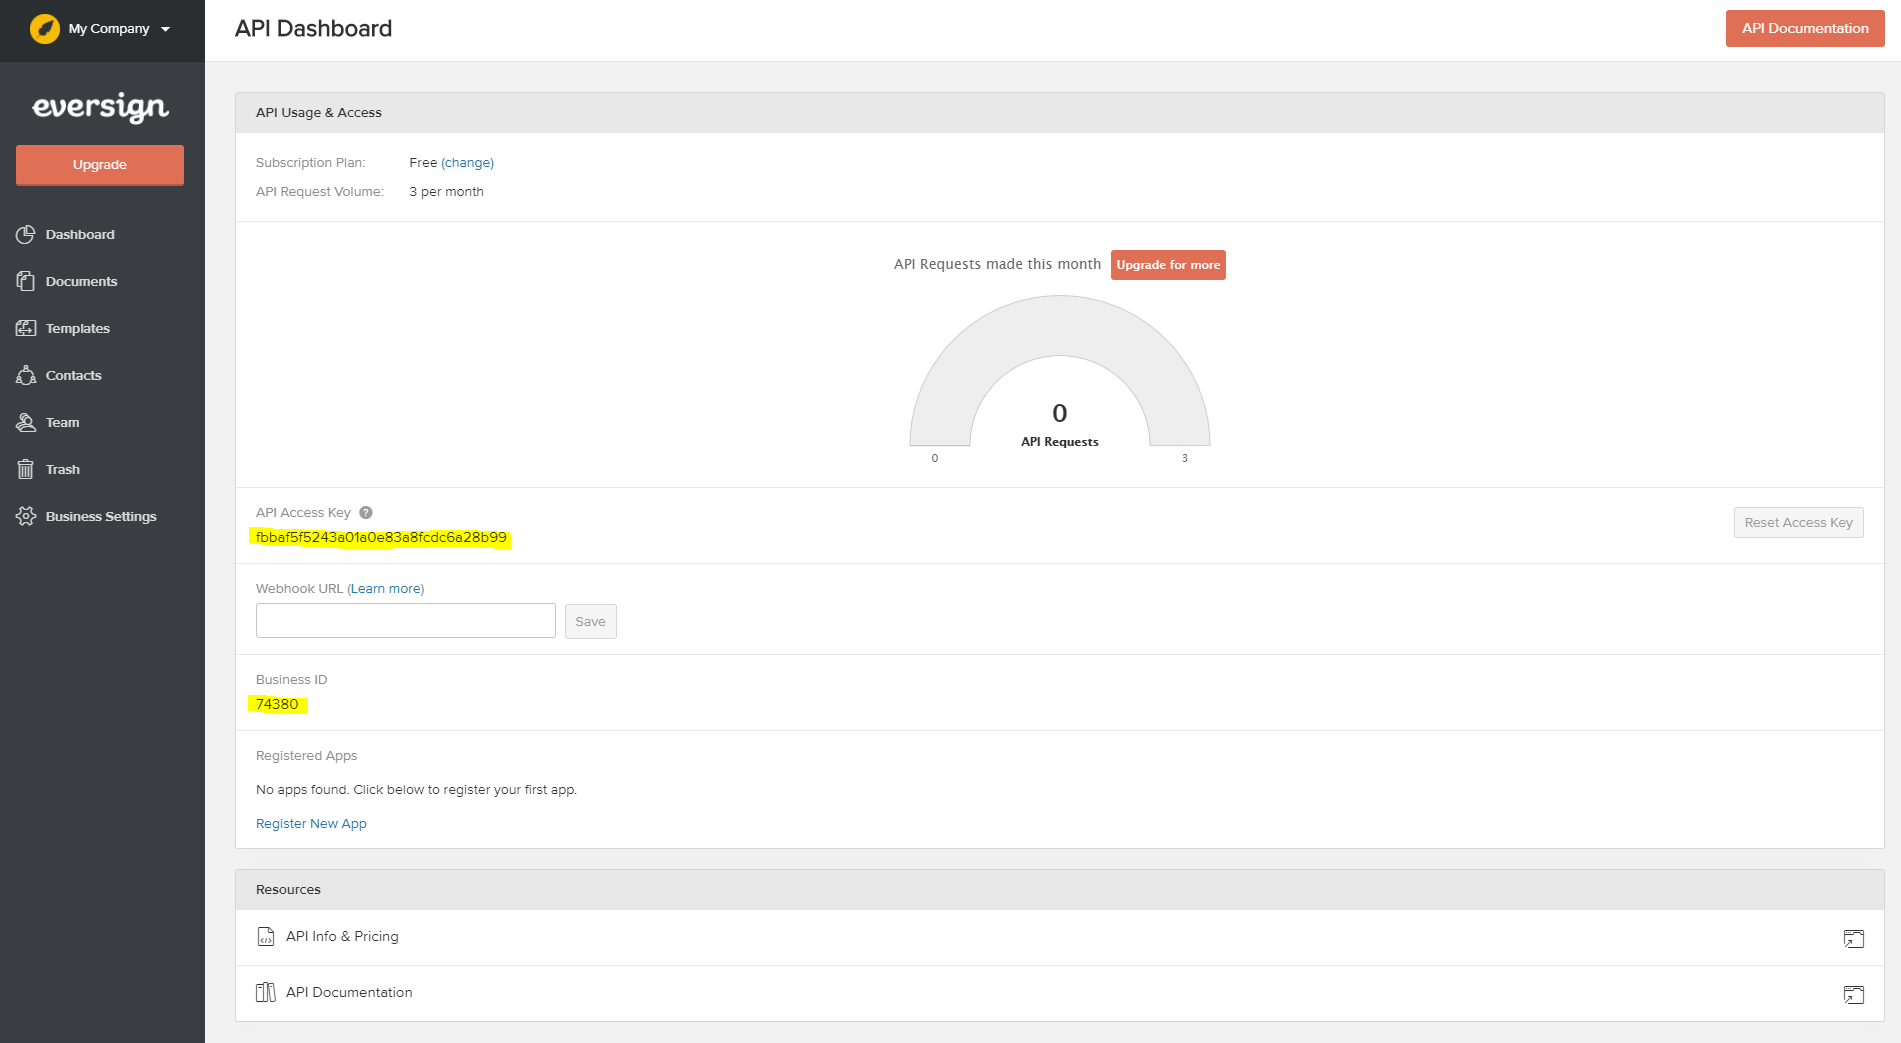
Figure 10 | eversign Dashboard
Copy and paste these into the Business Central Astral eversign setup wizard, then click "Next" (Figure 11).
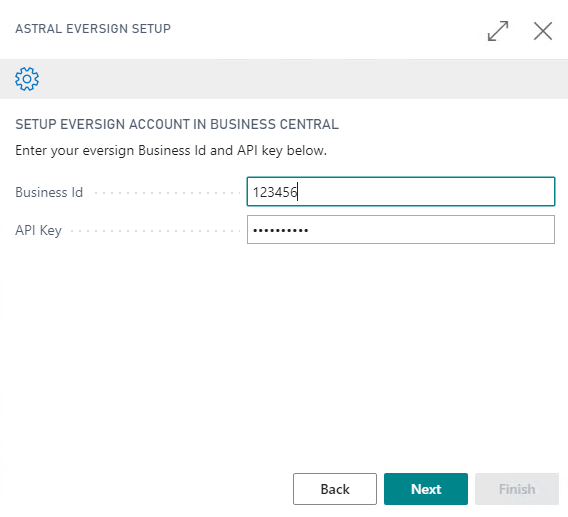
Figure 11 | Astral eversign Setup Wizard
The next page will direct you to a link on how to send your first document with Astral eversign (Figure 12). There is no setup required at this stage, however there is a way to edit the documents sent using Astral eversign, see that here.
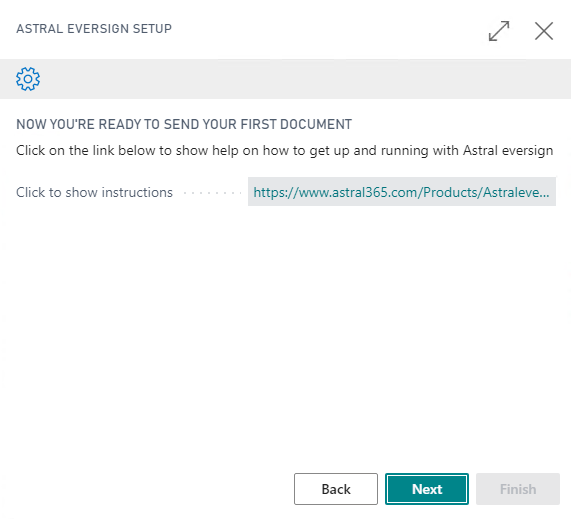
Figure 12 | Astral eversign Setup Wizard
Click "Next" again and your set up will be complete!
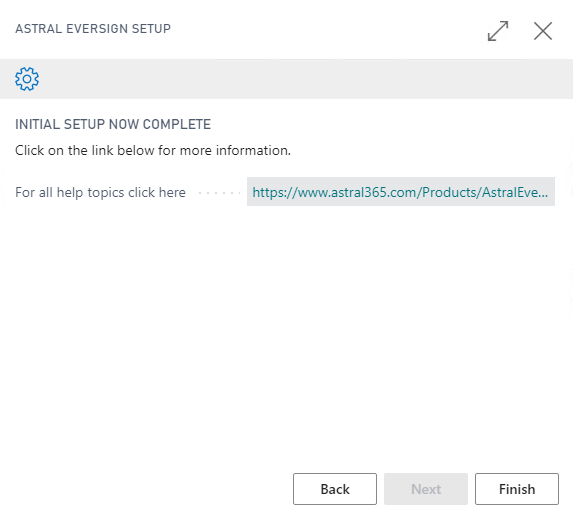
Figure 13 | Astral eversign Setup Wizard