Astral Recurring Invoices - Help:
Watch the Video
On the Recurring Invoice Template, the Recurring Invoice Schedule needs to be configured. This can be setup for daily, weekly, monthly and yearly invoicing. To explain each type, please find below worked examples for each type of scheduling.
From the Recurring Invoice List page:
Select an Invoice (1) and click on 'Edit' (2) in the ribbon bar:
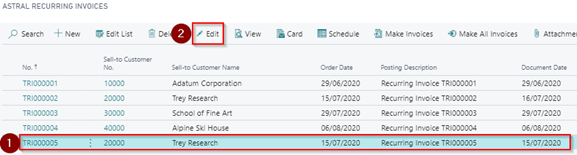
Figure 1 | Edit Recurring Invoice
On the Astral Recurring Invoice page, click on 'Process' (1) from the ribbon and then 'Schedule' (2):
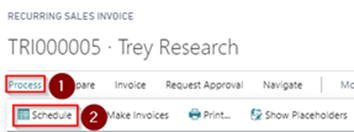
Figure 2 | Schedule
The Recurring Invoice Schedule Page opens:
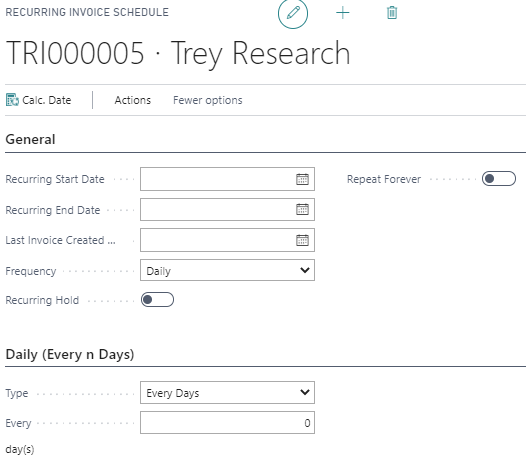
Figure 3 | Recurring Invoice Schedule Page
If you need to setup the Schedule for daily invoicing, you would enter the schedule as follows:
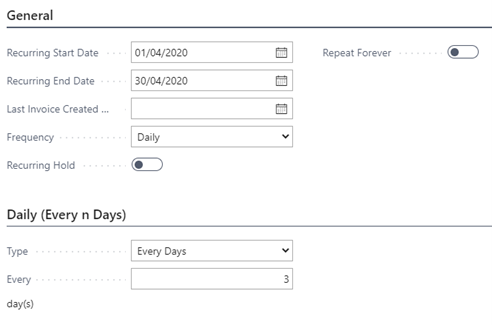
Figure 4 | Schedule For Daily Invoicing
Enter the following:
- Recurring Start Date as “01/04/2020” (you cannot generate Sales Invoices before this date)
- Recurring End Date as “30/04/2020” (you cannot generate Sales Invoices after this date unless you leave this field blank and toggle on “Repeat Forever”)
- Frequency as “Daily”
- Type as “Every Days”
- Every enter “3” (this prompts the Sales invoices to be created every 3 days)
If you need to setup the Schedule for weekly invoicing, you would enter the schedule as follows:
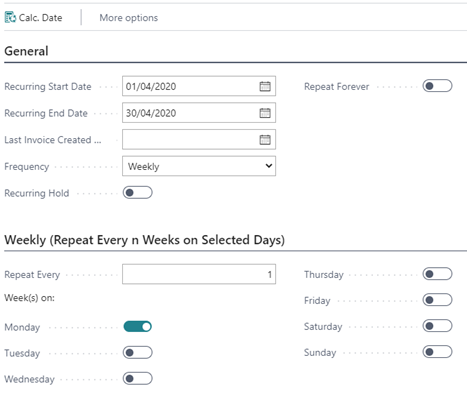
Figure 5 | Schedule For Weekly Invoicing
Enter the following:
- Recurring Start Date as “01/04/2020” (you cannot generate Sales Invoices before this date)
- Recurring End Date as “30/04/2020” (you cannot generate Sales Invoices after this date unless you leave this field blank and toggle on “Repeat Forever”)
- Frequency as “Weekly”
- Repeat Every as “1”
- Toggle “Monday”
If you need to setup the Schedule for monthly invoicing, you would enter the schedule as follows:
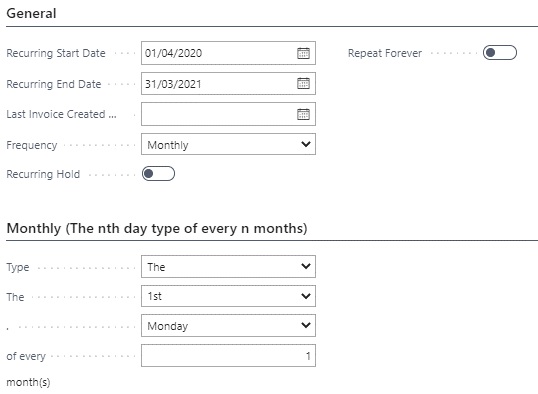
Figure 6 | Schedule For Monthly Invoicing
Enter the following:
- Recurring Start Date as “01/04/2020” (you cannot generate Sales Invoices before this date)
- Recurring End Date as “31/03/2021” (you cannot generate Sales Invoices after this date unless you leave this field blank and toggle on “Repeat Forever”)
- Frequency as “Monthly”
- Type as “The”; then “1st”; then “Monday” of every “1”
If you need to setup the Schedule for yearly invoicing, enter the schedule as follows:
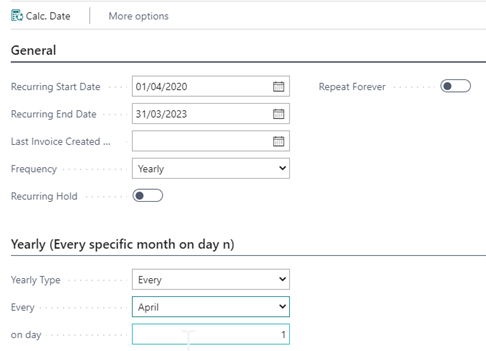
Figure 7 | Schedule For Yearly Invoicing
Enter the following:
- Recurring Start Date as “01/04/2020” (you cannot generate Sales Invoices before this date)
- Recurring End Date as “31/03/2023” (you cannot generate Sales Invoices after this date unless you leave this field blank and toggle on “Repeat Forever”)
- Frequency as “Yearly”
- Yearly Type as “Every”
- Every as “April”; on day ”1”
You may now close this window and return to Dynamics 365 Business Central.
NOTE: By default, the “Recurring Hold” toggle is disabled for new templates. This is to ensure that invoices are not generated and posted accidentally by the Job Schedule Task.