Astral Recurring Invoices - Help:
Watch the Video
Setup
The Astral Recurring Invoices Setup page is fairly minimal. To open the Setup page select 'Setup' from the Setup drop-down:
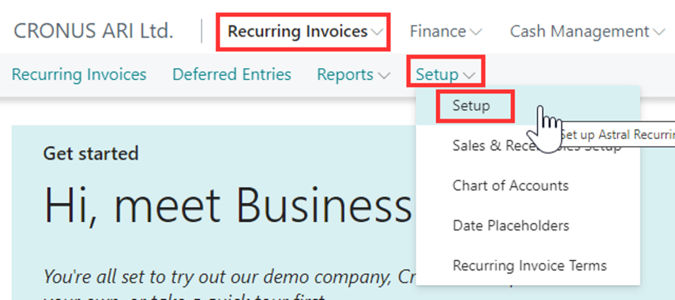
Figure 1 | Astral Recurring Invoices Setup
The following page will appear:
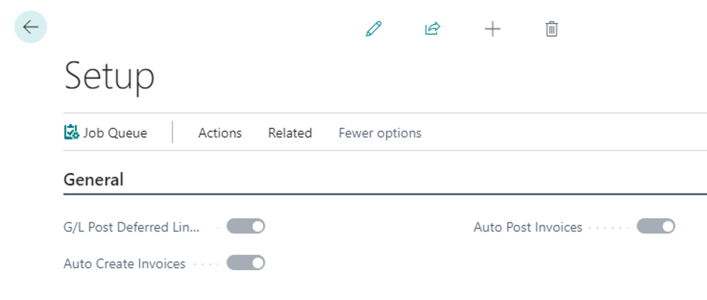
Figure 2 | Setup Page
The switches on this page are as follows:
G/L Post Deferred Line Description – when posting a Deferred Entry, the Description from the Sales Line or Purchase Line will be used for the “Deferred Entry” description field. However, the Description posted to “G/L Entry” will follow the normal “Business Central” posting procedure, which is to put the Sales Header or Purchase Header “Posting Description” (for example. Sales Invoice SI-0012345). Enable this switch to force the initial G/L Entry posting to also use the description from the Sales Line or Purchase Line “Description” field.
Auto-Create Invoices - Enable this switch to allow the “Job Queue” to automatically create the Sales Invoices from the Recurring Invoice Templates for you. This requires the Job Queue Entry to be configured and enabled.
Auto-Post Invoices - Enable this switch to also allow the “Job Queue” to automatically post the invoices after they have been created. Again, this requires the Job Queue Entry to be configured and enabled.
At the top of the page is the “Job Queue” action. Use this action to open the “Job Queue Entry Card” where you can set the frequency and start time and also enable the Job Queue Entry.
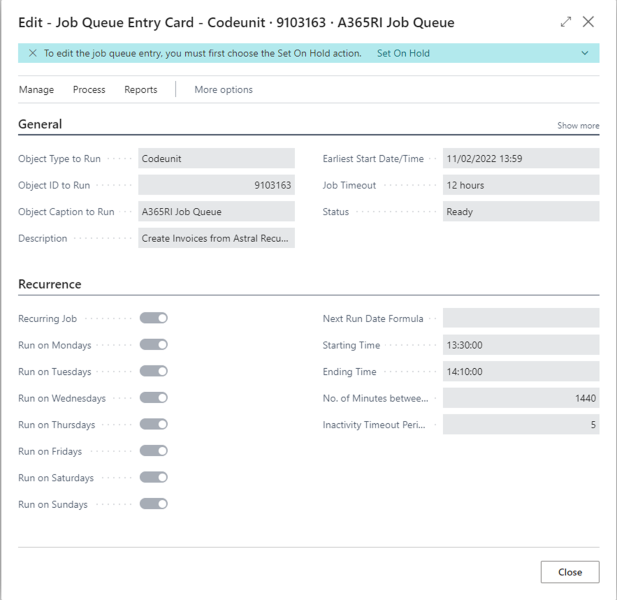
Figure 3 | Job Queue Entry Card
Sales & Receivables Setup
To open the Sales & Receivables Setup page select 'Sales & Receivables Setup' from the Setup drop-down:

Figure 1 | Sales & Receivables Setup
The Sales & Receivables screen will appear. In there, scroll down the screen to the 'No. Series' FastTab:
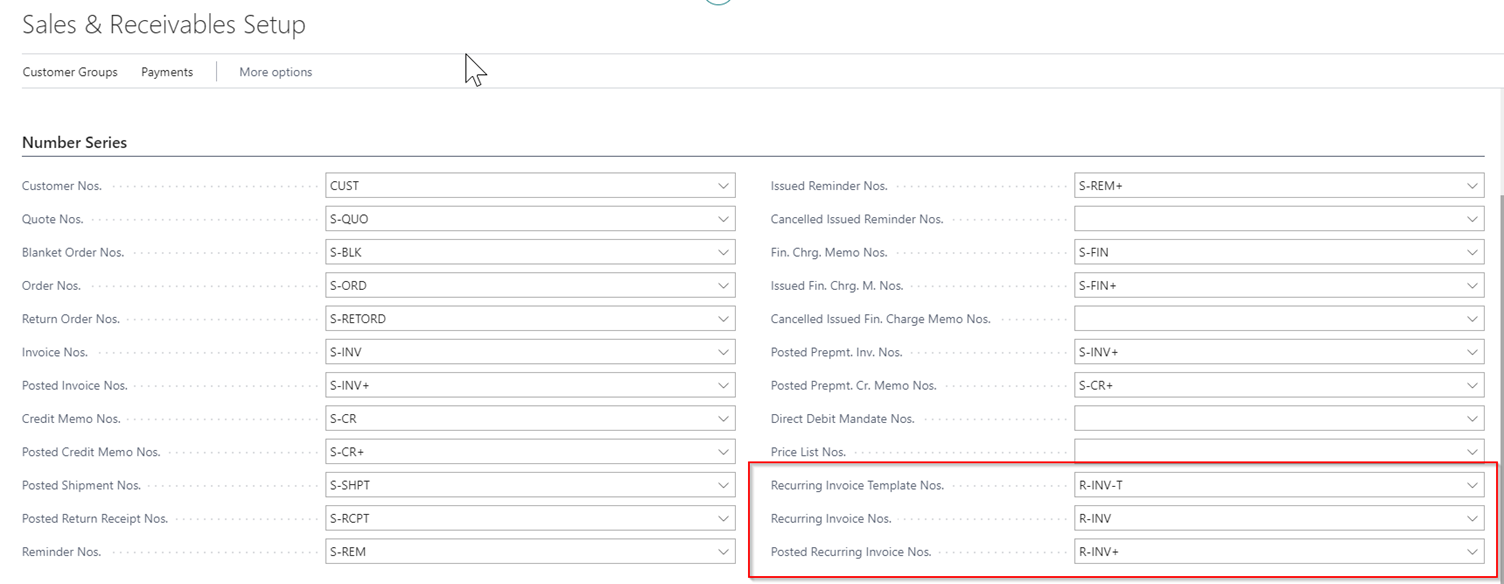
Figure 2 | Sales & Receivables Setup Page
Populate No. Series for the ‘Recurring Invoice Template Nos.’, ‘Recurring Invoice Nos.’ and ‘Posted Recurring Invoice Nos.’ The available no. series are as highlighted in screenshot above. To populate the fields, click on dropdown next to each field and select no. series from the no. series list.
Chart of Accounts
If you want to use the Deferred Entries functionality, you will need to toggle the new 'Deferred Account' switch on a G/L Account.
To open the Chart of Accounts page select 'Chart of Accounts' from the Setup drop-down:
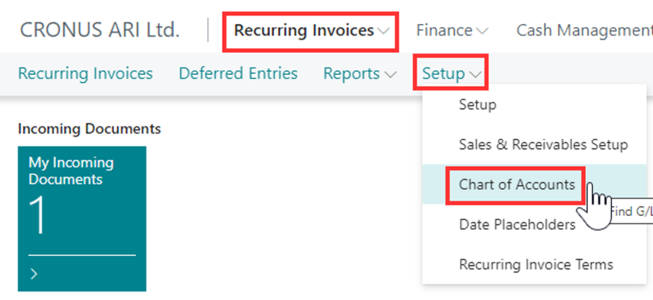
Figure 1 | Chart of Accounts Setup
From the Chart of Accounts page, select the account that you want to use for the Deferred Entries:
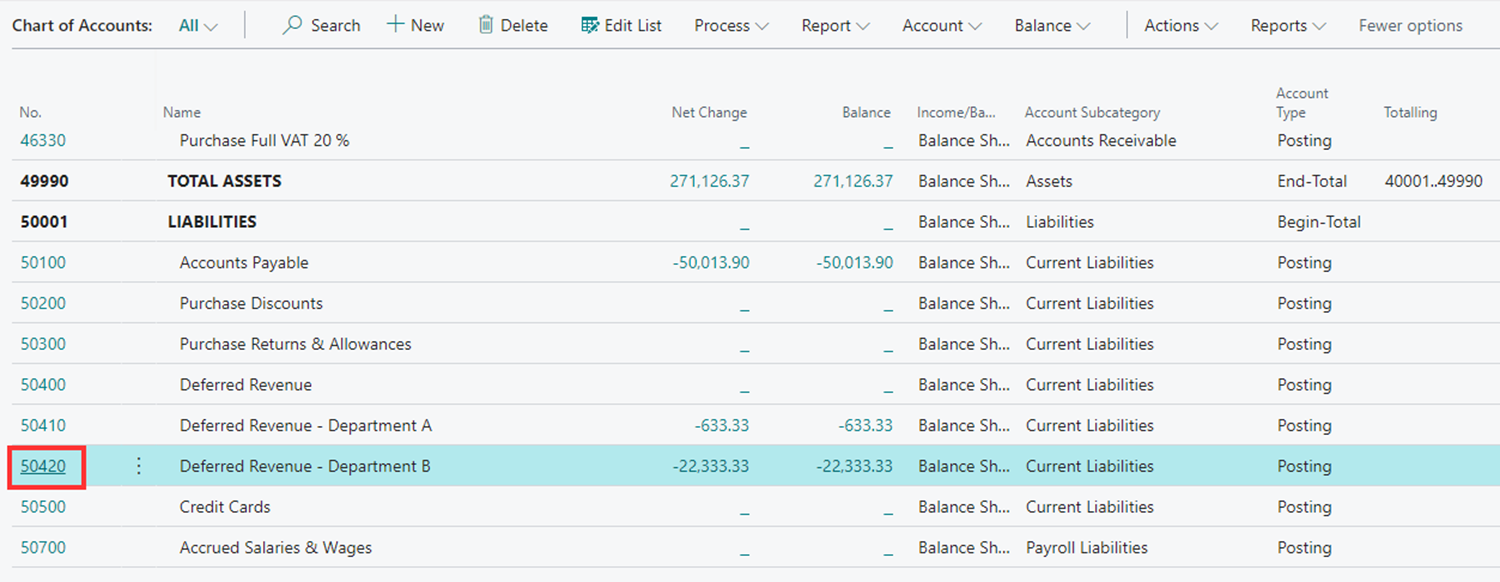
Figure 2 | Chart of Accounts Setup Page
Open the Card view by clicking on the 'No.' field.
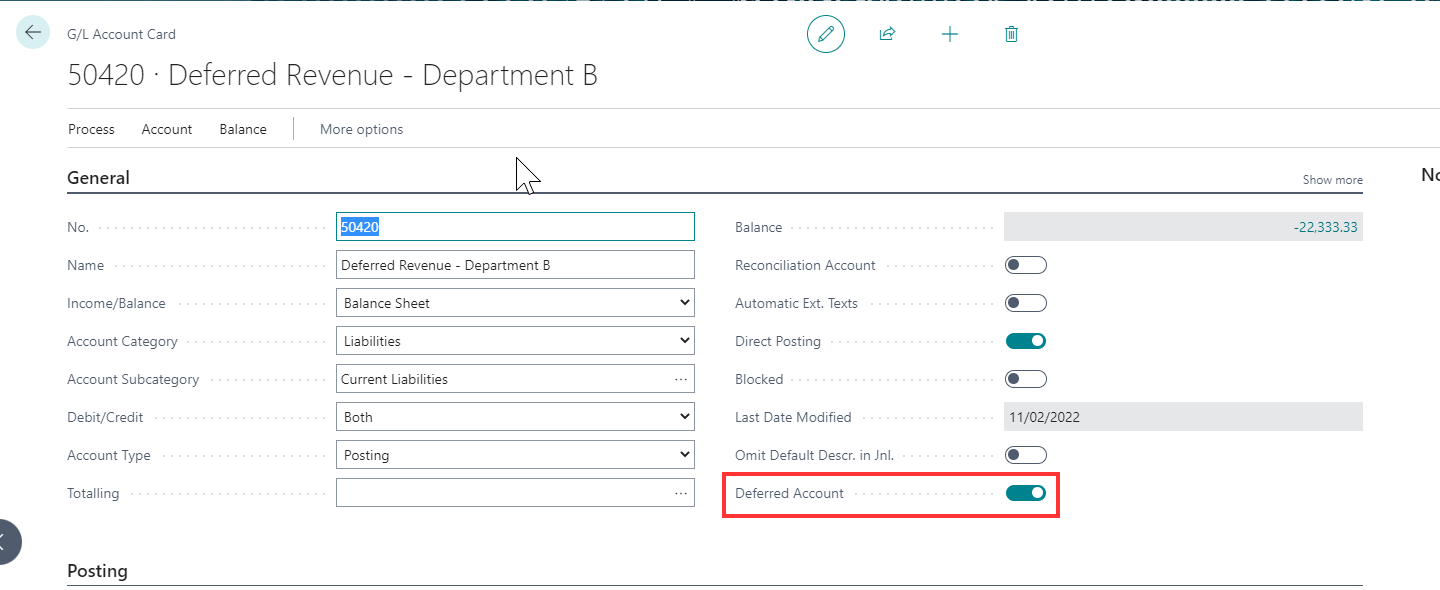
Figure 3 | G/L Account Card
Then enable the 'Deferred Account' switch. Note that the account must be configured for 'Direct Posting' to allow the 'Deferred Account' switch to be enabled.
You can have as many “Deferred Accounts” as required. We would recommend having one for Deferred Revenue and another for Deferred Expenditure.
Date Placeholders
To open the Date Placeholders page select 'Date Placeholders' from the Setup drop-down:
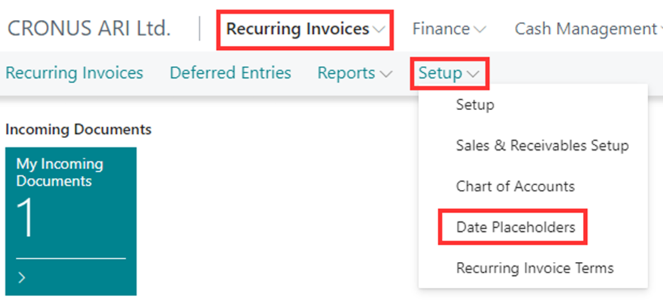
Figure 1 | Date Placeholders Setup
By default, placeholders 1 to 9 are added when the extension is installed.
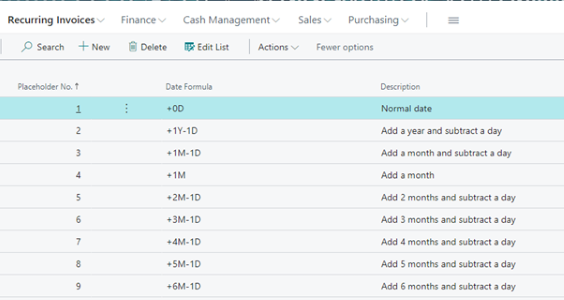
Figure 2 | Date Placeholders List
However, when a new company is created the list will be empty, and so you can create the 9 entries by selecting 'Actions' and then 'Setup Defaults'.
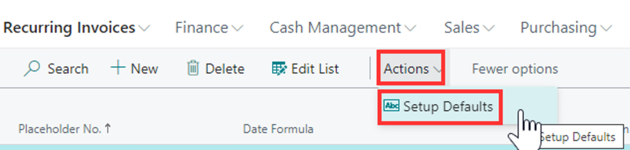
Figure 3 | Setup Defaults
The concept of a Date Placeholder is fairly simple. It is simply a way of informing the Sales Invoice Recipient (the customer) what period the invoice relates to via a comment line. If a comment line contains '%n' (where 'n' is a number correlating to an entry in the Date Placeholder table), it will replace '%n' with a date. The date will be the result of using the 'Date Formula' on the 'Document Date'.
As an example, if a comment line contains the text “For the period: %1 to %3” and the 'Document Date' of the sales invoice generated from the template is 01/12/2021 (1st December 2021), the comment will become “For the period: 01/12/2021 to 31/12/2021”.
The Date Placeholders can also be used in the 'Posting Description' field.
Date Formula is part of the standard functionality of Business Central, and is explained on the following Url:
https://docs.microsoft.com/en-gb/dynamics365/business-central/ui-enter-date-ranges#using-date-formulasFor the latest release of Astral Recurring Invoices, we have extended the “Date Placeholder” functionality of the Recurring Invoice Templates in to the “Deferred Entries” functionality of a Sales Invoice. By “Deferred Entries” we are referring to the deferral functionality that Astral Recurring Invoices provides, and not the standard “Deferred Code” functionality of Business Central.
When creating a “Deferred Entry”, the “Deferred Starting Date“ and “Deferred Ending Date” fields need to be specified. Choosing the number of the Date Placeholder in the “Deferred Starting Date Calc.” and “Deferred Ending Date Calc.” fields will auto-populate the fields on the Sales Invoice generated from the template.
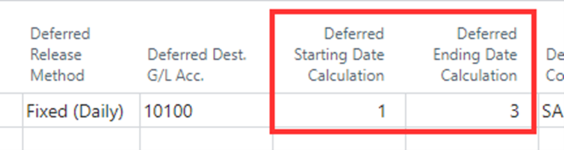
Figure 4 | Date Placeholders
Recurring Invoice Terms
To open the Recurring Invoice Terms page select 'Recurring Invoice Terms' from the Setup drop-down:
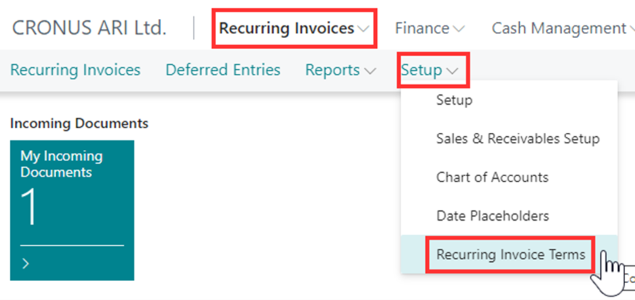
Figure 1 | Recurring Invoice Terms Setup
The Astral Recurring Invoice Terms page will open as follows:
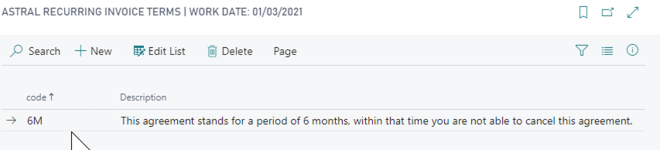
Figure 2 | Astral Recurring Invoice Terms Page
Within this screen you can setup different agreement terms that will be displayed on the Recurring Invoice Agreement that you can send to your customers.
To create a new record:
Click on '+New' from the ribbon bar. On the blank line, enter a short 'Code' and 'Descriptive' text for your agreement terms:
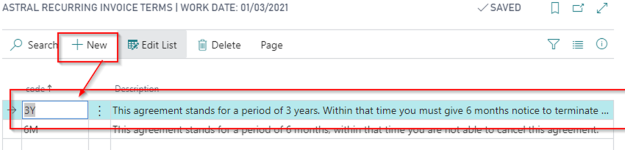
Figure 3 | Create New Record
Repeat this process until you have enough terms setup for your Recurring Invoice Templates.
You may now close this window and return to Microsoft 365 Business Central.
Making Printing the Recurring Invoice Agreement Terms Mandatory
The “Recurring Invoice Agreement Terms” is merely a section that prints out on the “Recurring Invoice Agreement Report”. This is a report that you may wish to send to your customer for approval. If you do decide to send the report to your customer, you may wish to force the “Recurring Invoice Terms Code” to be populated before the document can be printed.
To make printing the Recurring Invoice Agreement Terms section mandatory in Business Central you will need to do the following:
Select 'Sales & Receivables Setup'.

Figure 1 | Sales & Receivables Setup
The Sales & Receivables Setup screen will appear. In there, scroll down the screen to the 'General' FastTab:
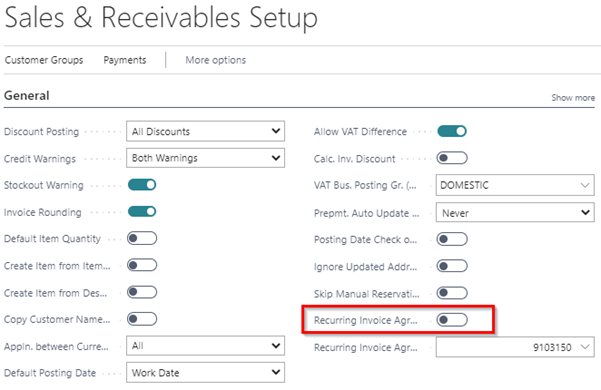
Figure 2 | Sales & Receivables Setup Page
In here, go to 'Recurring Invoice Agreement Terms Mandatory' field and toggle this on. Once this has been enabled, you will need to specify the 'Recurring Invoice Terms Code' on the 'Recurring Invoice Template' before you can print the 'Recurring Invoice Agreement Report'.
You may now close this window and return to Dynamics 365 Business Central.