Astral Reports - Help V5:
Open Astral Reports in the ribbon and select 'About', in here you will need to place your email address and the licence key provided by us, or click 'Request Licence' to generate a new licence.

Figure 1
Then click 'Check Licence' which will confirm the valid until date.

Figure 2
Now within the Astral Reports ribbon click on 'Login Details'.
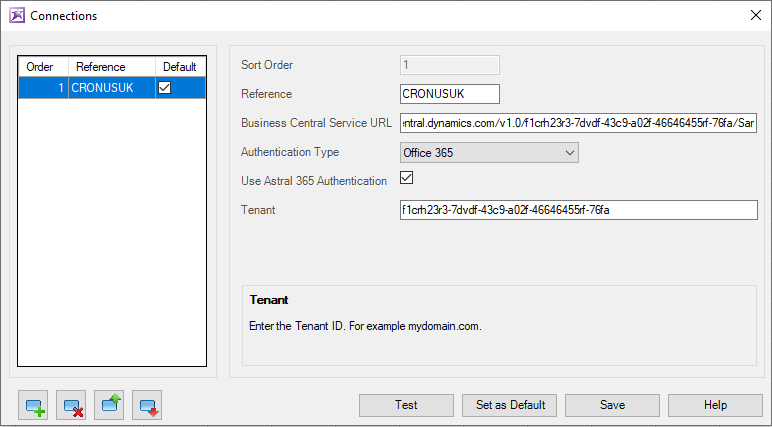
Figure 3
In the left box is a new feature for version 5 where you can now establish multiple Business Central connections. To do this, simply click on the 'Add a new connection' icon.

Figure 4
Astral Reports For Business Central allows for many authentication methods.
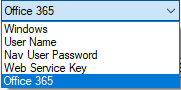
Figure 5
Typically, most organisations will now use Office 365 authentication, and so for this example we will establish a single connection using this authentication method.
You now need to link the Excel Add In to you Business Central web service, and this is done by pasting the URL copied from earlier in to the 'Business Central Service URL' box. However, only copy the text up until (and including) the ‘WS/’ part of the URL.
Since Office 365 authentication can be used for On Premise or Partner Hosted installatiojns, as well as SaaS, you will need to select 'Use Astral 365 Authentication' if you are using the SaaS version.
Now place your Tenant ID. To find this, click on the 'Help and Support' link on the Business Central homepage.

Figure 6
In the 'Help and Support' page that opens, the Tenant ID is located at the bottom under the 'Report a Problem' section.
Copy the Tenant ID value and paste it in to the Tenant ID field on the Connections form. Then click 'Save'. Once saved, click 'Test'. You should receive a message similar to below when the connection has been successfully established. Be aware of the 'Server Version' value in this message. This relates to the version of the 'Extension' that is inside your Business Central system. On the downloads page for the Excel Add In, it will detail the minimum server Extension version that is required.
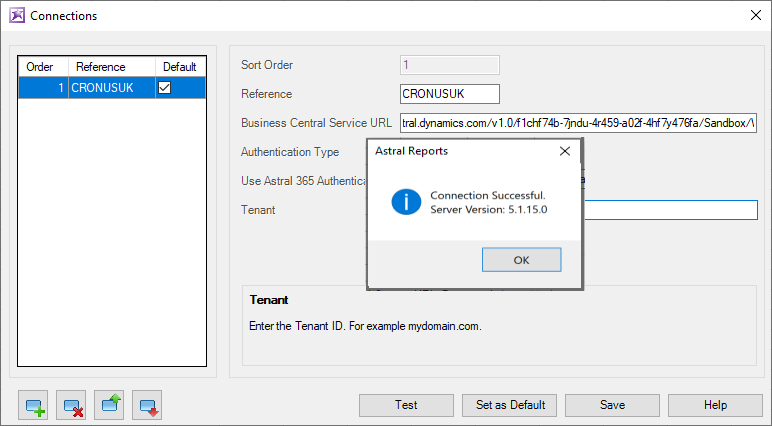
Figure 7
Once successful, click 'OK', and you are now able to use Astral Reports.