Astral Reports - Help V5:
Watch the video
Astral Reports has a 30-day free trial period. The trial will automatically end and you will need to submit the 'Buy Now' form to begin billing. Please note, that by submitting the form you are not purchasing straight away, the team will be in touch shortly after submission to set up your billing info. Once this is done they will confirm activation.
There are two downloads for Astral Reports; an AppSource Extension that is installed into your Business Central system and an Excel Add-In file that is installed on your PC. Both must be downloaded before you can begin using the extension.
If you decide you would like to go ahead and purchase the extension, there is no need to for any additional setup as the setup and credentials from your trial can be activated.
To install Astral Reports, visit Microsoft AppSource, and in the search bar type in 'Astral', selecting Astral Reports from the options that appear.
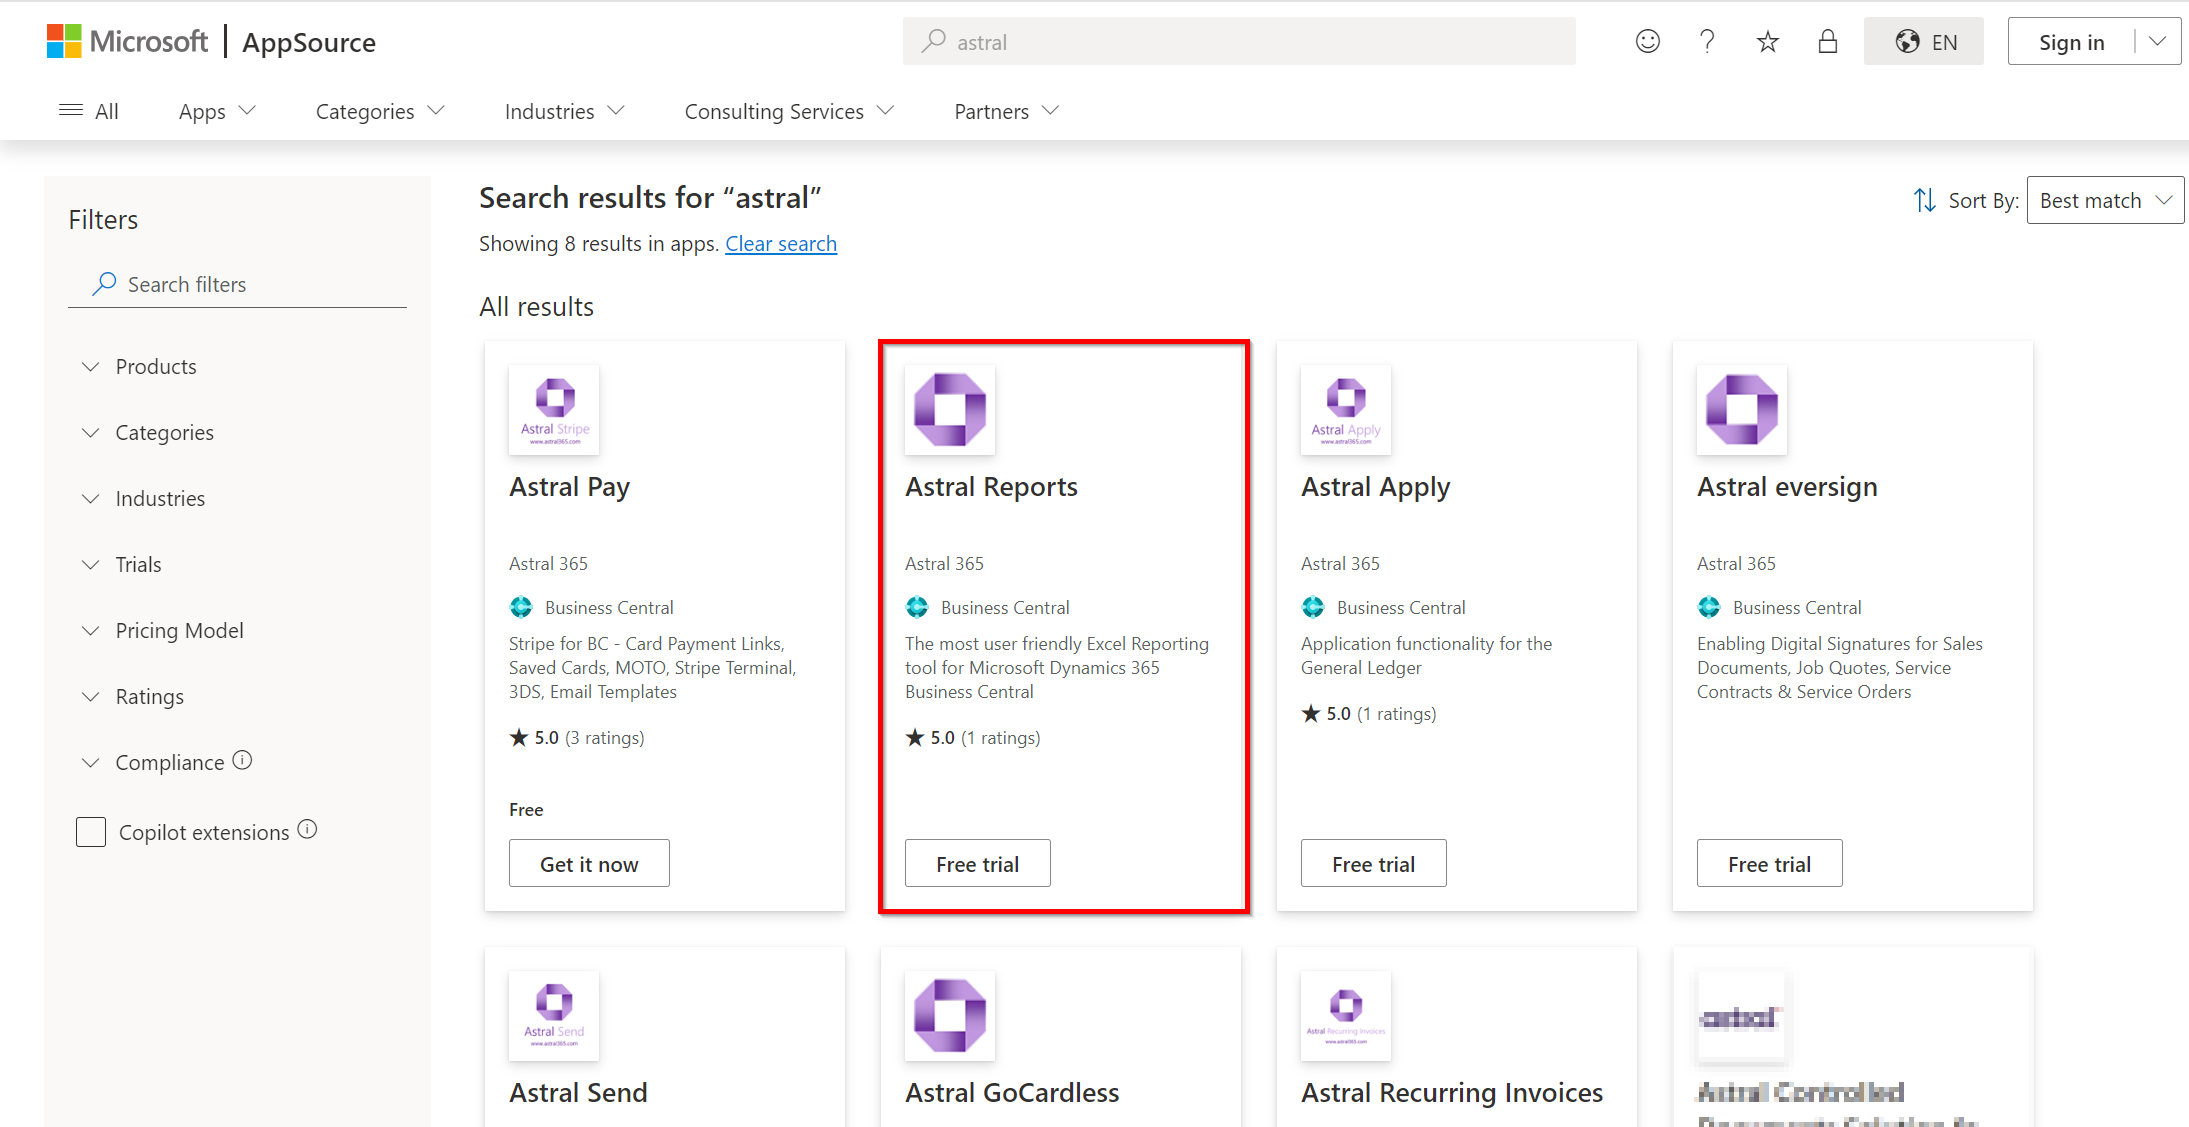
Figure 1 | Downloading from AppSource
Click on 'FREE TRIAL', and log on to your Microsoft AppSource account.
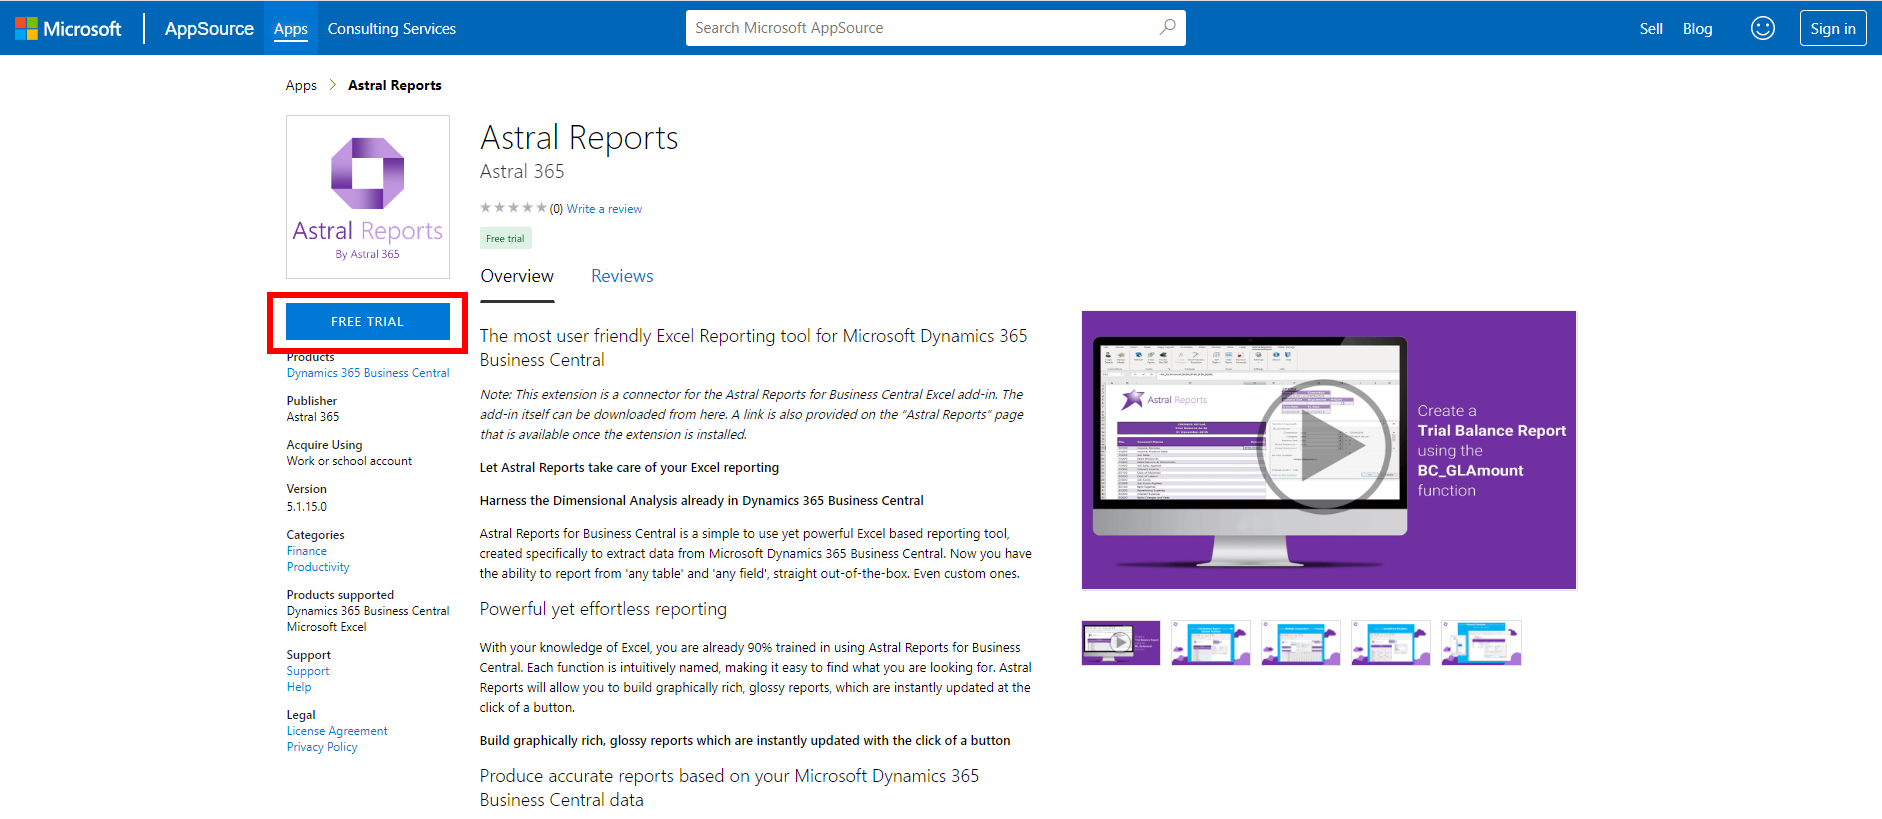
Figure 2 | Downloading from AppSource
Select the tick box, and click 'Continue'.
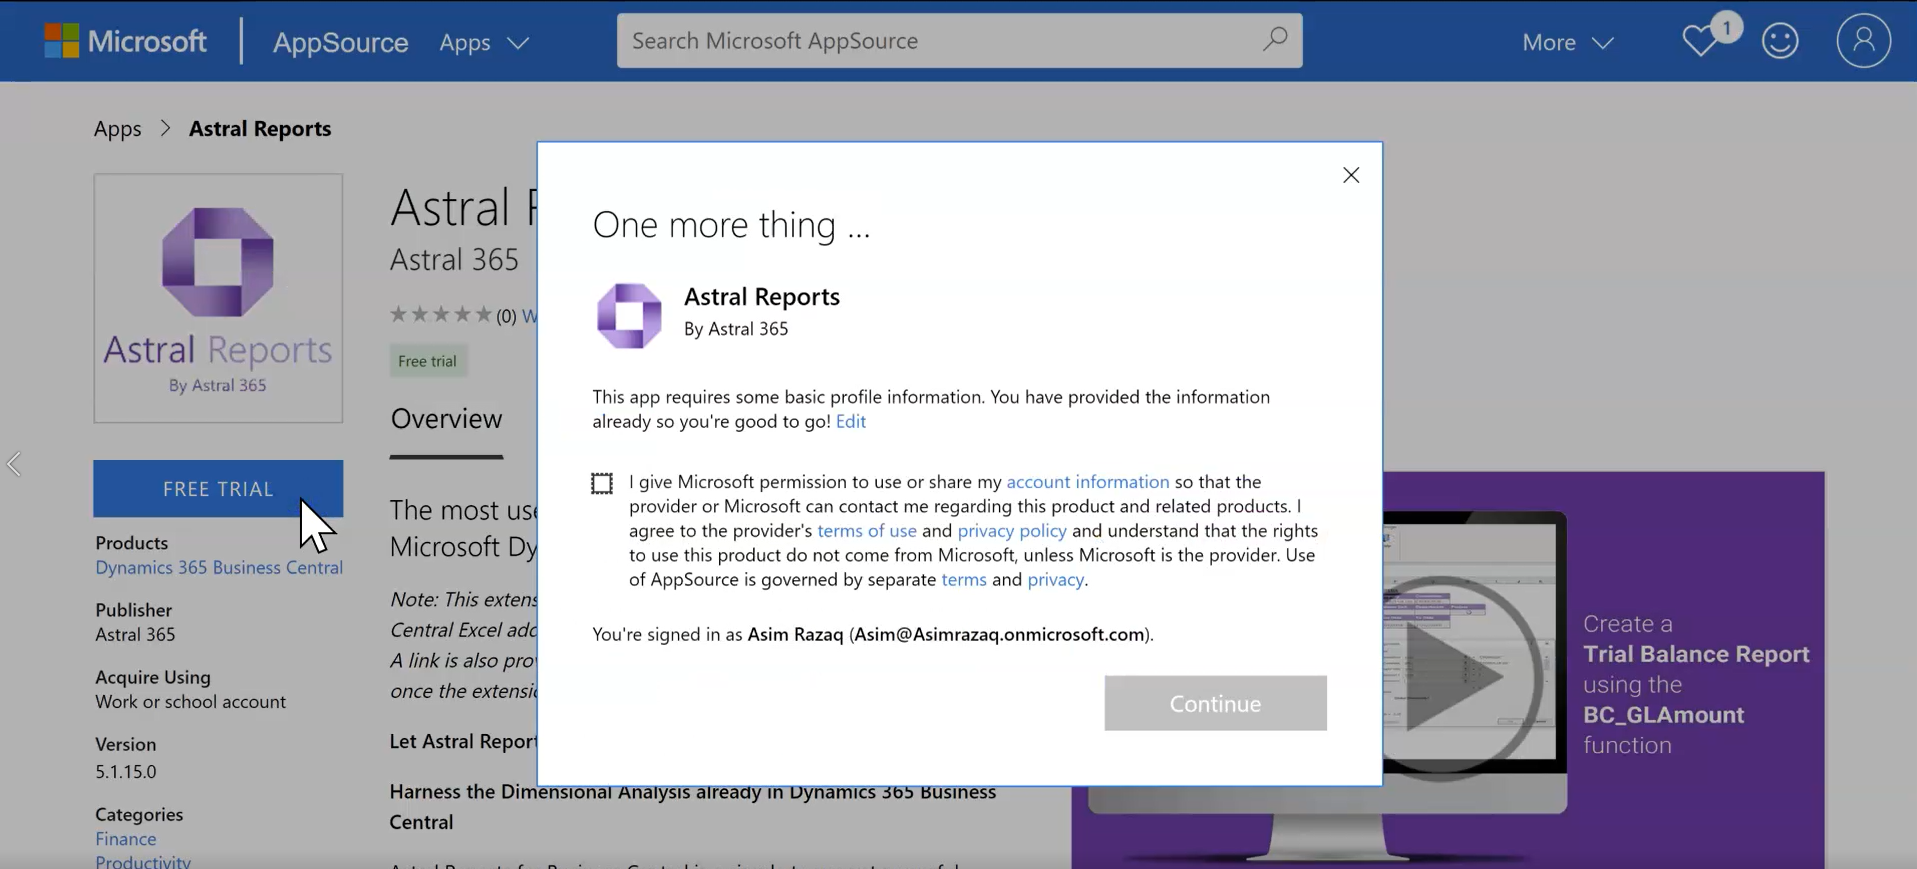
Figure 3 | Downloading from AppSource
This will now begin the installation of the Astral Reports Codeunit onto your Business Central tenant and will open Business Central on the ‘Extension Installation’ page.
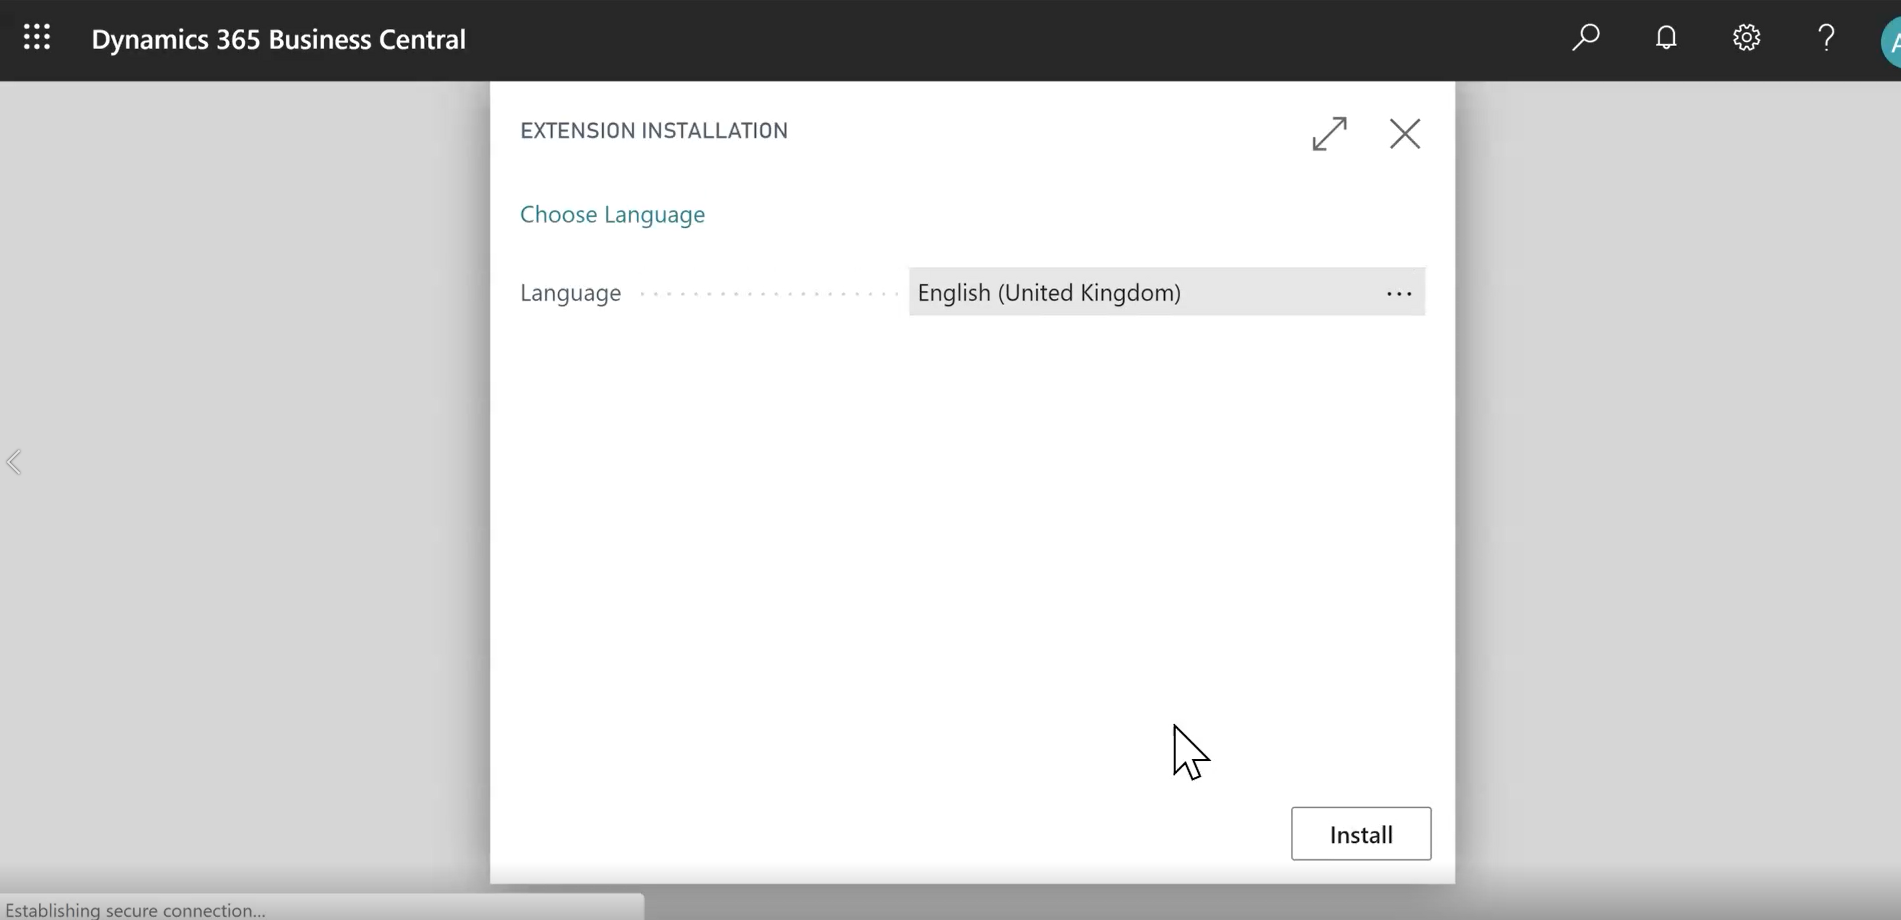
Figure 4 | Business Central Extesion Installation
Click 'Install', a message will appear that shows it is being downloaded in the background.
The download should only take a few seconds, once complete you should see a new notification appear on Business Central.
If you do not see the notification, try refreshing your screen.
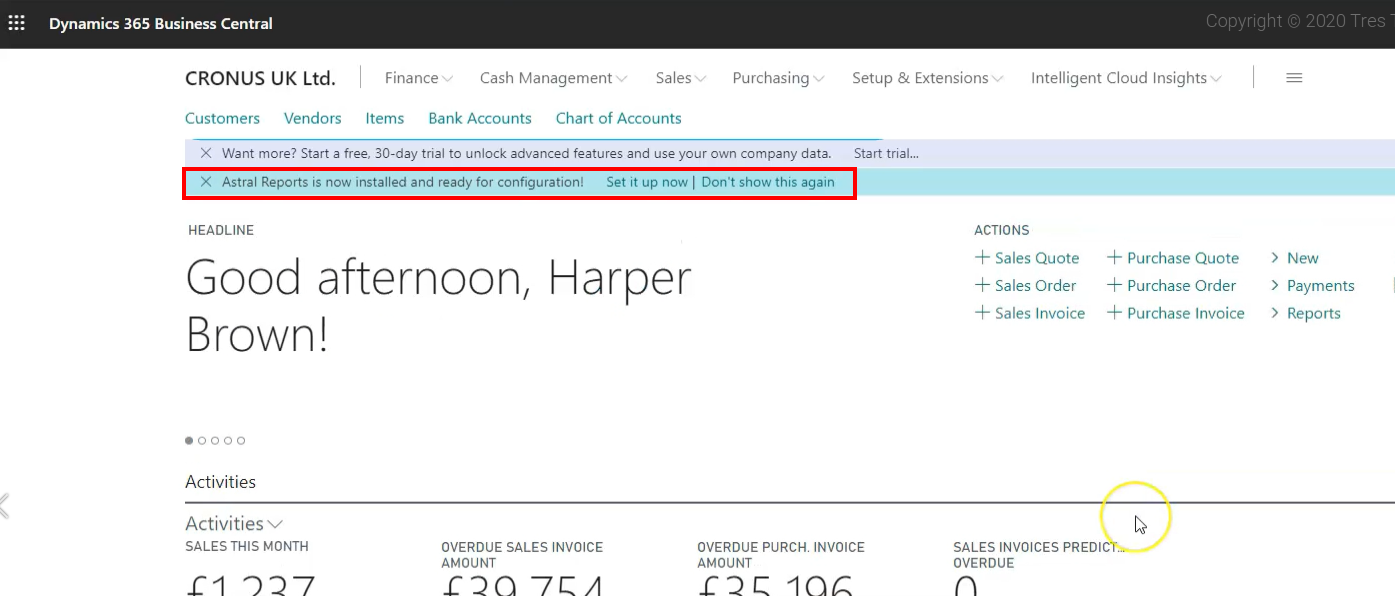
Figure 5 | Business Central Astral Reports Notification
Click on ‘Set it up now’ of the notification and the Astral Reports setup wizard will open.
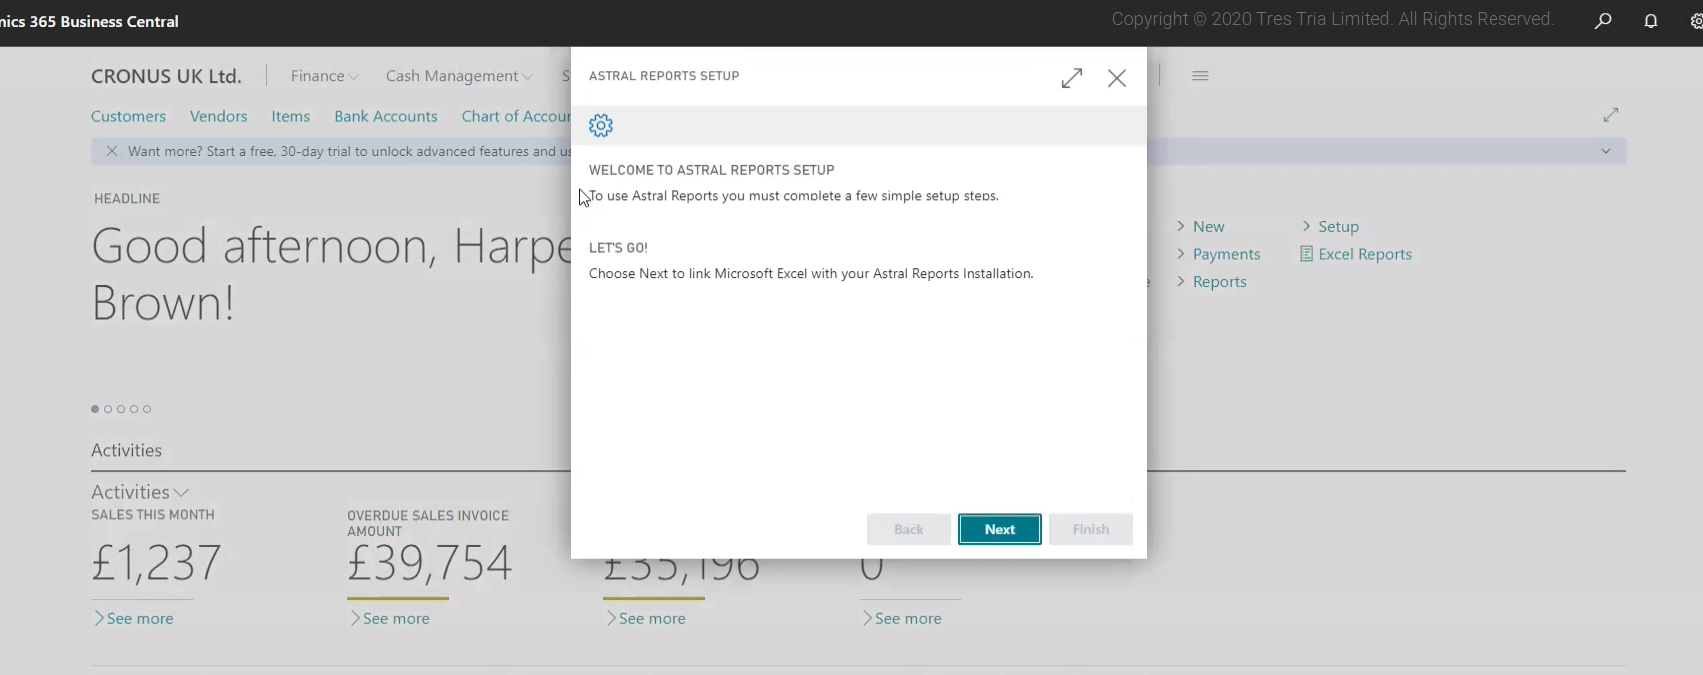
Figure 6 | Astral Reports Business Central Setup Wizard
The setup wizard will guide you through the steps that need to be taken in order to successfully setup Astral Reports.
Click ‘Next’.
The second window (figure 7) will guide you to the link for the setup video. Nothing needs to be completed here so click ‘Next’.
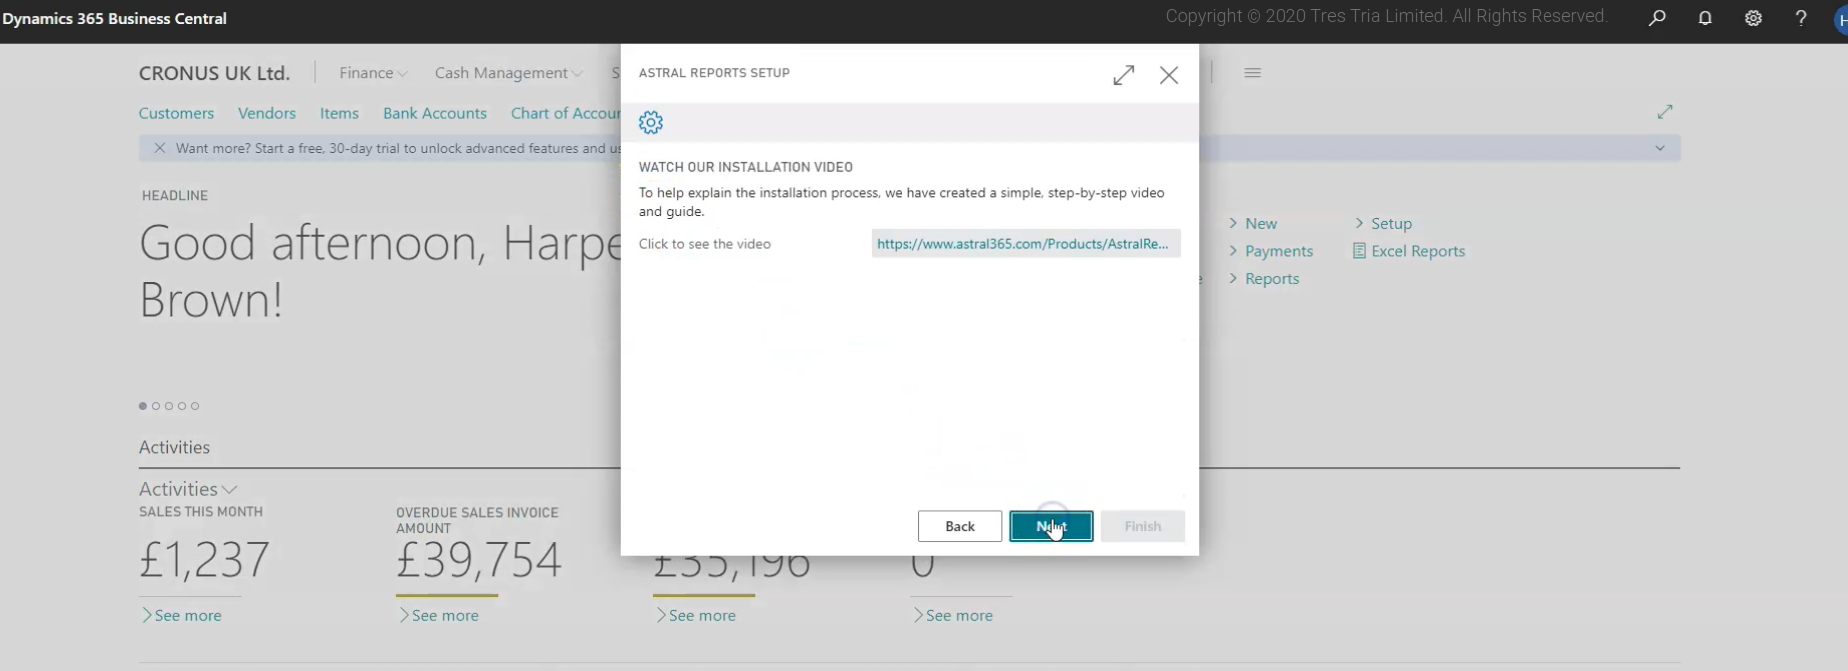
Figure 7 | Astral Reports Setup Wizard - Watch Our Installation Video
At the next window (figure 8) you are required to download the Excel add-in for Astral Reports.
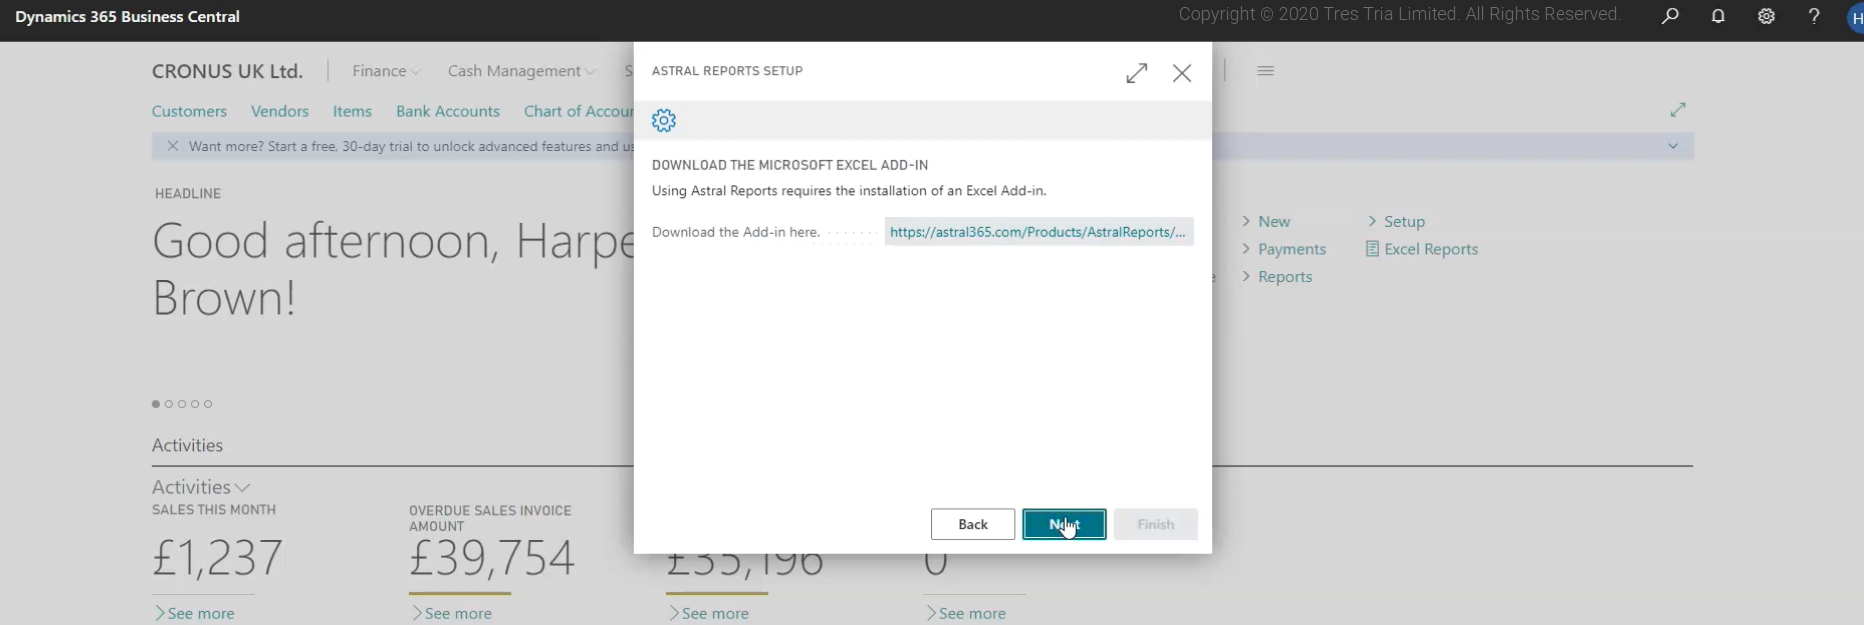
Figure 8 | Astral Reports Setup Wizard - Donwload The Microsoft Excel Add-In
Click the link provided in the window which will direct you to the Downloads page of our website.
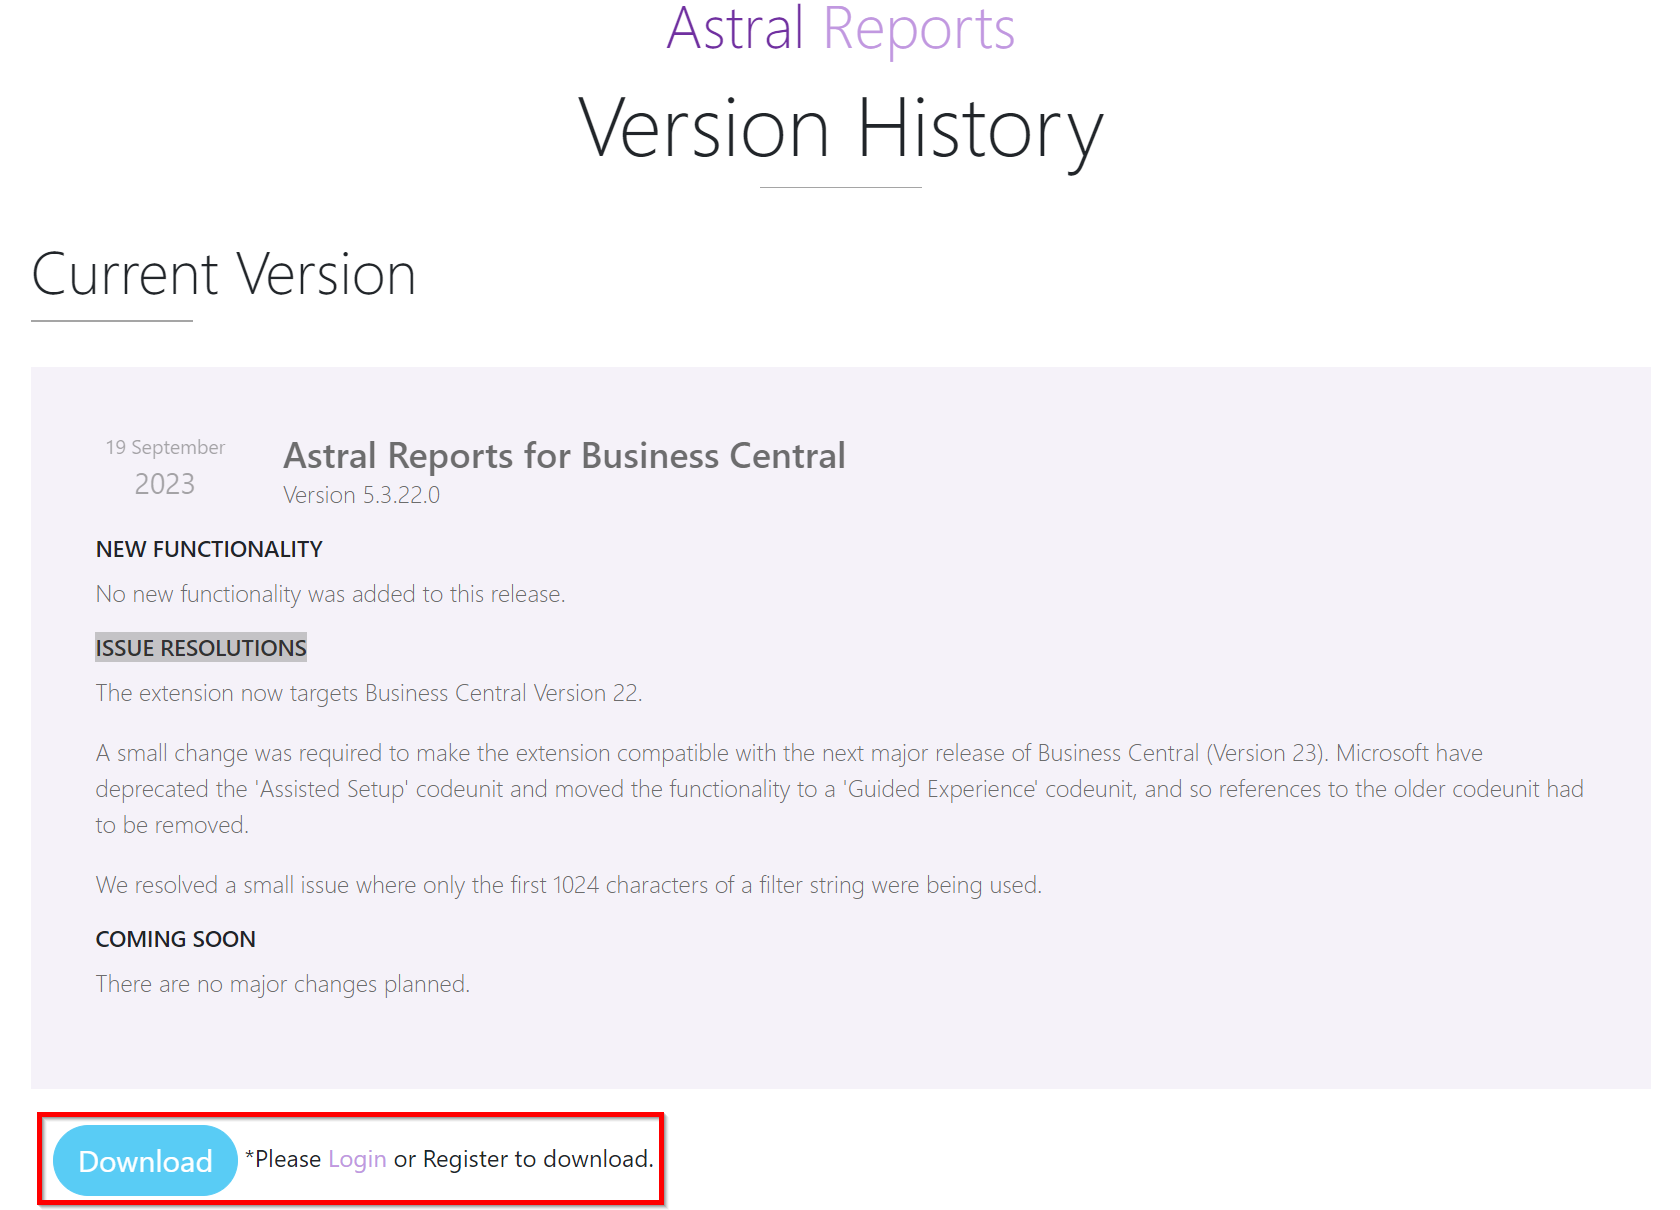
Figure 9 | Astral 365 - Astral Reports Downloads Page
This page shows the latest Astral Reports download available as well as past versions.
Before you can begin the download, you will notice that the ‘Download’ button is deactivated and unclickable. This is because you will need to register as a user on our website before you can access the download.
So, click ‘Register’ in the top right corner of the webpage, and fill in the required information.
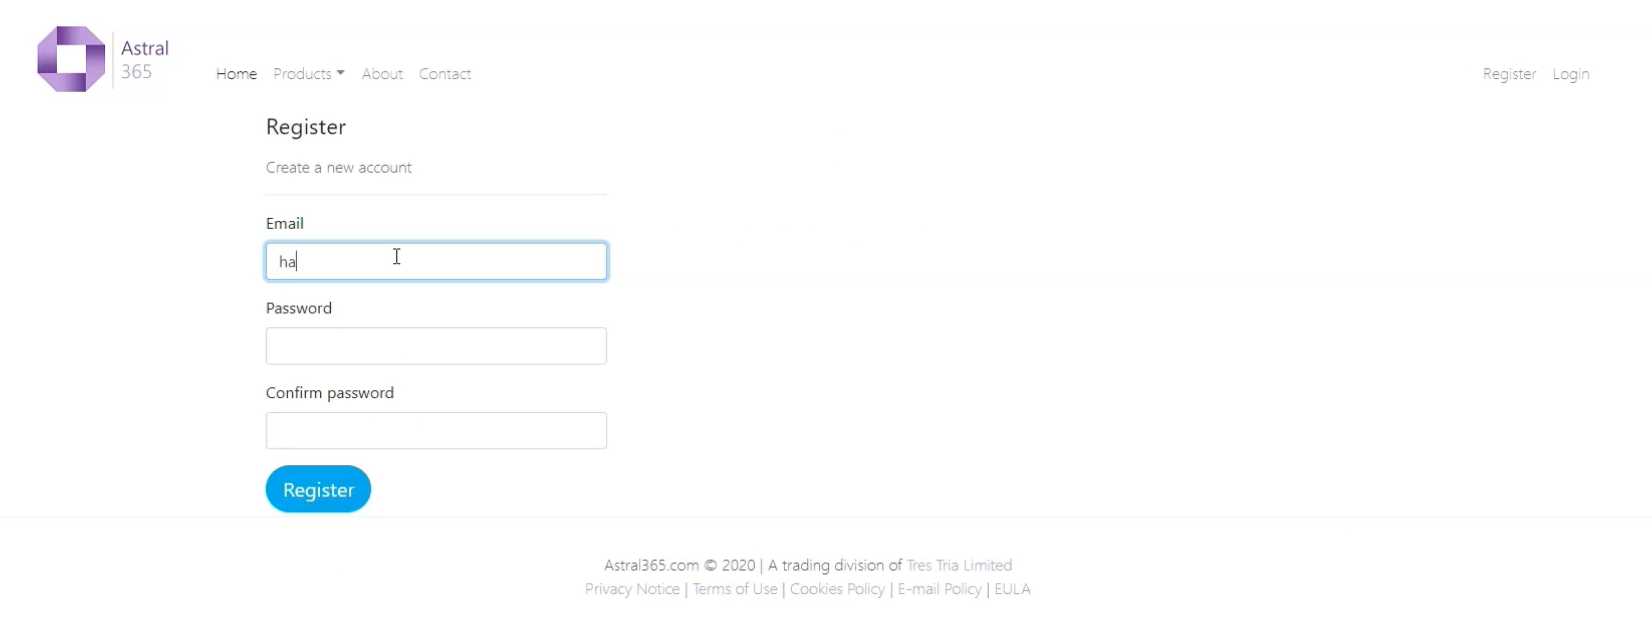
Figure 10 | Register For Astral 365
Once finished filling in the information and registering, to continue, you will need to confirm your email address and an email will be sent to the email address you registered with.
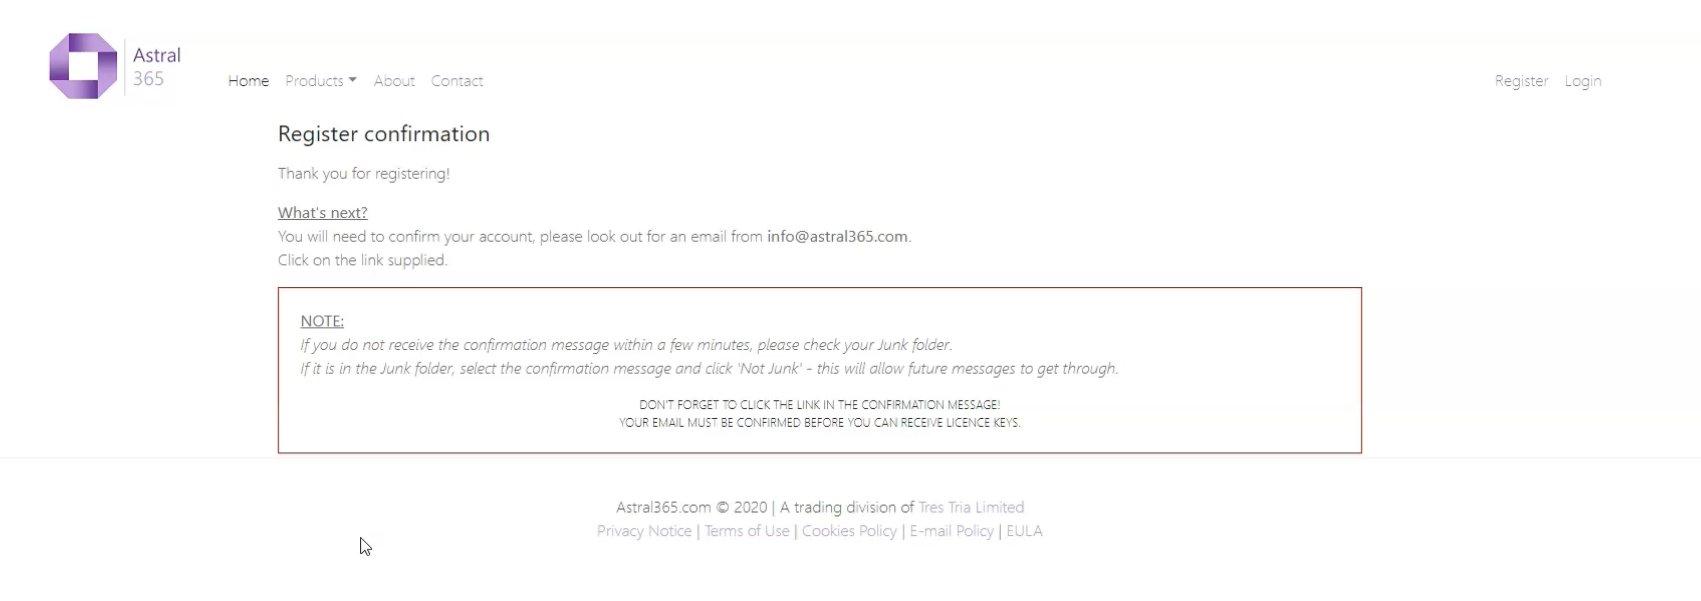
Figure 11 | Astral 365 - Confirm Your Email
Go to your emails where you will see an email from Astral 365.
NOTE: If you do not see the email, please make sure to check you junk/spam folder.
Click the link provided in the email which will redirect you back to the Astral 365 website.
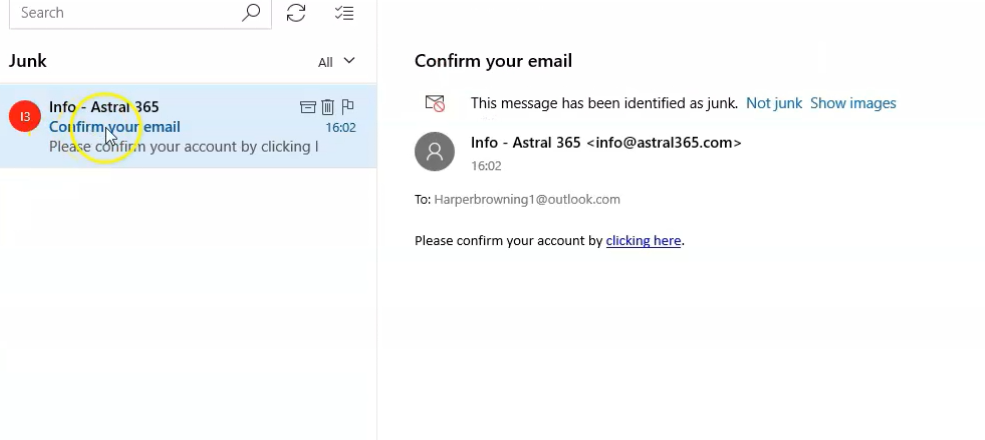
Figure 12 | Astral 365 Email Confirmation
Now log on to Astral 365 using the credentials you just provided and navigate to the Astral Reports product page. Then click on ‘Downloads’ in the top banner which will return you to the download page.
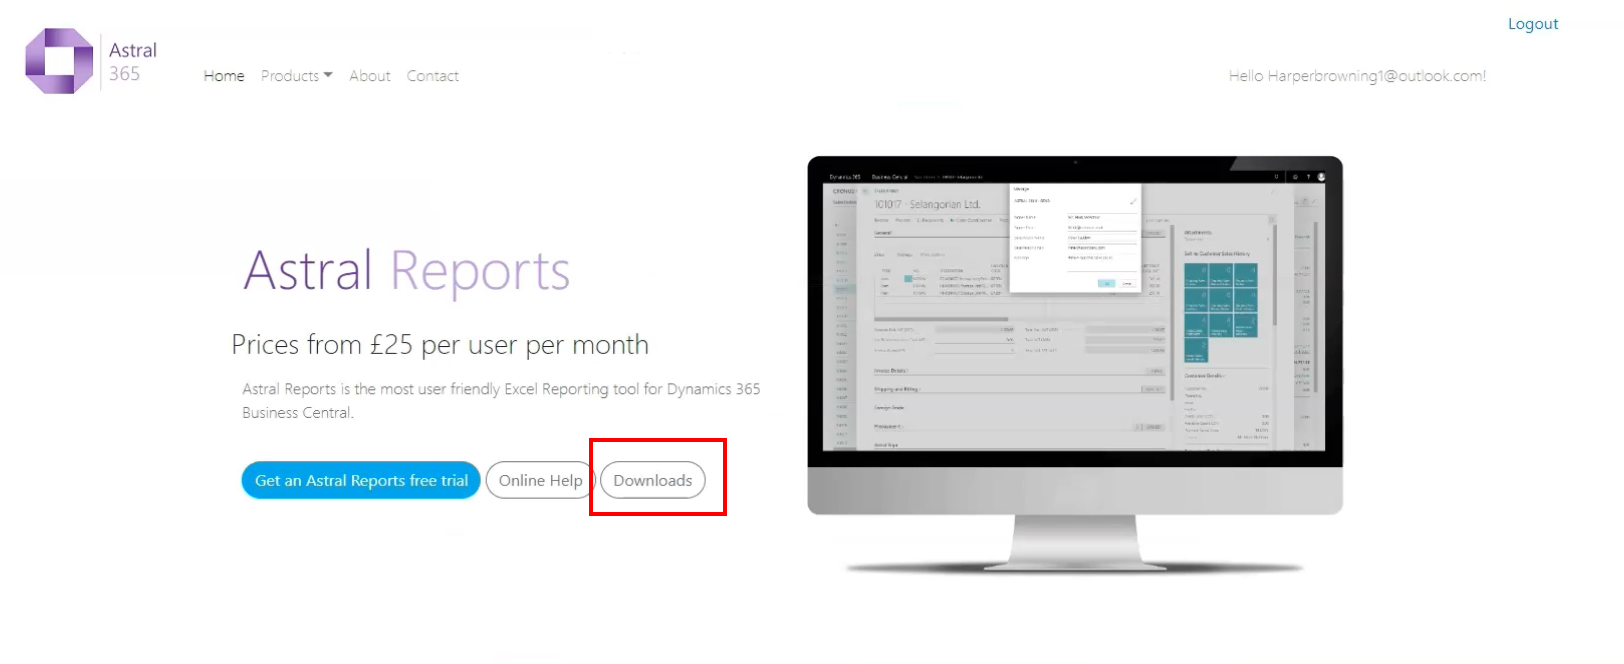
Figure 13 | Astral Reports Product Page
You will now be able to click the ‘Download’ button which will automatically begin the download for the Excel add-in.
The download will appear at the bottom of the screen under the name ‘AR4BCSetup’.
Once it is complete, click on it to activate the setup wizard.
NOTE: Make sure that if you have any Anti-Virus software installed, ensure it does not interfere with the install.
On the first window of the setup wizard (see figure 14), read through the ‘License Agreement’, and when you are happy you understand the terms, select ‘I accept the agreement’, and click ‘Next’.
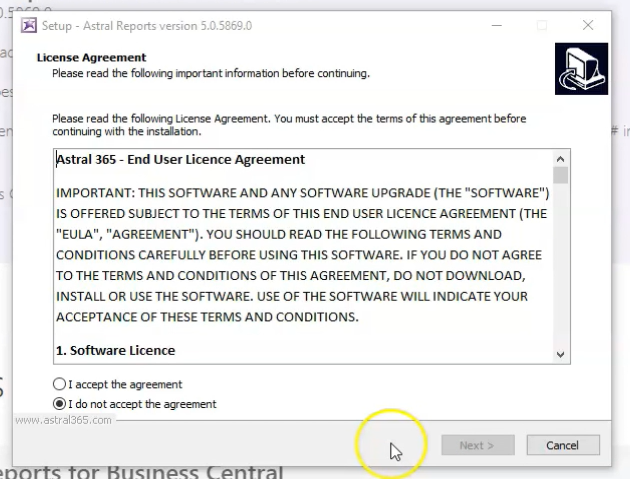
Figure 14 | Astral Reports Download Wizard - License Agreement
Read the next section, then click ‘next’ again (figure 15).
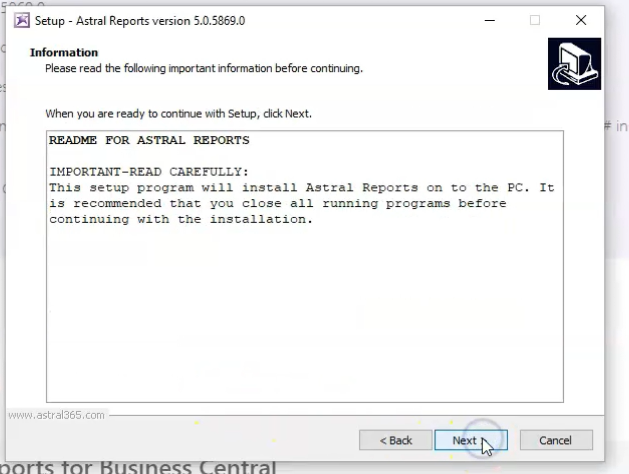
Figure 15 | Astral Reports Download Wizard - Information
The install will default the file location as being the user folder in the local drive. This can be changed but we recommend it remains here. So, click ‘Next’.
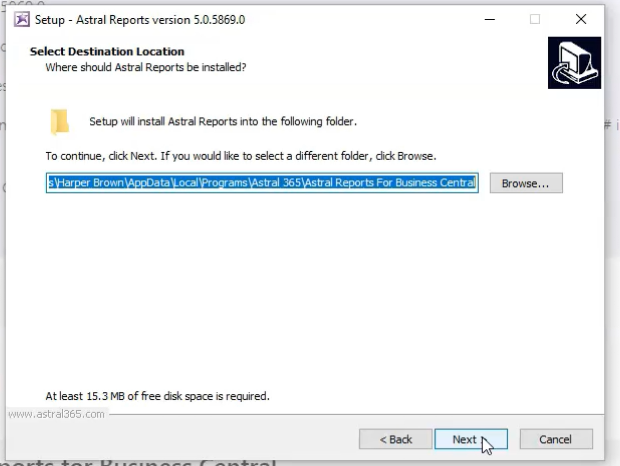
Figure 16 | Astral Reports Download Wizard - Select Destination Location
Read through the next few windows (figures 17 and 18) clicking ‘Next’ each time, until you get to the ‘Ready to Install’ window.
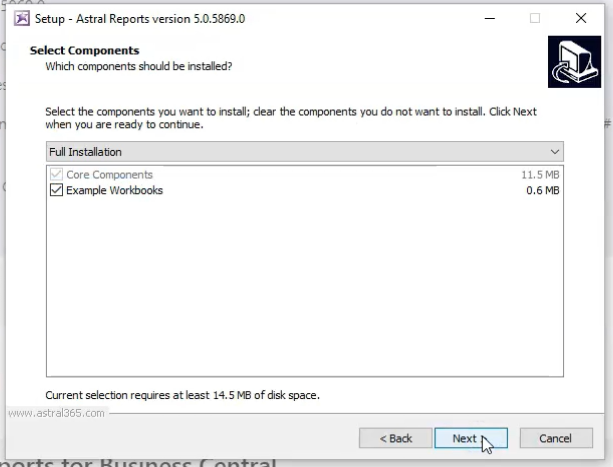
Figure 17 | Astral Reports Download Wizard - Select Components
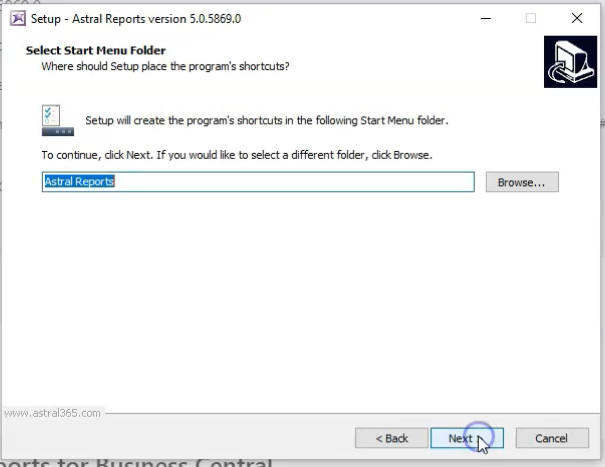
Figure 18 | Astral Reports Download Wizard - Select Start Menu Folder
On the final ‘Ready to Install’ window, click ‘Install’ (figure 19).
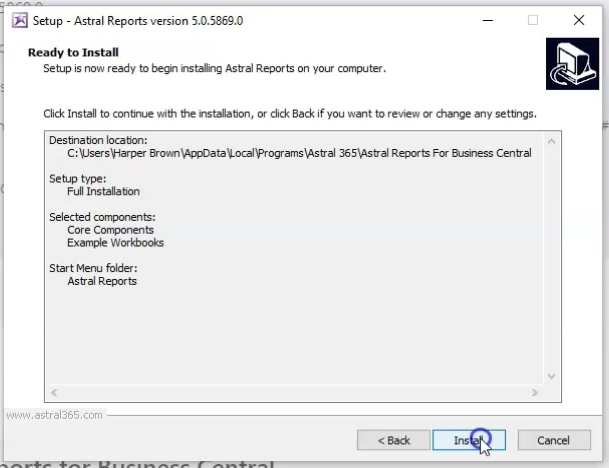
Figure 19 | Astral Reports Download Wizard - Ready To Install
The install should only take a few seconds, then read through the information shown, click ‘Next’ then ‘Finish’.
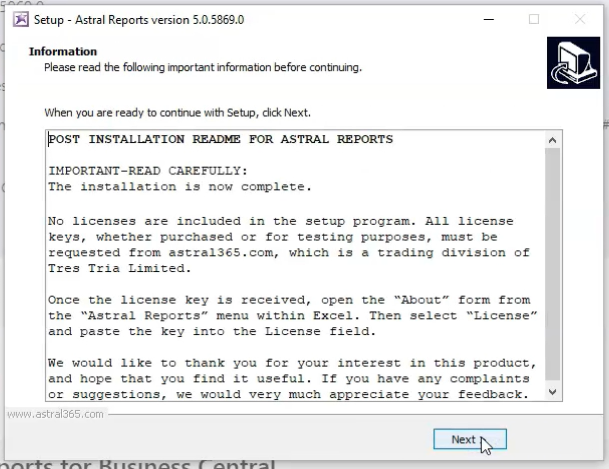
Figure 20 | Astral Reports Download Wizard - Information
This stage is now complete, so return to Business Central and the Astral Reports setup wizard, and click next on the ‘Download the Microsoft Excel Add-In’ window.
The final step is to connect Astral Reports to Excel, and you will need the information provided in the 'Get Yourself Connected' window (figure 21).
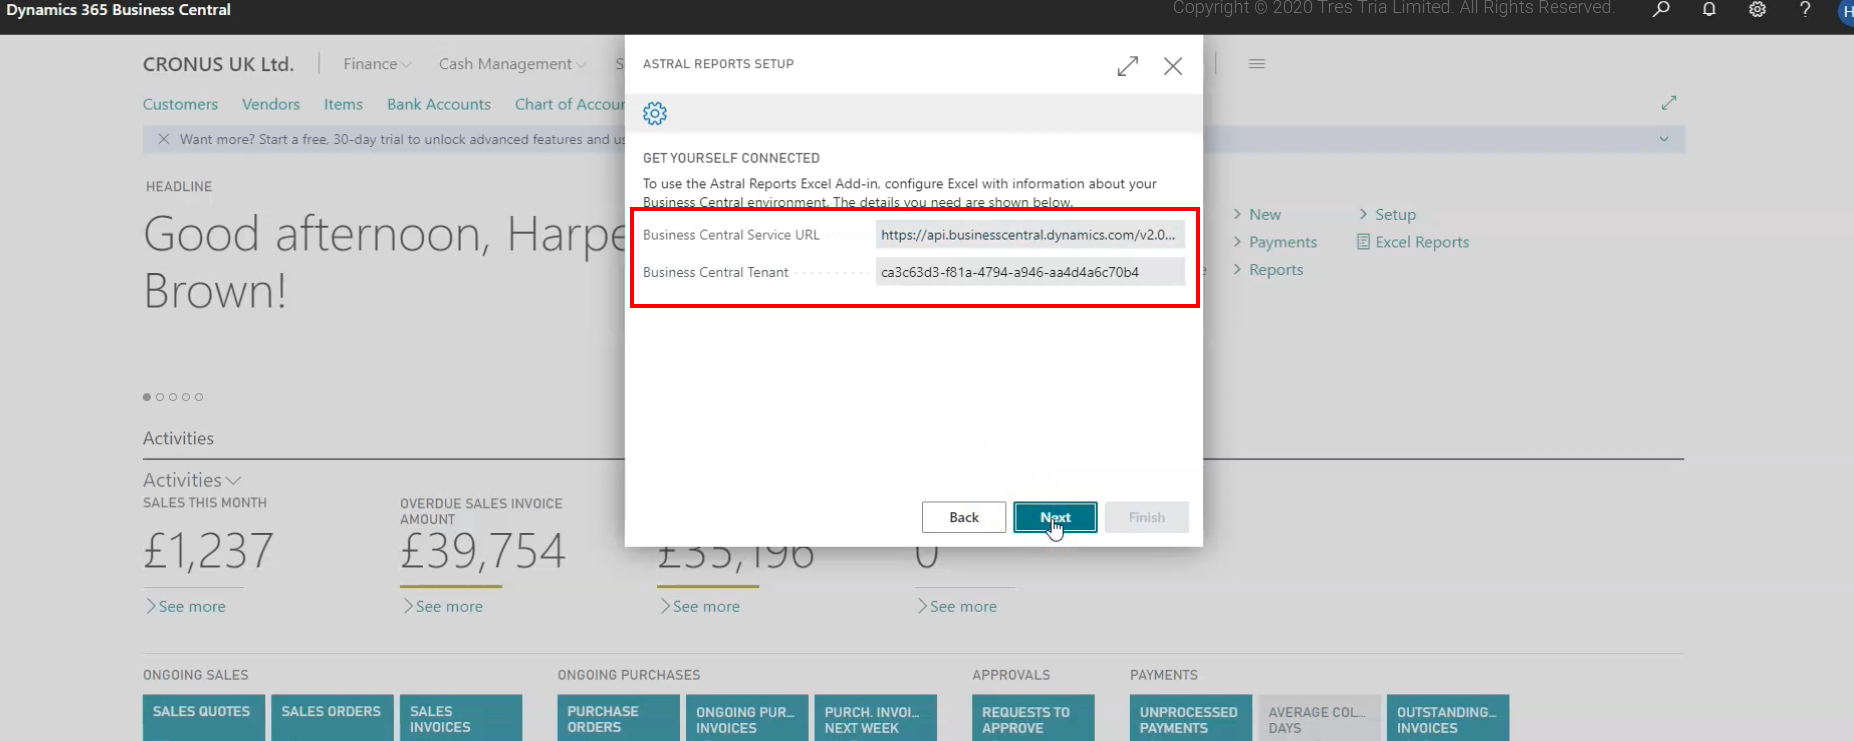
Figure 21 | Business Central Setup Wizard - Get Yourself Connected
In the event that your user does not have Super user permissions, you will need to include the Astral Report permission sets to that user prior to continuing the Excel proportion of the install.
Open the User Card.
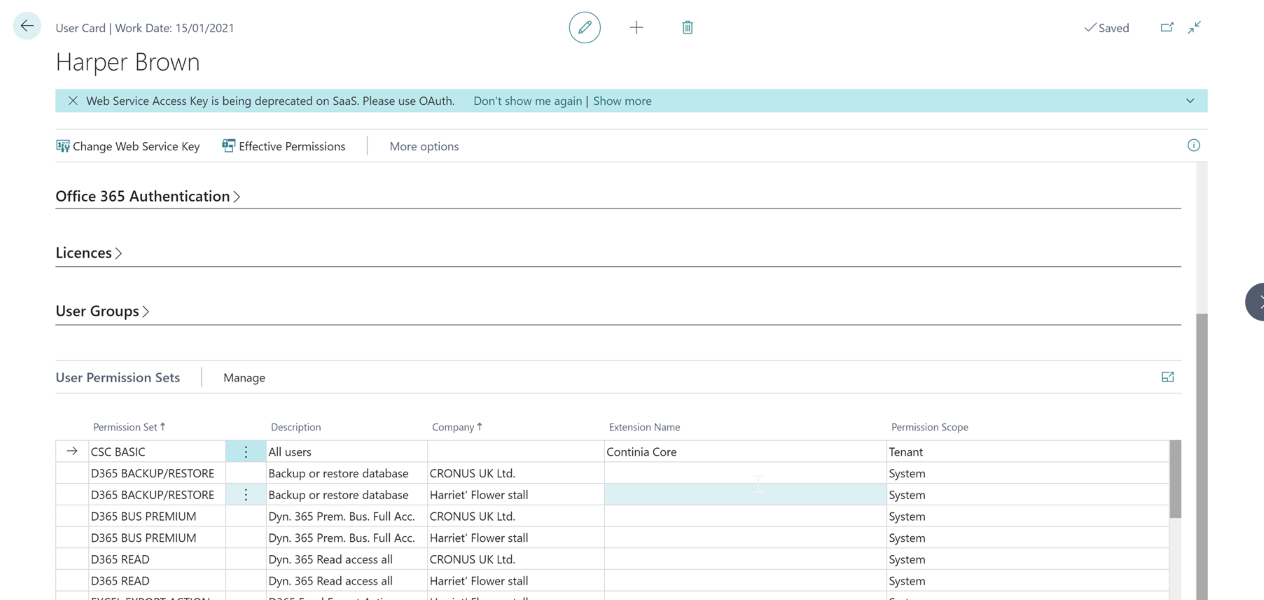
Figure 22 | User Card
Select a new line then click onto the ellipses and search for ‘Astral Reports’ and click ‘OK’.
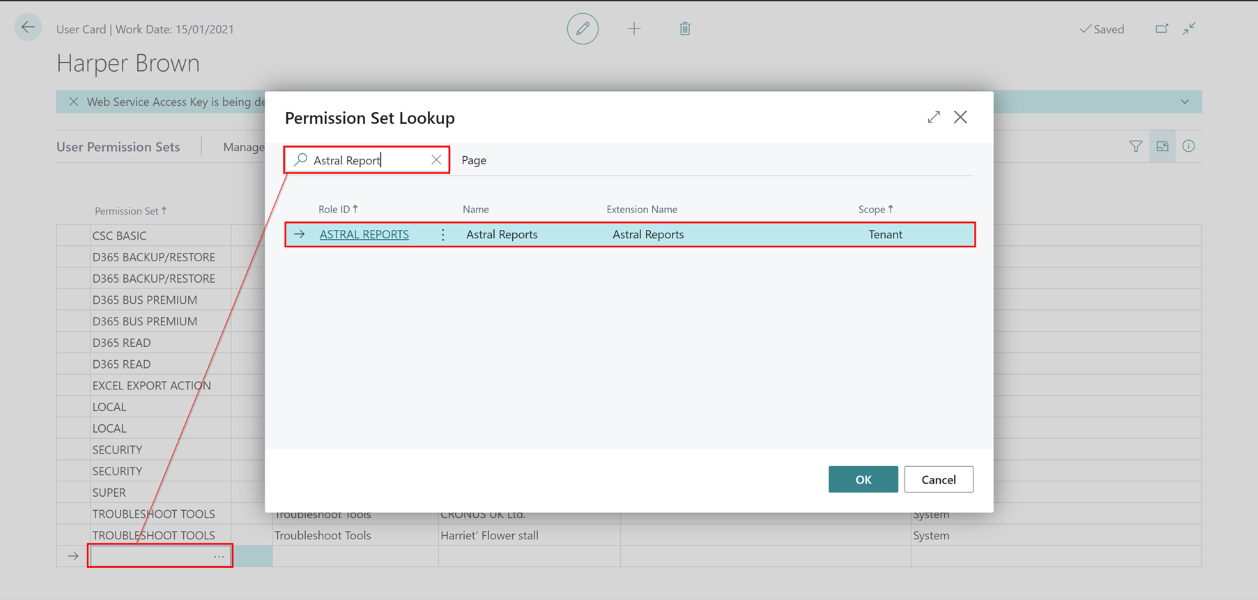
Figure 23 | Permission Set Lookup
Open Excel, and you should now be able to see the new Astral Reports option tab on the ribbon.
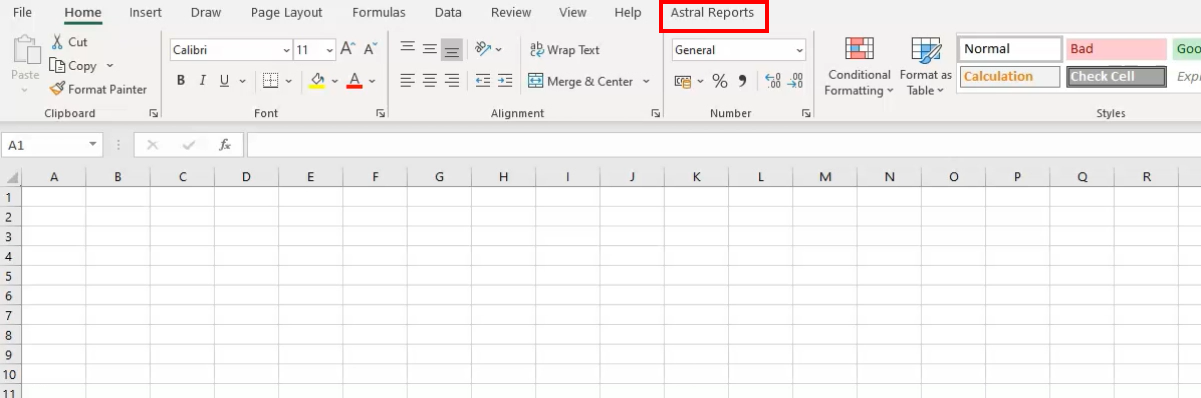
Figure 24 | Excel Connection Setup
Click on the tab, then click ‘About’ (figure 25).
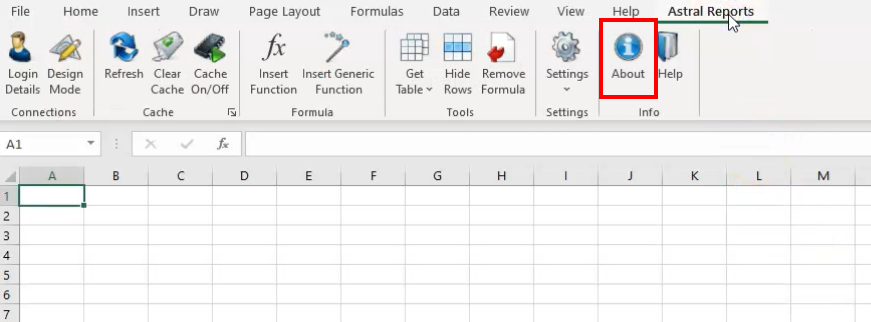
Figure 25 | Excel Connection Setup
The ‘About Astral Reports’ window will open.
You will have received another email from Astral 365 after completing the download from the website. Use the information contained in the email to fill this window (see the example in figure 27).
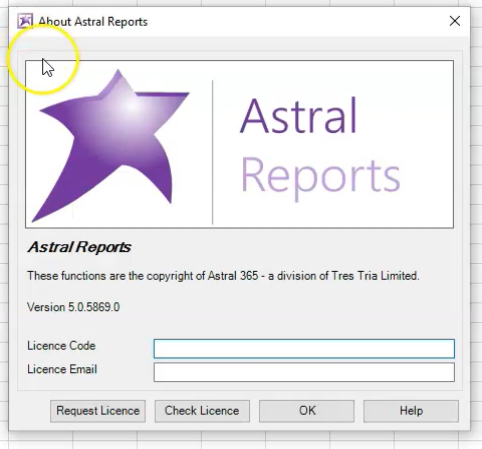
Figure 26 | Excel Connection Setup - About Astral Reports
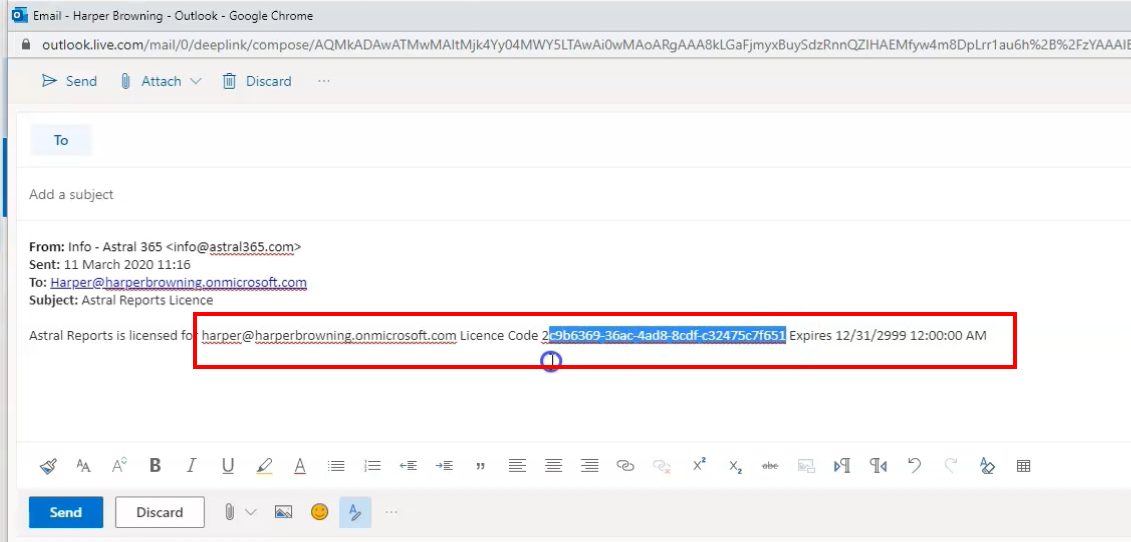
Figure 27 | Excel Connection Setup - Astral Reports License Email
Once you have filled in the required information, click ‘Check License’.
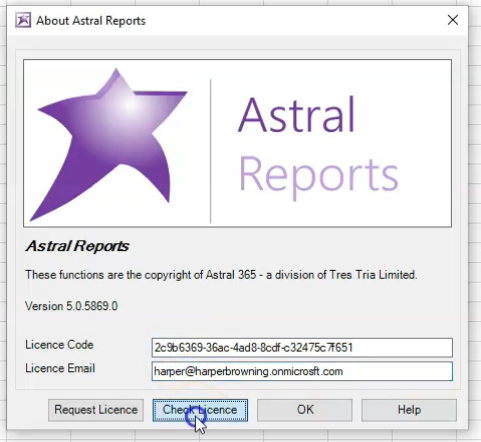
Figure 28 | Excel Connection Setup - About Astral Reports
A notification will pop up to tell you how long the Licence is valid for. Simply click ‘Ok’.
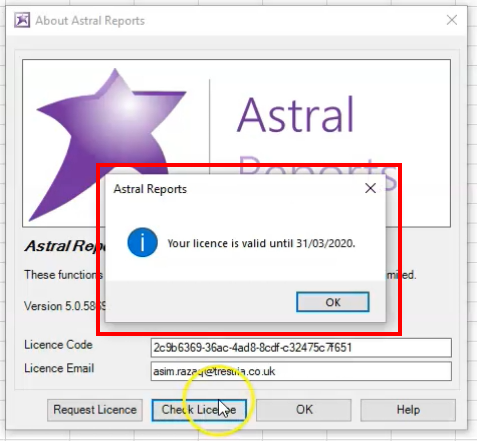
Figure 29 | Excel Connection Setup - About Astral Reports Licence Valid
Now, still in Excel, click on ‘Login Details’ on the top left corner of the Astral Reports ribbon.
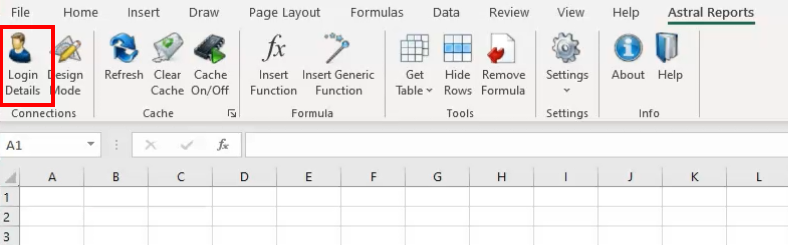
Figure 30 | Excel Connection Setup
The ‘Connections’ window will open where you will connect Excel and Astral Reports to Business Central and will need to fill in the information.
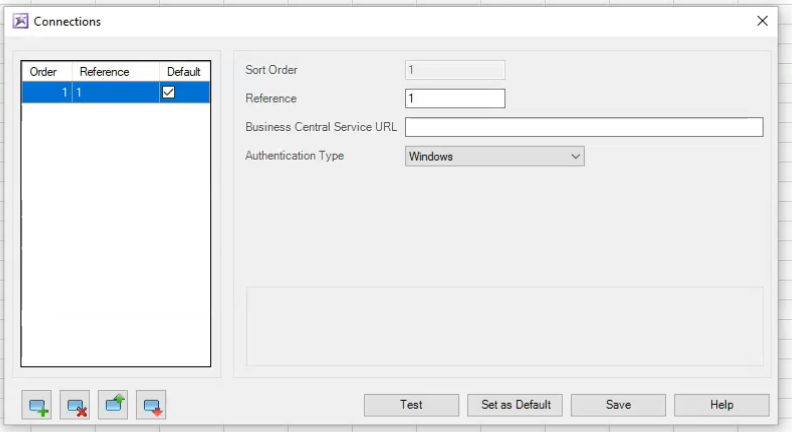
Figure 31 | Excel Connection Setup - Connections Window
Fill in the ‘Reference’ section – this is ideally the name of your company that Astral Reports will be connected to.
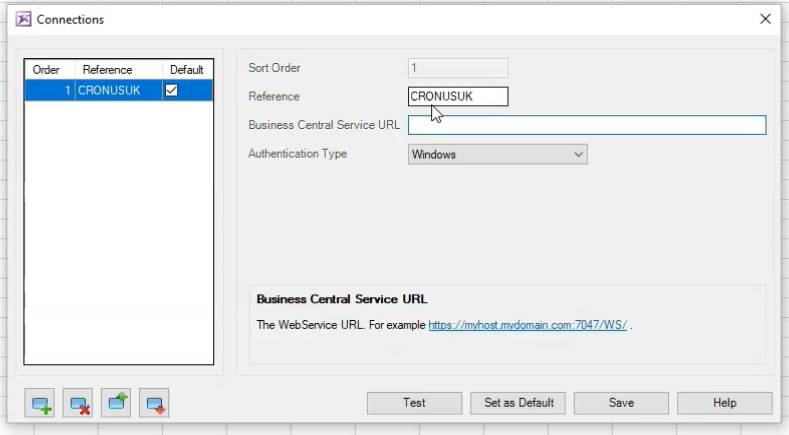
Figure 32 | Excel Connection Setup - Connections Window
To fill in the ‘Business Central Service URL’, navigate back to Business Central and copy and paste the information provided from the setup wizard window.
TIP: To copy the information from the setup wizard, expand the window (figure 33), highlight the link (figure 34), and press Ctrl & C on your keyboard then navigate back to Excel and paste (figure 35).
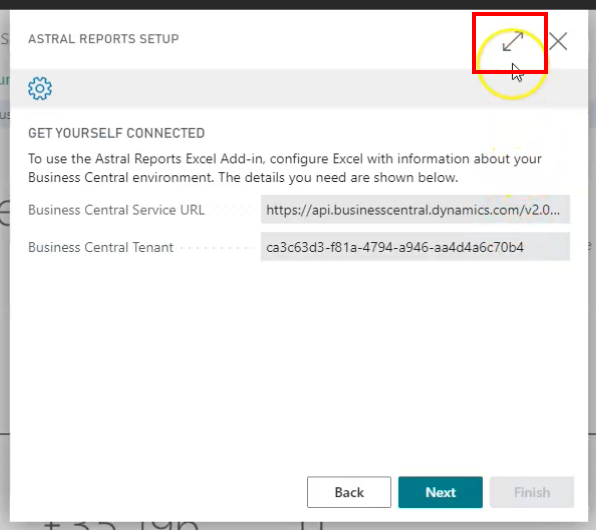
Figure 33 | Excel Connection Setup - BC Setup Wizard - Get Yourself Connected

Figure 34 | Excel Connection Setup - BC Setup Wizard - Get Yourself Connected
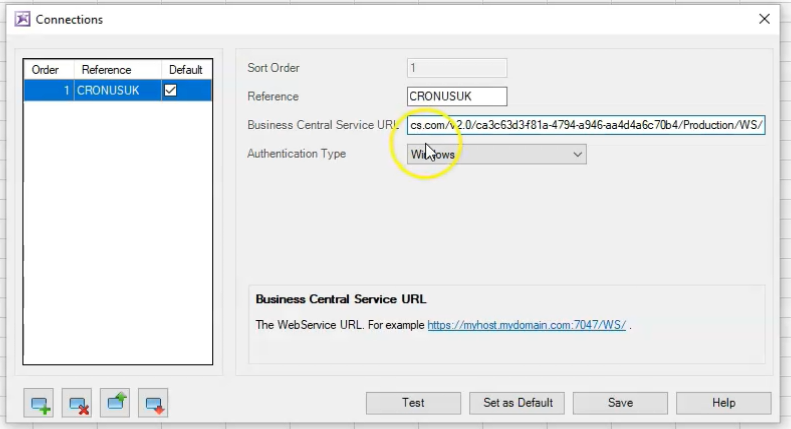
Figure 35 | Excel Connection Setup - Connections Window
For ‘Authentication Type’ select ‘Office 365’ from the drop-down options.
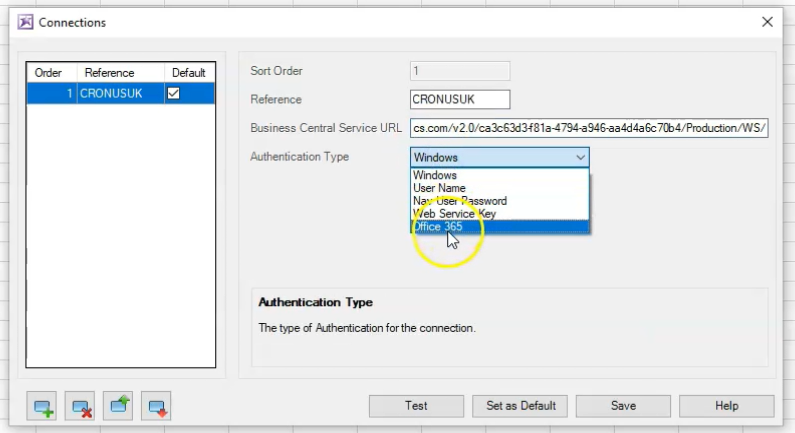
Figure 36 | Excel Connection Setup - Connections Window
Now tick ‘Use Astral 365 Authentication’ which will use your Office 365 credentials to authenticate.
NOTE: Astral 365 Authentication is for the SaaS version of Business Central only. For on Premise installations using Office 365, the process is slightly different.
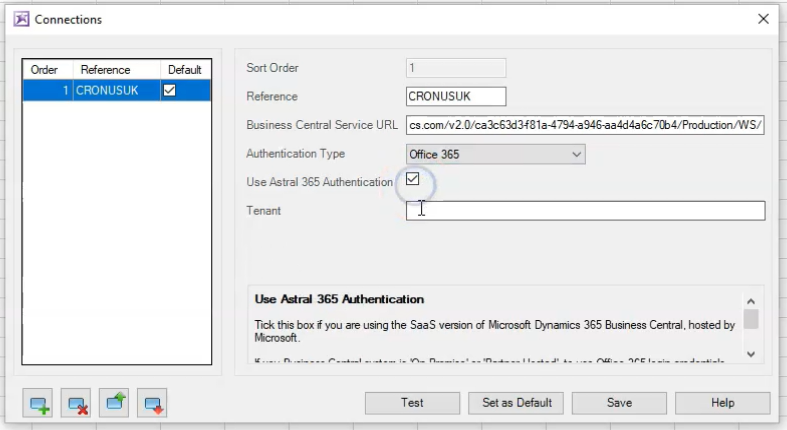
Figure 37 | Excel Connection Setup - Connections Window
Now fill in the ‘Tenant’, again get this information from the setup wizard in Business Central (figures 38 - 40).
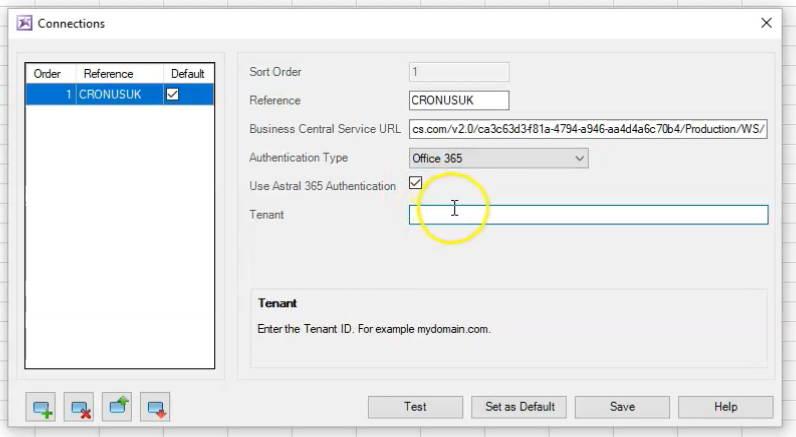
Figure 38 | Excel Connection Setup - Connections Window
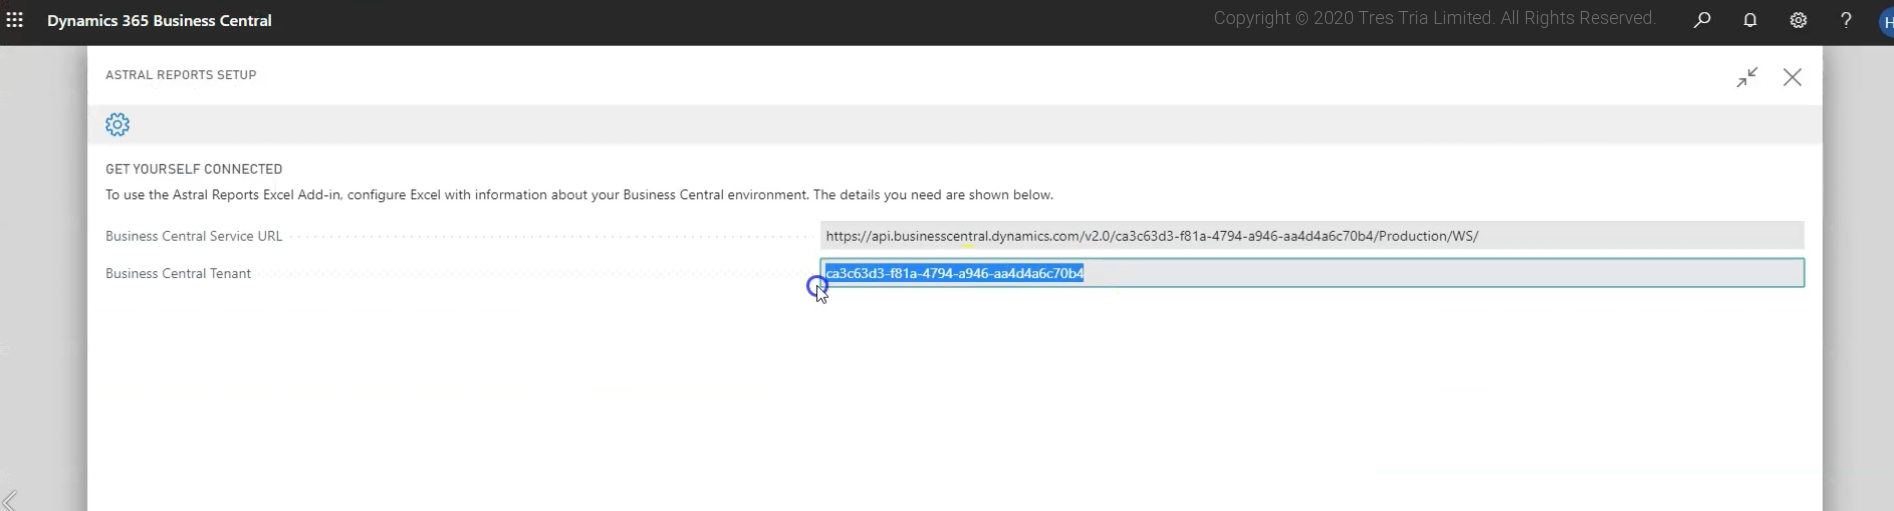
Figure 39 | Excel Connection Setup - BC Setup Wizard - Get Yourself Connected
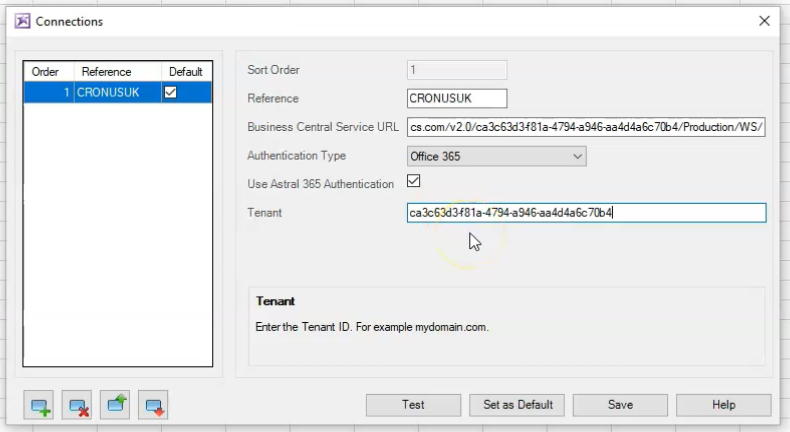
Figure 40 | Excel Connection Setup - Connections Window
Once all the information is filled in (see figure 40), click ‘Save’.
Now click ‘Test’, this will make sure that your connection was successful.
The message that is displayed (figure 41) is shown in case you have stored credentials that are no longer valid and allows you to remove and re-enter them.
Click ‘Yes’ and fill in the information.
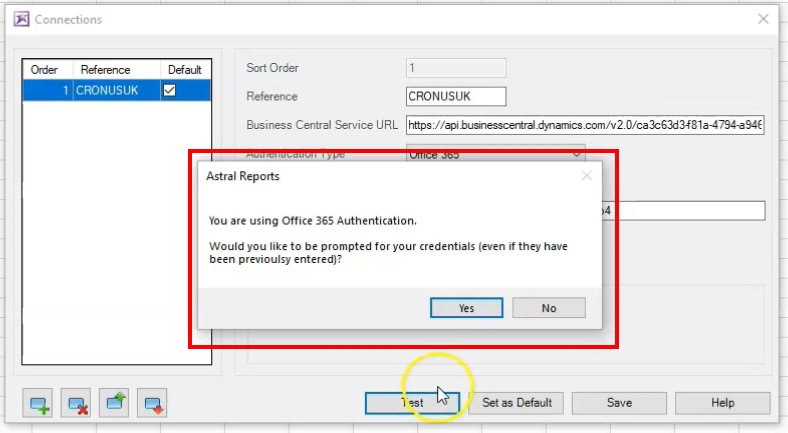
Figure 41 | Excel Connection Setup - Connections Window
Once you have filled in your details and clicked ‘Sign in’, you will be promoted to give permission (see figure 42). This gives the permission of Astral Reports to be used by your organization. The permission is only required once, by one member of your organization.
Read through the information, then select the tick box ‘Consent on behalf of your organization’ and click Accept.
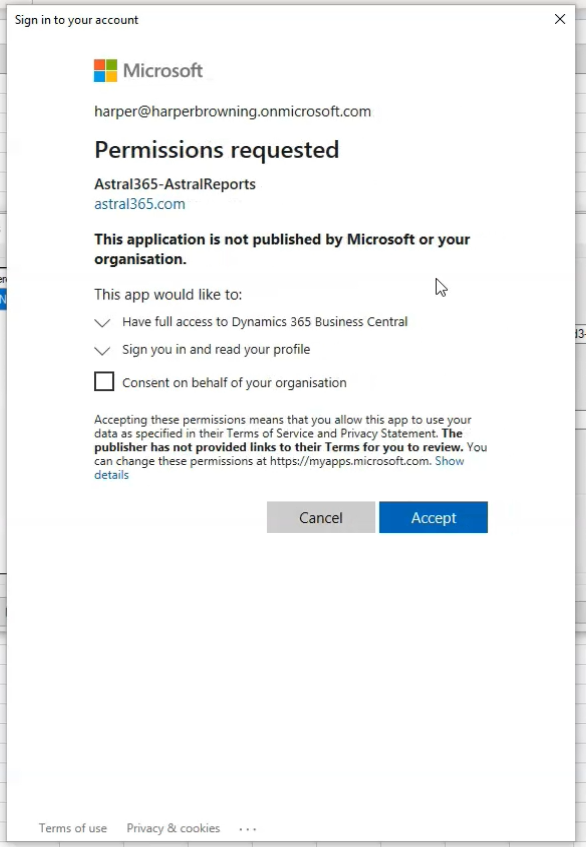
Figure 42 | Excel Connection Setup - Permissions
The next message that shows should indicate that the connection has been successful (figure 43). Click ‘Ok’ then close the ‘Connections’ window.
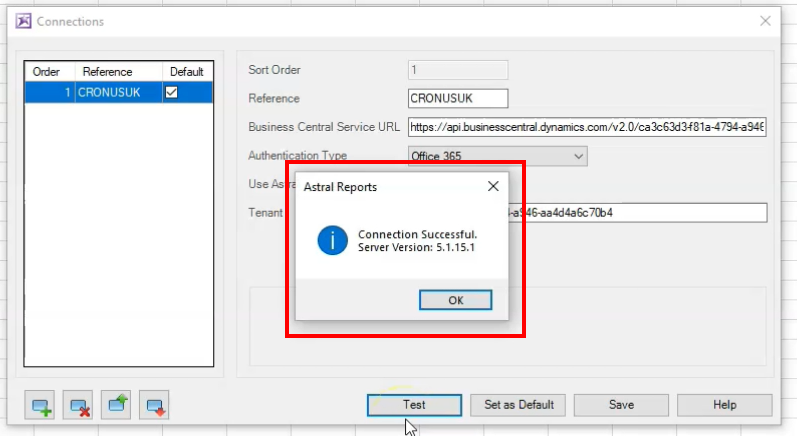
Figure 43 | Excel Connection Setup - Connections Window
Now navigate back to Business Central to complete the setup wizard.
Click ‘Next’ now that you have completed the ‘Get Yourself Connected’ step.
Click ‘Next’ on the next window again, ‘Get Yourself A Free Trial Licence’, as you have already completed this step.
Congratulations, the setup is now complete!
NOTE: please remember that helpful information such as; links to Astral Reports Online Help, Download page, and details of the connection can always be found by simply searching for Astral Reports within the Business Central search facility.