Astral Send - Help for Customer Engagement:
Once the app has been deployed, permissions need to be granted to the Business Central Security Role for the new customisations.
On the Dynamics 365 page, in the ribbon click on the cog and then on Advanced Settings:

Figure 1 | Business Central Settings
On the Settings page, under System, click on “Security”:
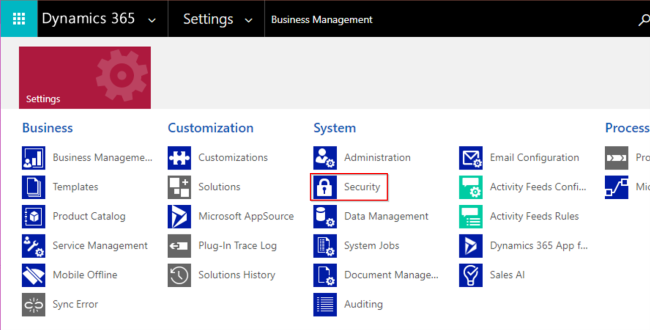
Figure 2 | Settings Security
On the Security page, click on “Security Roles”:
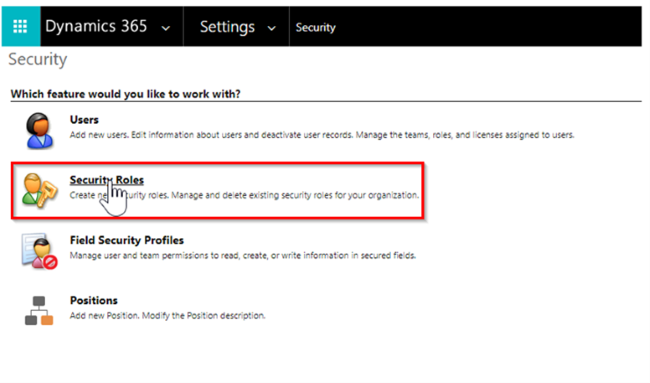
Figure 3 | Security Roles
Assign the Role to the Business Central CDS Integration Role:
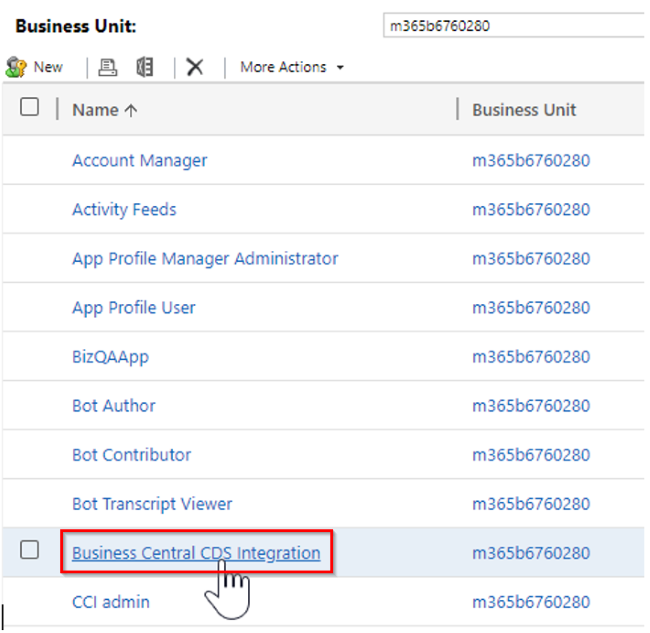
Figure 4 | Business Central CDS Integration Role
Then give the role a name:

Figure 5 | Assign Role Name
Next, assign the complete set of access rights, by clicking each 4 times, so the buttons are completely green:
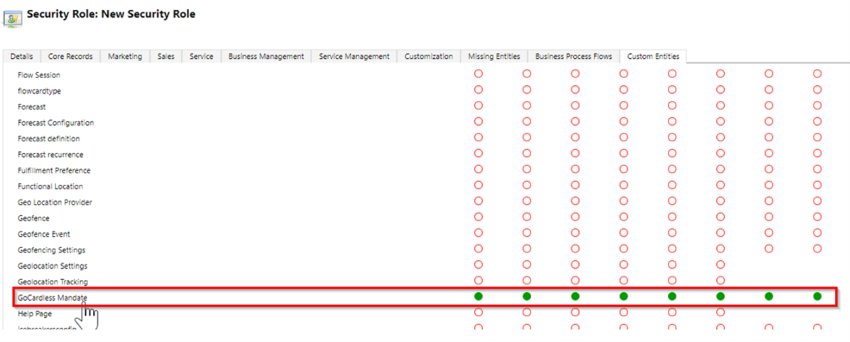
Figure 6 | Assign Access Rights
Now a new role needs to be setup, which needs to be applied to the users so they can see the new features.
Create a new Role to be assigned to the team or users that need to access the new fields and assign the rights as above to the new role (giving all access rights in the same way):
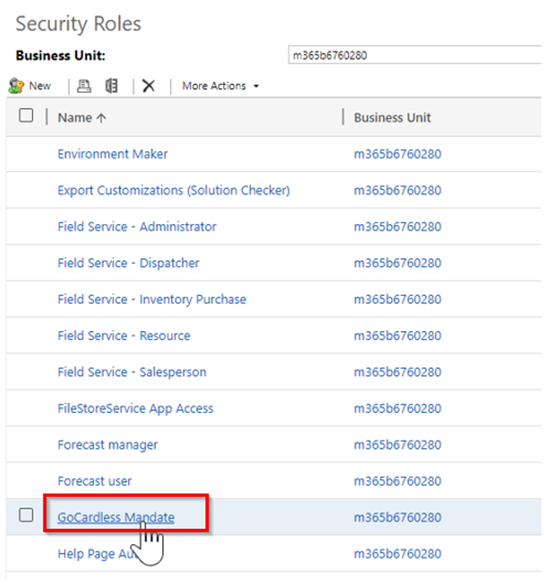
Figure 7 | Security Roles
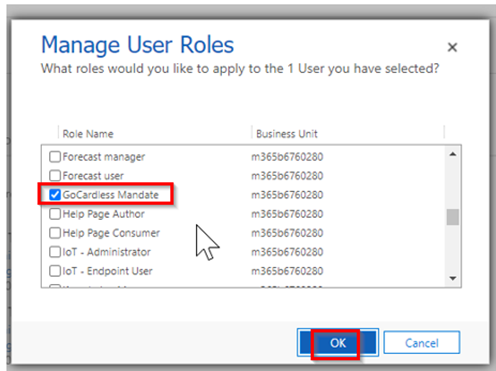
Figure 8 | Manage User Roles