Astral GoCardless - Help:
Watch the Video
The Setup Checklist allows you to keep track of what is incomplete for the Astral GoCardless setup.
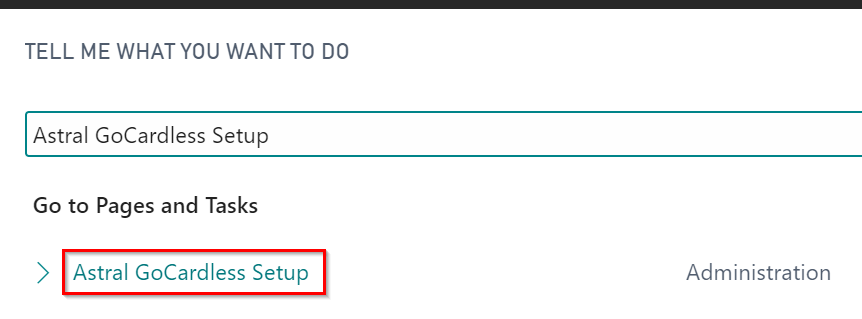
To access this, in the search bar type 'Astral GoCardless Setup' and select it from the list.

Figure 1 | Setup
The Setup page will open, then click on 'Setup Checklist' in the ribbon.

Figure 2 | Setup
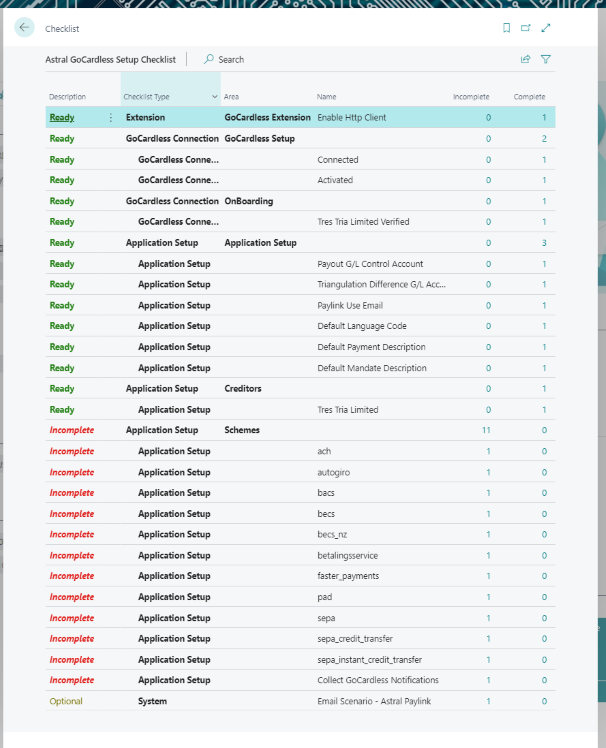
The required setup is split into Connection Setup; Application Setup; Email Setup; Direct Debit Schemes; and Notification Setup.

Figure 3 | Astral GoCardless Setup Checklist
Each line in this screen represents setup or configuration that is required before you start creating Direct Debit Mandates.
Review each line where the 'Description' field is red and states Incomplete. To complete these actions, click on the number of records in the 'Incomplete' column, and it will open the wizard at the correct step.

Figure 4 | Incomplete Item Example
Follow the instructions on the screen to complete the setup.
Once all of the setups are complete you can start to create Customer Direct Debit Mandates.
Email Setup
The Email Scenario step is optional, as if there is a Default Email Account, this will be used for sending emails. If you prefer to use an account other than the Default account, you would create a second Email Account and assign the 'Astral GoCardless' email scenario to it.
Click on the number in the incomplete column for 'Email Scenario – Astral GoCardless'.
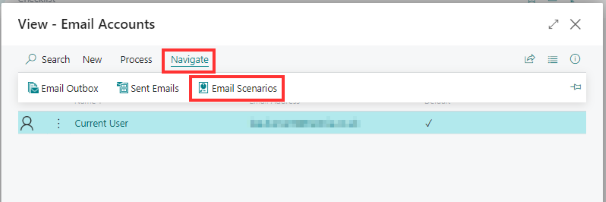
The Email Accounts window will open (figure 5). Select the Email Account that you would like to use for sending Mandate PayLinks or Billing Request Links (or create a new Email Account).
Then click 'Navigate' and then 'Email Scenarios'.

Figure 5 | Email Accounts
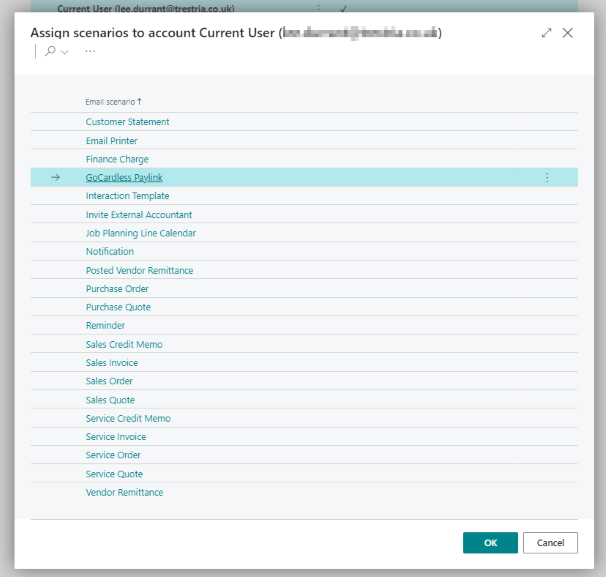
Select the 'GoCardless PayLink' entry and click 'OK'.

Figure 6 | GoCardless PayLink
Notifications Setup
In the Setup Checklist again, click on the number in the Incomplete column for 'Collect GoCardless Notifications'.

Figure 7 | Collect GoCardless Notifications
The window in figure 8 will open.

Figure 8 | Set Status To Ready
Click on 'Process' and then click 'Set Status to Ready'.
Close the window.