Astral eversign - Help:
Watch the Video
This details how to configure the six document types to be sent to eversign. The six document types are Sales Orders, Sales Invoices, Service Orders, Service Contracts, Sales Quotes and Job Quotes. Each of the six document types has its own tab in the setup page. In this scenario only the setup for Sales Orders is covered, but the setup is the same for each of the six document types.
In the search bar type “Astral eversign Setup” and select “Astral eversign Setup” from the list.
The Astral eversign Setup page is shown as below:
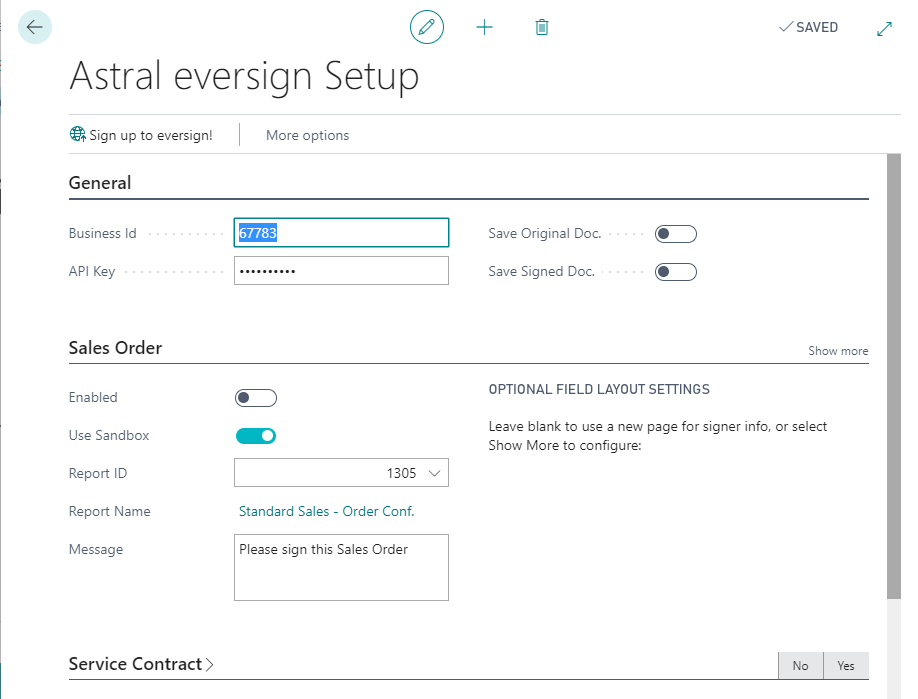
Figure 1 | eversign Setup Page
To enable the sending of a document, the 'Enabled' switch must be set to on.
Documents can be sent in Sandbox mode. This means that no charge is made by eversign, but the document is marked as not legally binding. This mode should be switched on for internal testing.
The Report ID is the Microsoft Dynamics 365 Business Central report ID of the report document that will be sent for signature. By default, on installation of the extension, this is set to the default document set in Report Selections – Sales for Orders.
The Message field enables the user to set a default message to be sent with the document. This has a default value on install but can be edited.
It is possible to set the positions that the three signature boxes appear on the signed document. These three signature boxes are Name, Signature and Date. By default, if no settings are made, these boxes appear on an additional last page of the signed document. The figures below outline the setting of these position fields. Figure 2 shows these boxes on a document. Figure 3 shows the fields available to set their positions in Microsoft Dynamics 365 Business Central. Note that all or none of these parameters must be set. If none are set, then the three fields are placed in the default position at the end of the document. The fields X Position, Y Position, Width and Height are all measure in pixels.

Figure 2 | Signature Boxes On Document
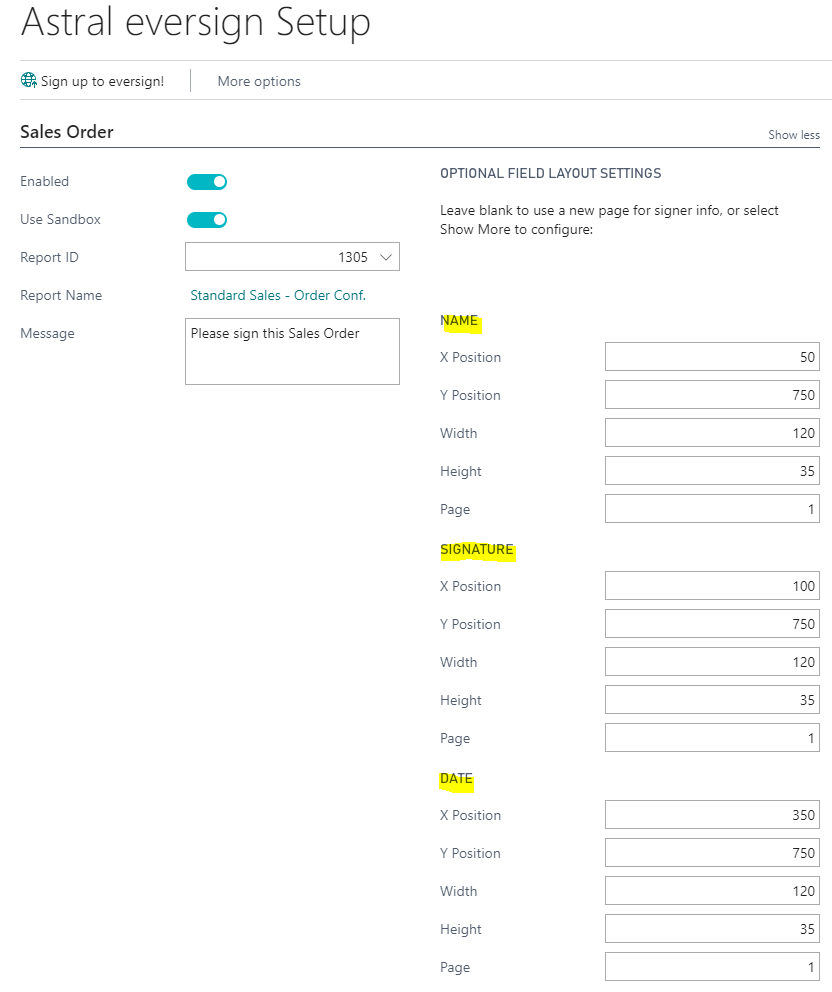
Figure 3 | Fields Available To Set Signature Box Positions
Astral eversign allows up to four additional pdfs to be attached when sending a document for electronic signature with eversign.
To assign additional attachments to the relevant document types, click on the Additional Attachments button in the Astral eversign Setup page:
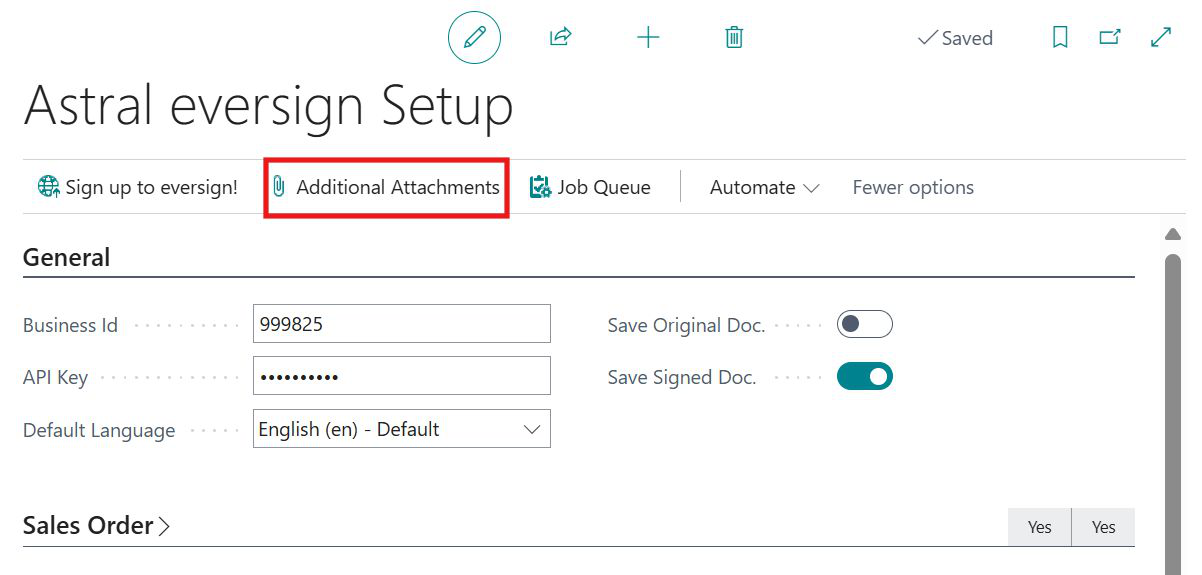
Figure 4 | Additional Attachments button
This will open the Astral eversign Additional Attachments page:

Figure 5 | Astral eversign Additional Attachments page
Specify the Document Type and Attachment No and click on ‘Upload Document Attachment’ to import the document. When it has been successfully uploaded, a tick will appear in the Document Uploaded column and the File Name field will be populated. Place a tick in the Enabled column to confirm that users should have the option to include this attachment on all documents of this type.
When sending individual documents to eversign the user can specify whether to include the additional attachments or not. In this example, when the user clicks on the ‘Send Document for Signature’ button from the Sales Order page, the Astral eversign - Send page includes the following options in the Additional Attachments FastTab:
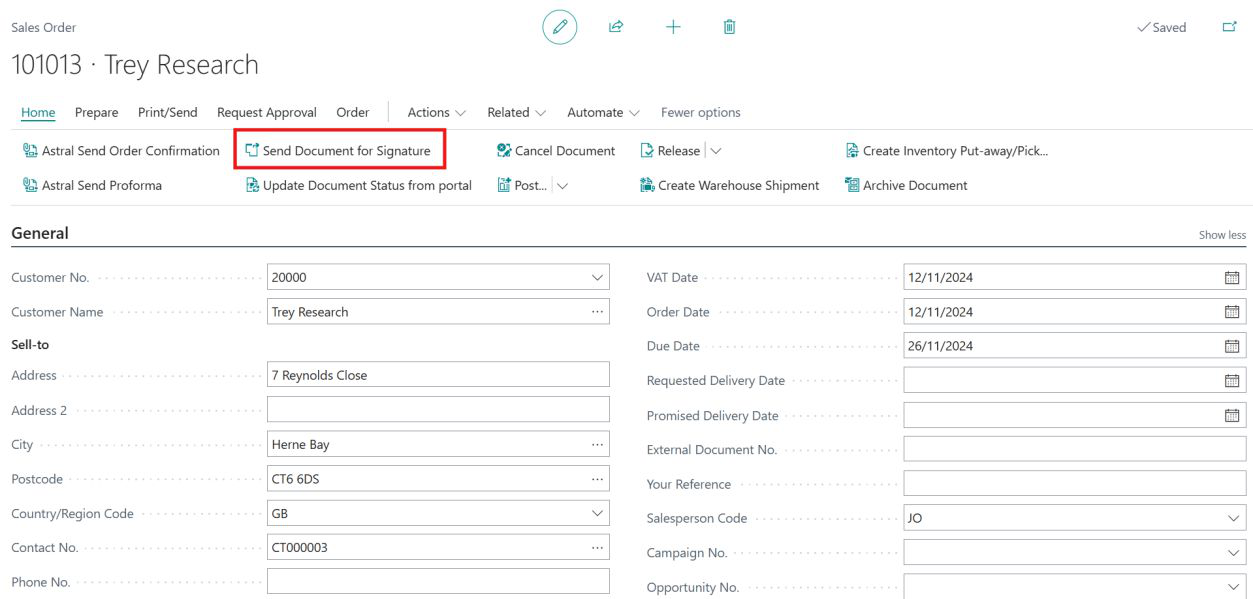
Figure 6 | Send Document for Signature
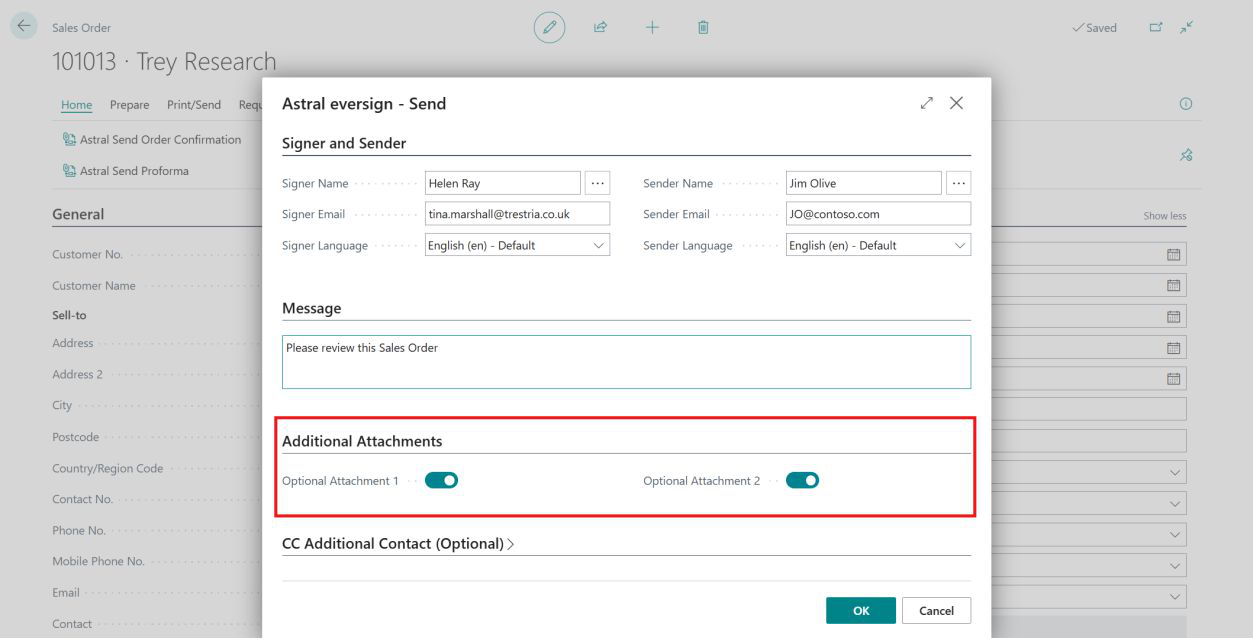
Figure 7 | Astral eversign Send page
The Optional Attachment buttons can be enabled and disabled as required.
If enabled, when the user views the document to be signed in the eversign portal, the additional attachments will also be available to view as additional pdf files.