Astral Apply - Help:
Watch the Video
To open the 'Astral Apply Setup' page, use Business Central’s search facility and enter 'Astral Apply'.

Figure 1 | Search Astral Apply Setup Page
From the search results, select 'Astral Apply Setup' and the following page will be displayed:

Figure 2 | Astral Apply Setup Page
The setup is in relation to the 'Auto-Apply' functionality for Customer, Vendor and Employee Ledgers. There are also filters correlating to each of the ledgers that can be used to 'filter in' or 'filter out' specific accounts.
For example, to enable Auto-Apply on all Customers except for the customers “ASTRAL01” and “MICROSOFT01” the page would be configured as follows:

Figure 3 | Astral Apply Setup Example
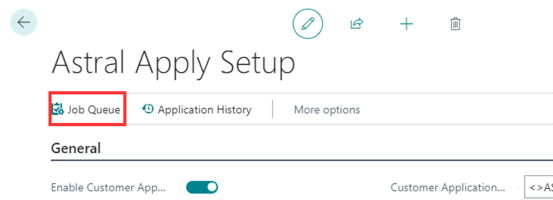
Then, to check that the Job Queue Entry is enabled, click 'Job Queue'.

Figure 4 | Job Queue
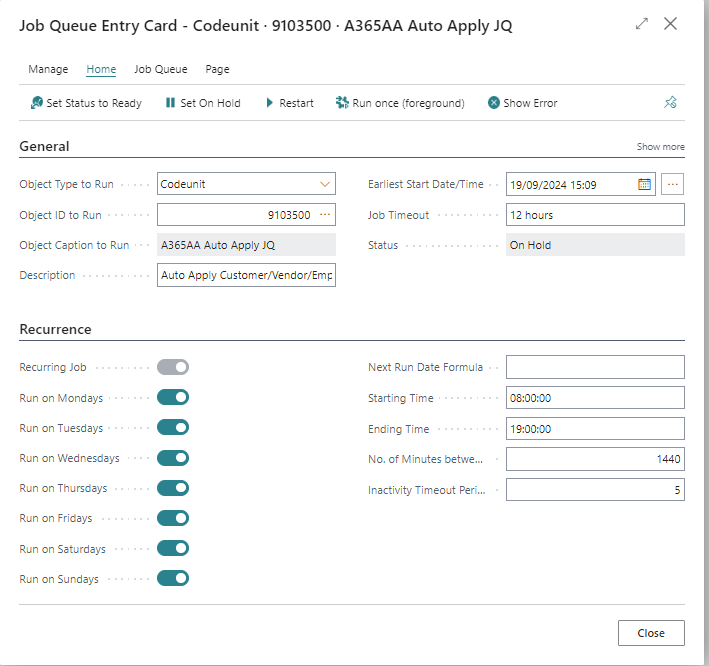
The following page will open, and note that by default it is configured to run every 24 hours (1440 minutes).

Figure 5 | Job Queue Entry Card
Before enabling the Job Queue Entry, make sure that you specify a timeframe that best suits your needs.
Once configured, select 'Set Status to Ready' to enable the job.

Figure 6 | Set Status to Ready